
There's nothing like impending winter to kick me into gear, and this was one project I knew I needed to get done before the cold! So this is the story of how I painted them, and the silly, indecisive journey that made the process take so long. But after 30 years, I know indecisive is the way I work so I'm just rolling with the (very slow) punches over here.
Whether you're indecisive or not, painting is always a great way to freshen things up on a low budget, and dining chairs are no exception! This is a perfect project for spray paint because you don't have to worry about streaks, drips, or getting a brush around all those spindles and nooks.
But before can paint, you need some chairs. Obviously *said in my best Prof. Snape voice*. For me, that meant starting with a hunt for a new set of chairs. We had a set of DIY industrial chairs from our last house, but they just weren't fitting my style any more. Ever since we moved in and built our extra-wide farmhouse table, I'd been dreaming of a set that better fit the style of our new table and new house.
For more chair-painting goodness, check out my $3 yard sale chairs and my industrial chair makeover!
I did a little poking around sites like wayfair and overstock, but deep down I knew that my thrifty roots couldn't abide new chairs when there were so many second-hand options out there for a fraction of the price. You know what they say: "Buy used and save the difference!" So I put most of my efforts into Craigslist and fb marketplace. I knew I wanted something simple, not too formal, with a classic style. And I didn't want to spend a fortune. During my long search for chairs, I also looked at tons of dining room inspirations on pinterest (part of the reason my search was so long was because I couldn't lock down quite exactly what I wanted) and, at long last, I started to hope for a classic Windsor-style chair. The one day, these guys popped up:
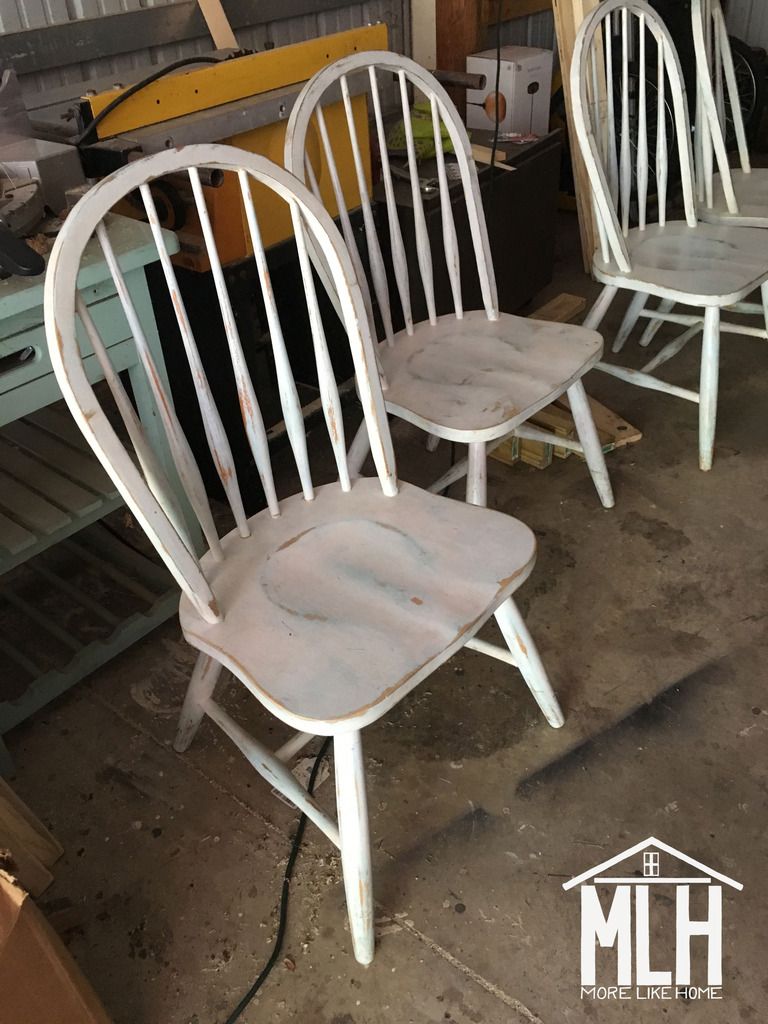
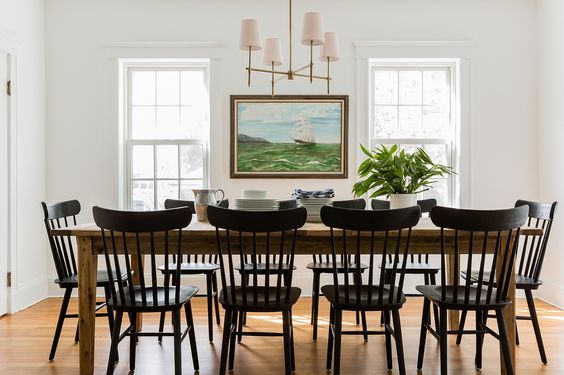
It was a set of five (the four I needed for the dining room plus an extra I could use for our office desk!) and they even had the thinner style back spindles I was hoping for (some have wider, flatter spindles). I wasn't crazy about the white, but I knew I could solve that problem with a little spray paint. And the best part? It was $50 for the set. That's $10 per chair. We snatched them up and got ready to paint... or so I thought. Then I had one more attack of indecisiveness. And it was a doozy. Because all along, I'd been thinking black chairs like this:
But then... I started thinking about green chairs. And I love green.
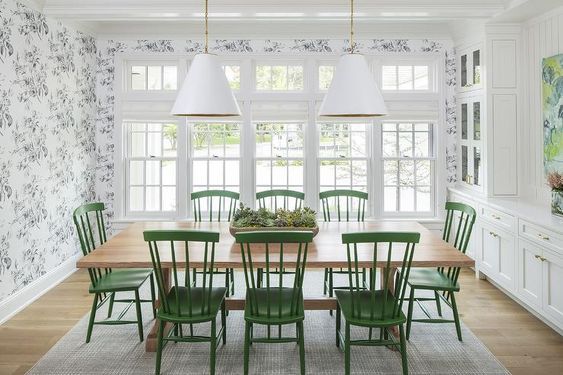
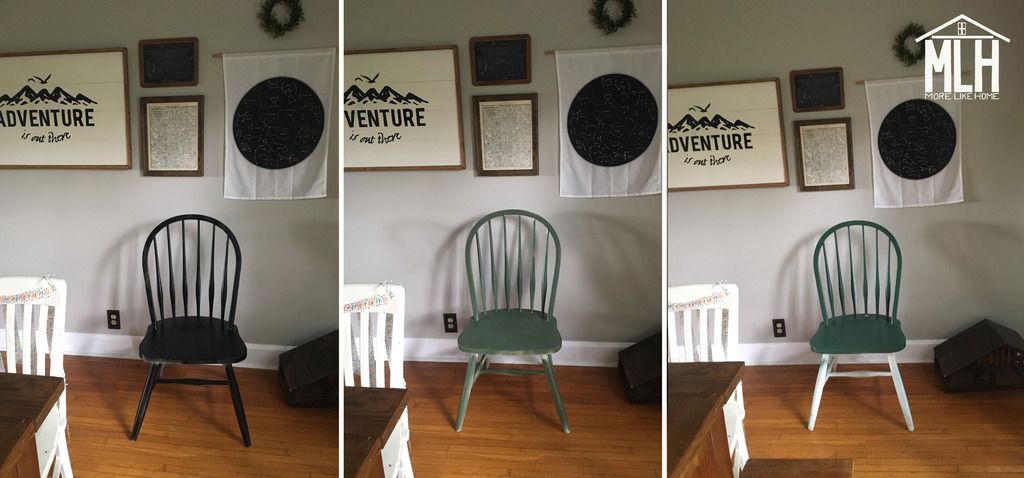
And I had a month long debate about which would be better. Black is classic and timeless, but green is fresh and fun and unique. It was a literal month-long endeavor with multiple color samples and lots of staring at half-painted chairs. And I pestered you guys to no end on instagram with photos of my newest shade and polls about which was best. And like the heroes you are, you never let me down!

Even if you were shaking your heads and wondering "why can't this woman just choose a green?!" you took it like troopers! And I feel like I owe you an explanation because, guys, I only have so much time for projects. As much as possible, I want to make sure I do them right the first time. I just needed to be sure before I put all the time into painting the whole set.
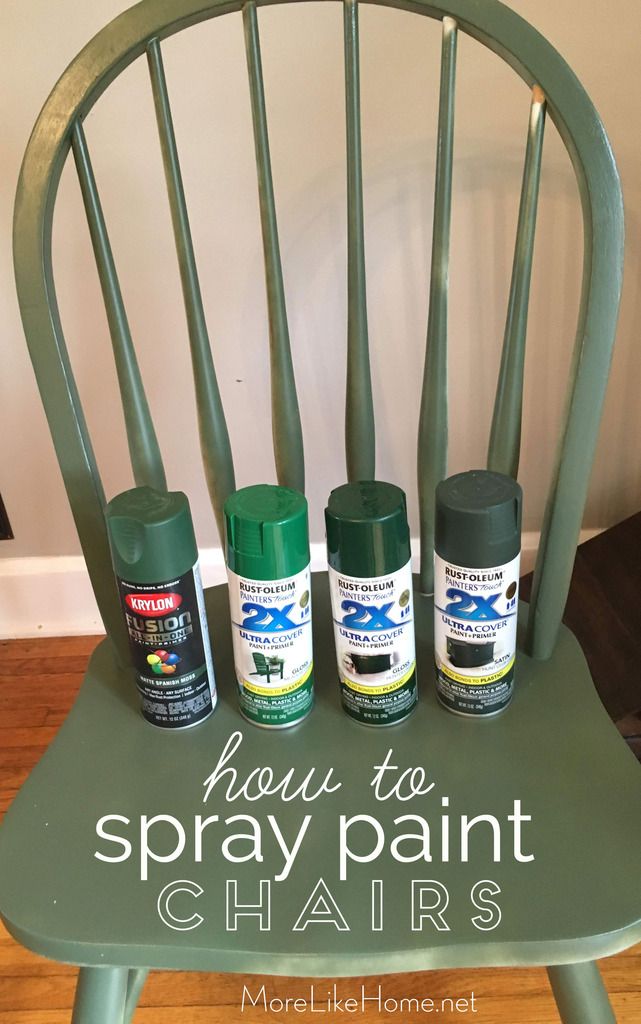
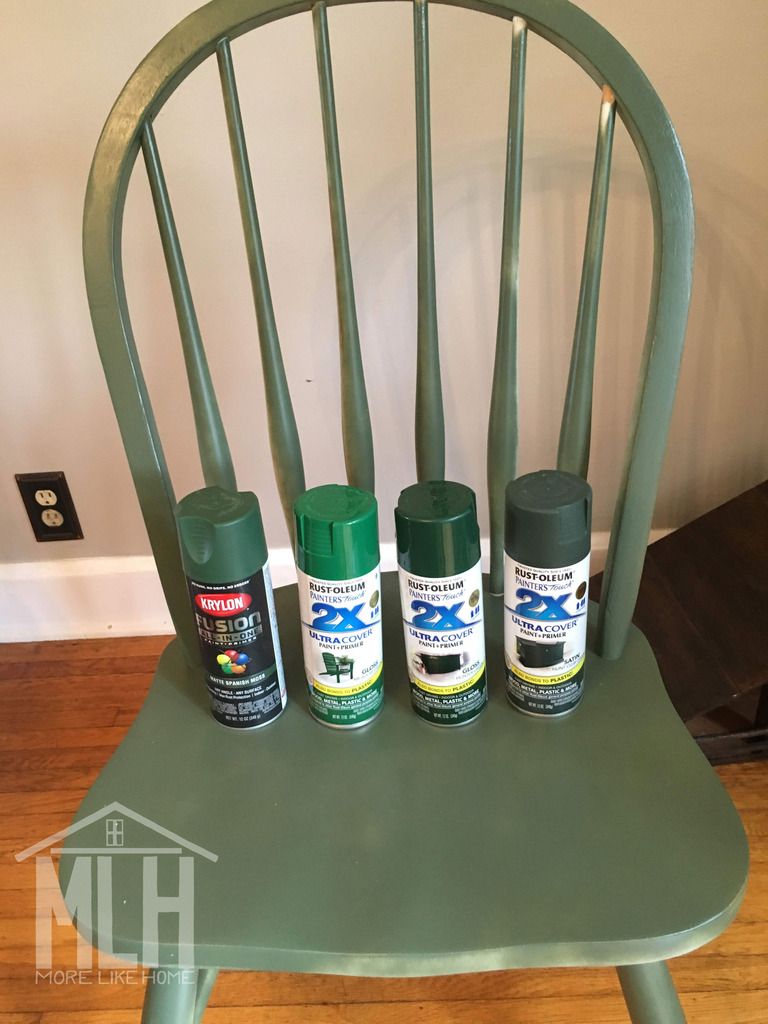
So I bought just about all the greens I could find.
Some were just so bad.
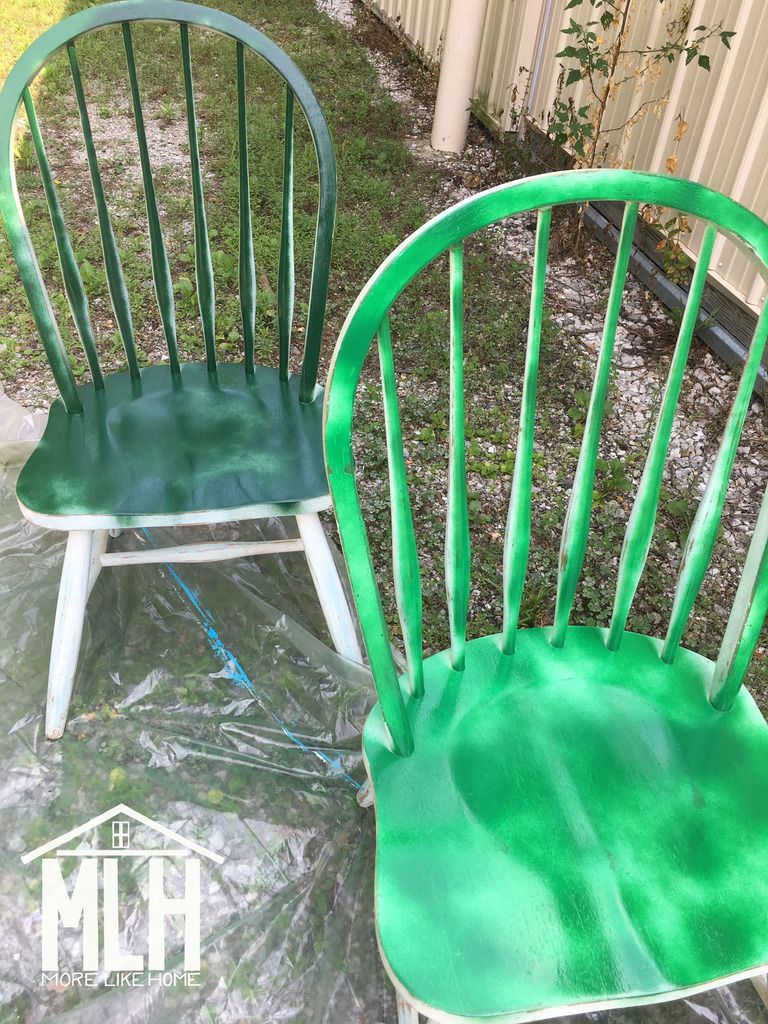
Others were promising.
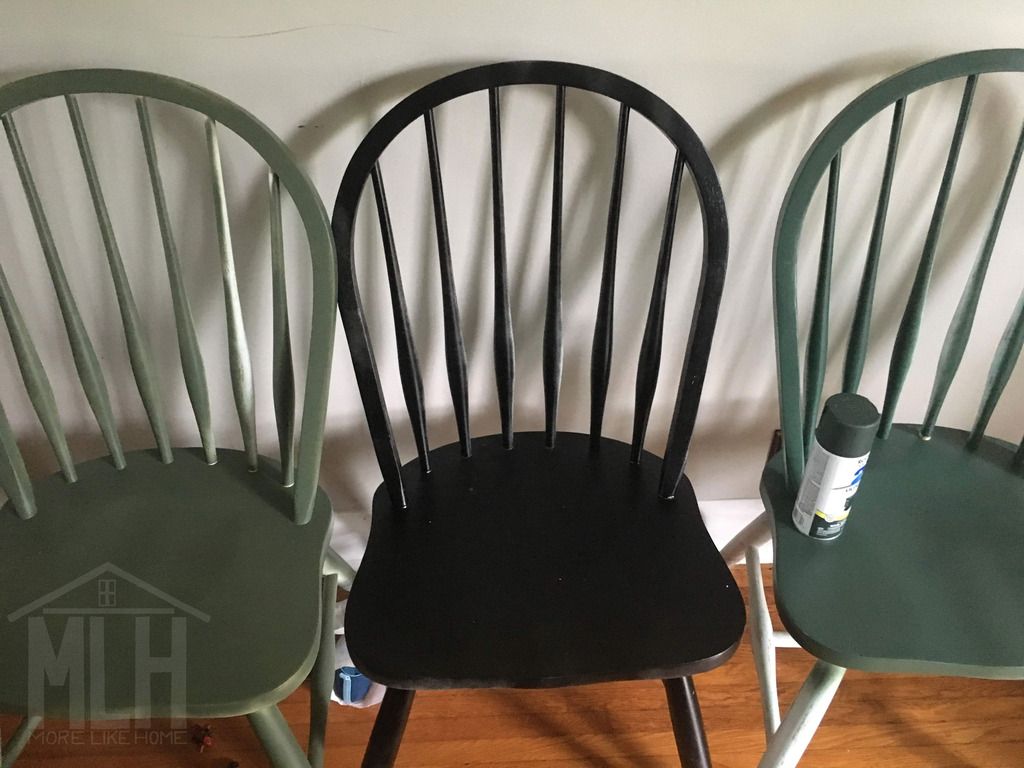
And maybe I would have ended up going with green if there were more options, but the shades are pretty limited when it comes to spray paint. And in the end, none of them were quite what I had in mind.
So at last, after I had tried them all, I felt confident in what I had know all along: black was right for us. The contrast with the gray walls and wood floors was perfect. I also realized, from a practical standpoint, that at some point these will need repainted (hello, lots of small boys who scuff up everything) and black will be so much easier to touch up without any worry about color-matching.
So, if you're going to be painting chairs here's the super simple steps:
- Wash them. Getting second-hand chairs, it's best to scrub them down to get off any dirt or grime they've picked up over the years.
- Sand them. Scuffing them up a bit with a fine sandpaper will help the paint adhere.
- Wipe off any dust from the sanding.
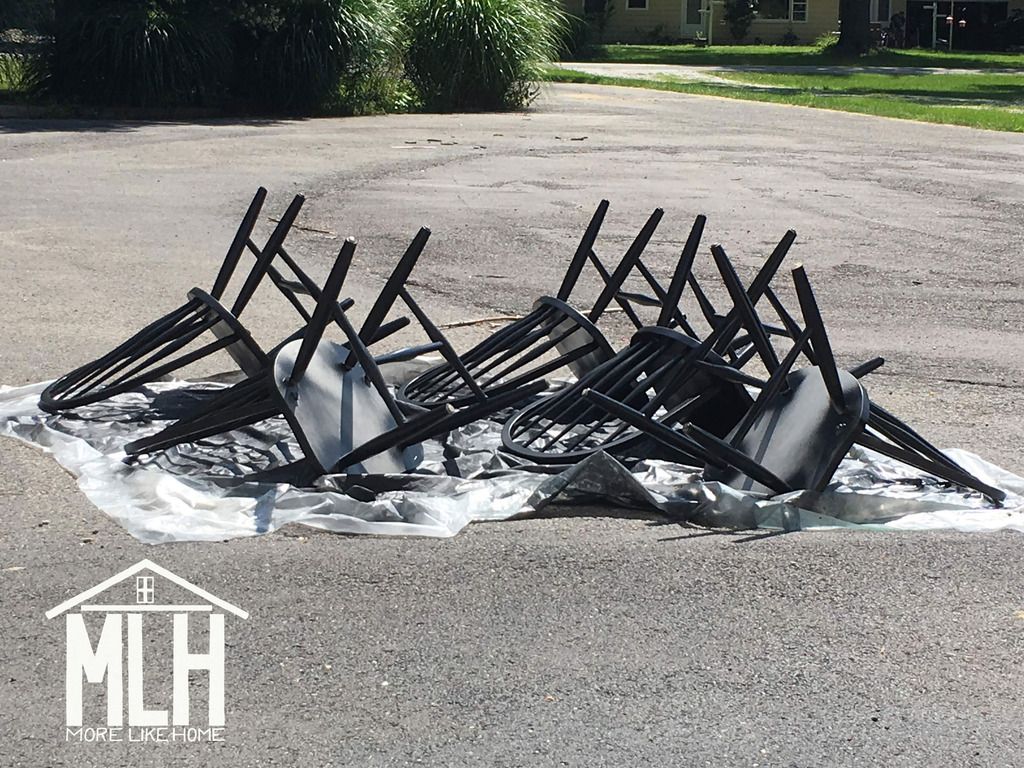
- Start painting. Use thin coats and follow the instructions for drying time between coats. It took three coats to get good, full coverage over the white.
- Flip them upside down and paint all the nooks and angles you couldn't get before. (I used Rustoleum Black with a Satin finish)
- If your chairs have spindles like these, check to see if they shift up-and-down and make sure you paint any new areas that could be visible.
- You can also seal them with polyurethane. But we're trying without. I'll let you know how it goes.
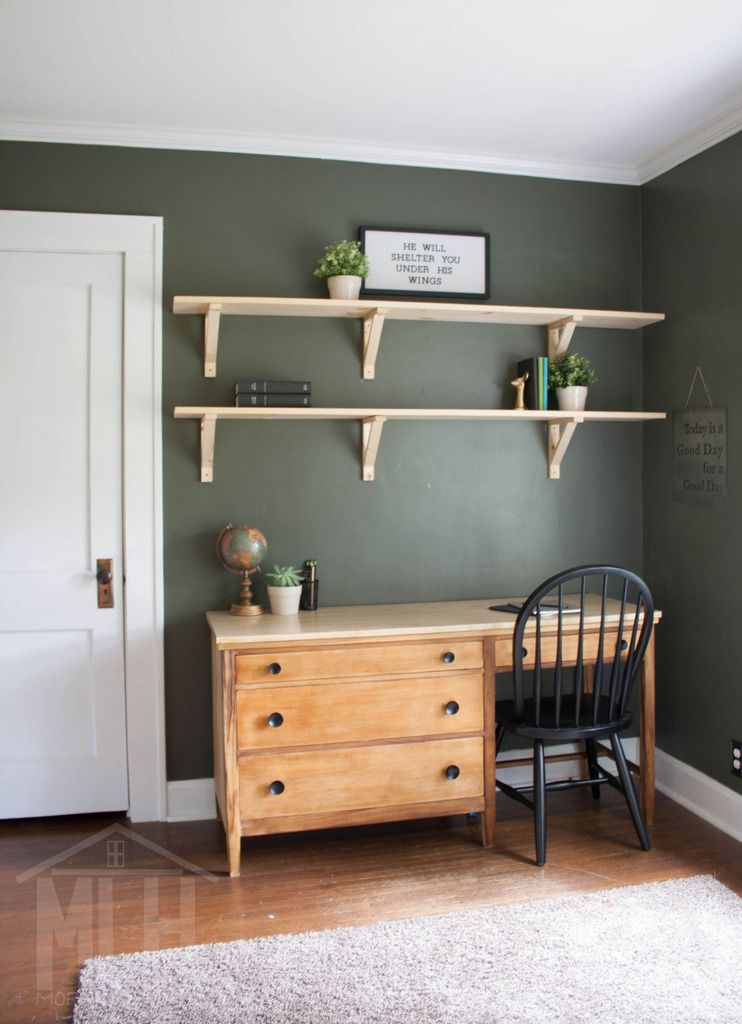
That's it! Now we're sitting pretty with a matching set of chairs that fits so perfectly into my vision for our home with a relaxed, casual feel, a classic style, and a farmhouse vibe.

And the extra chair is looking spiffy in our updated home office (check out how we completely updated the space for just $35).
I'd love to hear your best painting tips (or best budget makeover tips in general). Let's cheer each other on to beautiful homes on a budget!
Hi! the DIY plans look amazing. Just one technical glitch that the pictures are not loading in the browser. Maybe it is just on my end.
ReplyDeleteThanks
Sorry to hear that! Hopefully they are working for you now. We got a few notes about the same problem across the site the same day! Technology is just crazy sometimes. :)
DeleteHi! Can you do the same process with spray paint for a kitchen table too? :) Or just good for chairs? Thank you!
ReplyDeleteHi! I expect it would work for a kitchen table, but after the spray paint I would seal the top with several coats of polycrylic. A tabletop will take a lot a lot more wear and tear than the chairs so it will probably need the extra protection! :)
DeleteHow many cans of paint or how much did one can do?
ReplyDeleteHi! It took about a can and a half for each chair.
DeleteCan you provide an update on the wear and tear without the final coat of sealer/polyurethane? I just finished spray my chairs and am trying to decide if that final coat is necessary prior to placing cushions back on. Thanks!
ReplyDeleteHi! Honestly, these chairs have built-up several scratches over the last two years, mostly on the legs. I'll definitely need to touch them up at some point. A sealer could have helped with that, but this was also my first time spray painting chairs that had previously been painted with chalk-paint and they are showing much more wear than any other chair I've painted. So I suspect that painting over chalk paint is at least a factor in how they've held up.
DeleteWith that said, I have spray painted other chairs in the past without sealer and they all held up much better than this set has. We had one set for several years that never got a scratch on them, but that set was also pre-kids so they suffered much less abuse. ;)
You could always go without the sealer for now and if you end up having trouble you could touch them up and seal them at that point. That way you're not putting in the extra work if you don't have to. Hope that helps! :)
Hi! I have just purchased a table and chairs - think they have been stained, do I need to remove all the stain, or just rough up with a sand before spraying?
ReplyDeleteNope, I would just rough them up! Good luck! :)
DeleteHi...What color green is the chair in the 1st picture with the four cans of spray paint on it?
ReplyDeleteHi! It was that first can in the photo - Krylon Fusion brand, and I think the color was Spanish Moss. That was my favorite green! :)
ReplyDeleteYou said these chairs had gotten scratched easily & you were planning to touch up then add a top coat / sealer. Can you please give us an update on the durability of the chairs after top coat, and what kind of top coat/sealer you used? Thank you!
ReplyDeleteDid you use black chalk paint ?
ReplyDelete