
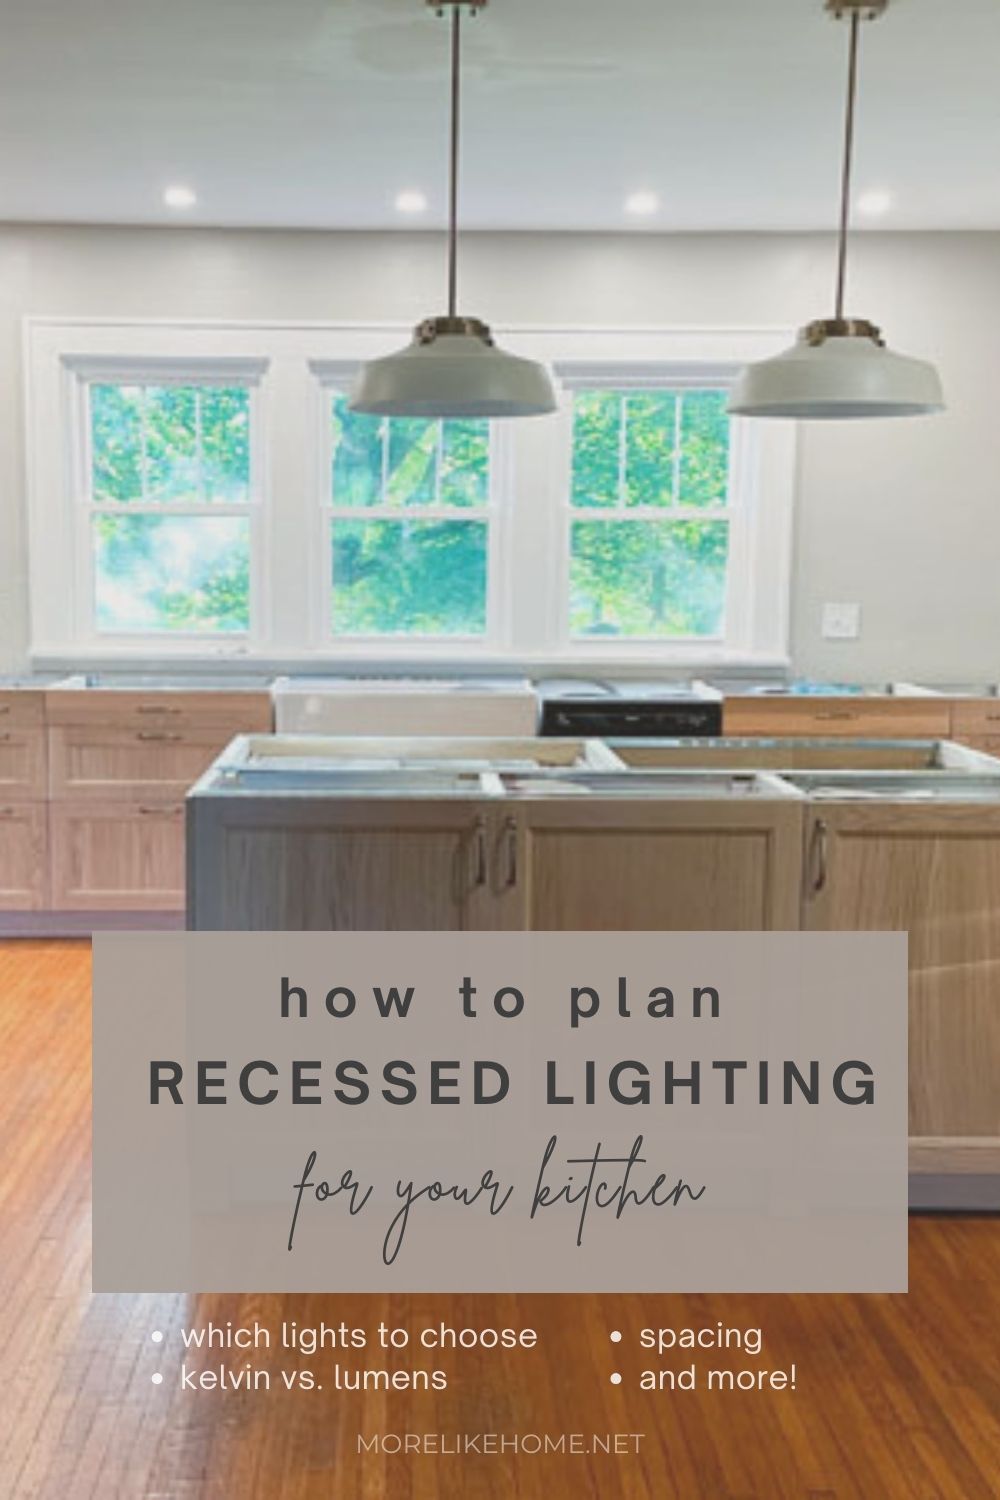
Lighting is so important to a functional kitchen. I'll admit I'm no lighting expert, but I did plan all the lighting for our DIY kitchen remodel myself and I know that you can do it, too! So today I'll share the lighting choices we made for our kitchen (and why we made them) which should at least be a good starting point for you to jump into your own kitchen lighting project!
Disclaimer: I'll start by saying - yes, installing your own lighting involves electrical work. And yes, it can be dangerous if you are not careful or don't know what you're doing. Any projects you take on are at your own risk, so choose what you are (and are not) comfortable with. With that said, the other day I asked my husband if I should even be posting about electrical work because someone might try something dumb and get hurt, and this is what he said: "It's a skill, just like anything else. If they want to learn to do it, they can learn." And it's true! When we got married he was not handy. At all. But now he does stuff like this all the time because he was willing to learn when he had the chance (and he's willing to research new things he doesn't know yet). He learned from my mom, who learned from my grandpa who did construction for years. Now Nathan helps our friends with projects and teaches them how to do it, too. So if it's something you want to do for yourself, go learn how to do it (and how to do it safely). And if you're not comfortable doing it? That's fine! That is what professionals are for.
But this post is really about planning. And wherever you land on the installation, you can still plan the lighting for your kitchen yourself and I'll still help you pick the best lights for your space!
End of disclaimer.
Now onto to the lights!
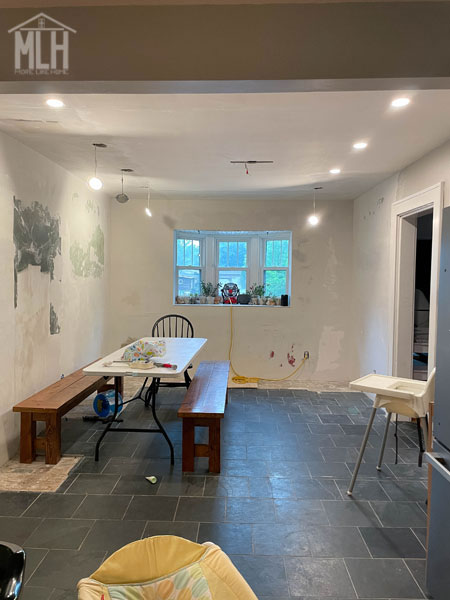 |
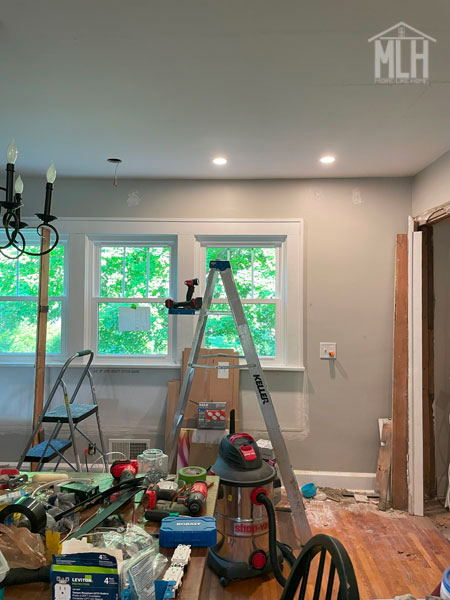
| We added the same recessed lighting in our dining room, too. |
The Lights We Chose
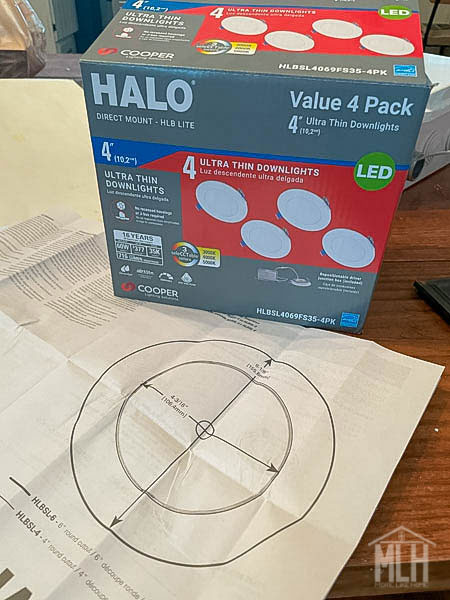
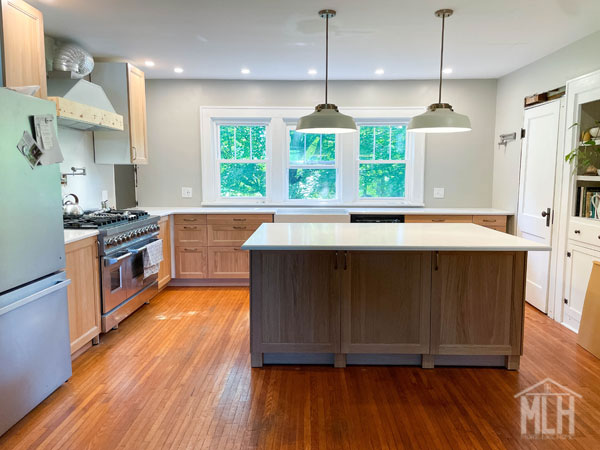
After researching different can lighting options, I landed on these 4" recessed lights. We really liked these ones because they are super easy to install (they don't require any kind of housing or can - they clip right onto the drywall!), they are super slim so they are easy to work with even in tight spaces, the profile when they are installed is super minimal (they don't stick out or draw attention), they work with a dimmer, and you can adjust the light temperature to suite your taste!
Lumens + Kelvin
These are the fancy words of the lighting industry, so here's a quick lighting lesson to help you choose the right lights for your space:
Lumens refers to how bright the light is. So you would want a lower lumen number for say a bedside reading light, and a higher number for a kitchen workspace. Recessed lighting is typically around 800 lumens, and our lights come in just a bit under that at 716L. We've still been really happy with them and don't even use them at full capacity all the time (thanks to a handy dimmer switch). Also keep in mind that lumens add up. For example, two 400 lumen fixtures would put out the same amount of light as one 800 lumen fixture. I definitely do not recommend going that low in a kitchen, just trying to illustrate the principle. :) The lumen number is important in determining the number and spacing of fixtures you will use.
Kelvin, on the other hand, refers to the warmth of the light color. A lower Kelvin number will give a more yellow light (going too far this way can feel dingy), while a higher number gives a more blue light (going too far this way can feel sterile). 3000K seems to be the sweet spot for a light that feels welcoming and natural, so I was careful to choose fixtures that offered that number as an option.
Placement
There are two measurements to consider when you're planning placement for recessed lights in a kitchen:
- the distance from the wall to the fixture
- the spacing between fixtures
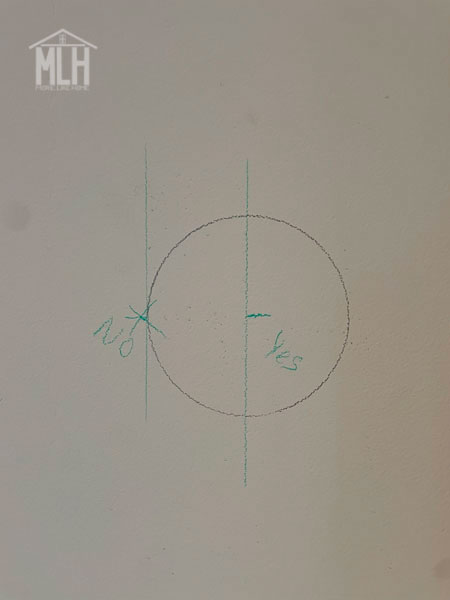
In my recessed light research I found a lot of recommendations saying to put kitchen lights 24" from the wall. This was only my first time installing them, but... I have to say I wholeheartedly disagree. At 24" from the wall they'll be casting more light on the floor than the countertop. Which is fine if you need a well-lit walkway, but I'm more interested in a well-lit work surface. With that in mind, we decided to place our lights closer to the wall over the counters (more on that in a minute). The general recommended spacing between can lights, according to my research, is found by dividing the height of the room in half - so in a room with 8' ceilings lights would be space 4' apart. This may be more fitting when they are used in other rooms as general lighting, but since we're lighting a workspace (and this is our primary lighting in the space) we wanted to make sure it was really well lit so we decided to go with only 30" between lights.
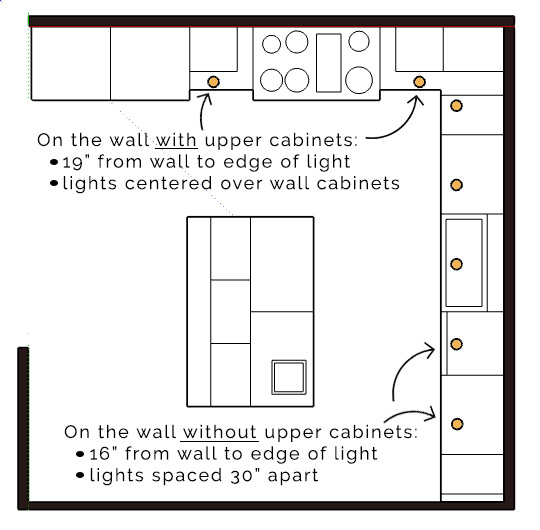
On the sink wall (since there are no wall cabinets) we placed the lights with only 16" between the wall and the edge of the light. We started with one light centered over the sink, then placed lights every 30" from there.
We only placed two lights along the wall with the stove since we'll also have a large hood with built-in lighting. There is one wall cabinet on each side of the hood, so I centered a light in front of each cabinet to make sure it felt balanced and intentional. Since we had cabinets to work around this time, we changed the spacing a bit and put these ones 19" from the wall so they wouldn't be right up against the cabinets.
We also made a last minute addition and put one random can light in the far corner of the kitchen (bottom left in the layout above) where it just felt a bit dark. It may be the opposite of balanced and intentional, but it works really well to brighten up that corner and we are so glad we did it! Remember: it doesn't matter if something looks "right" if it doesn't actually work well for your family! It's better to have enough light than to stress over perfect placement.
 |
| Marking (and re-marking) the light placement on the ceiling. It's always good to double check! |
Those recessed lights are the majority of the lighting for our kitchen and it's so nice and bright! We didn't realize how dark our old kitchen was until the first time we fired up these lights. And we did install a dimmer switch so we have some flexibility if we ever want it.
Planning Your Own Lighting
Ready to layout your own lighting? It's a great idea to sketch up your kitchen and mark exactly where you want your lights before you begin. Be sure to take into account how bright your lights are, your ceiling height, any obstacles you need to work around (wall cabinets, hoods, beams, ceiling joists, etc.), and where you want your lights to be centered when possible (like over the sink). There are lot of things to consider and your space will have unique needs and challenges. Don't be afraid to take time to think through what will work best for your space and your family. Once you have a plan, you can start installing!
 |
| First light in! |
Installation
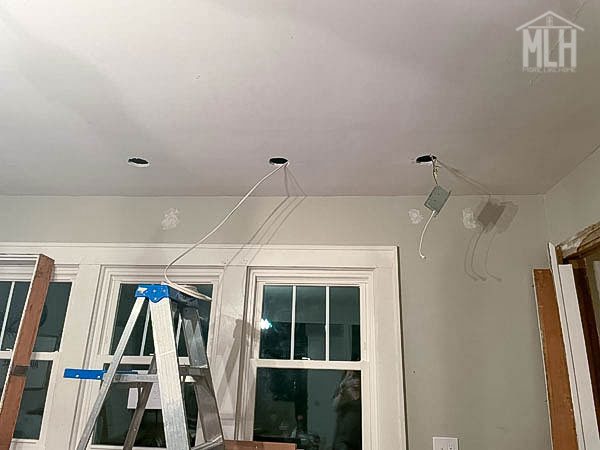
Before we started installing, I used the template that came with the lights to mark circles on the ceiling where each light would go. This was much harder than is should have been because apparently I lose my ability to measure when I'm pregnant. But I eventually got them all marked out. Then we used a stud finder to make sure we weren't going to hit any ceiling joists with this layout.
Nathan used a saws-all to cut out the holes I marked (we have this one). We ran wire through the ceiling from hole to hole to connect the lights, then they popped into place. Of course there's more that goes into it than that, like connecting to a light switch and connecting the switch to your fuse box (with the power OFF, people), but like I mentioned in the beginning, I'm going to leave it up to you to learn to do that and how to do it safely if that's something your interested in. It's not something I feel like I can walk you through here.
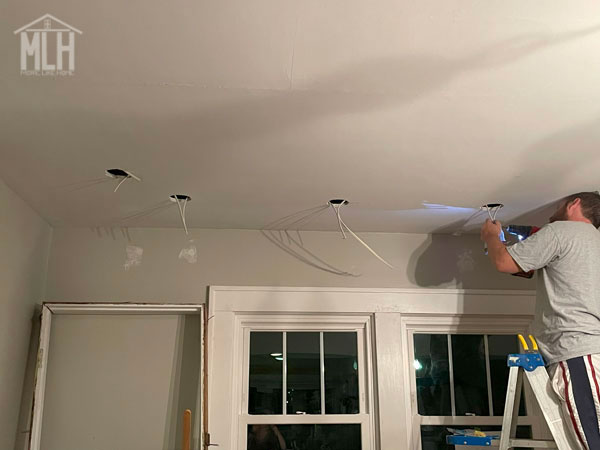 |
| Running wires from hole to hole to connect the lights. |
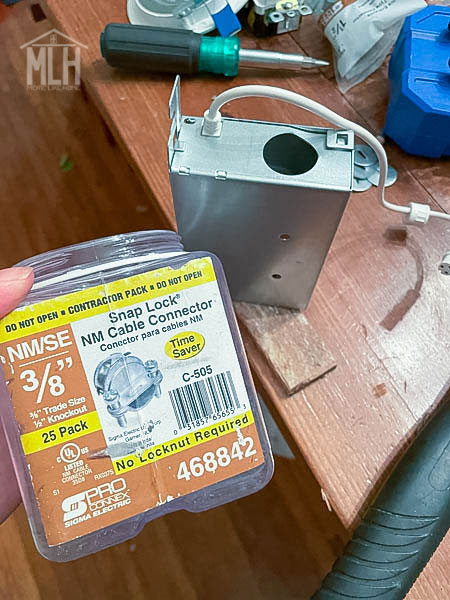
I will give you this tip, though: If you buy these lights go ahead and grab a box of these Snap Lock Cable Connectors while you're there. You'll be running wires into that hole you can see in the metal box and the edges are fairly sharp. These connectors protect the wires as they go through so you don't accidentally cut them on the metal:
Cost
We probably saved a couple thousand dollars by doing all this ourselves instead of hiring an electrician. Like I said, don't mess around with electricity if you don't know what you're doing because it really can be dangerous, BUT if you have the opportunity to learn and someone willing to teach you - take it and run! It's such a great skill to have! Here's a (rough) breakdown of our costs for the recessed lighting:
- We spent about $14 per light at Home Depot and installed eight lights for a total of about $112.
- We also purchased a dimmer switch for $25.
- And spent around $30 on wire.
- We also items we already owned like tools and electrical tape.
- Recessed Lighting Total: $167
Island Lighting
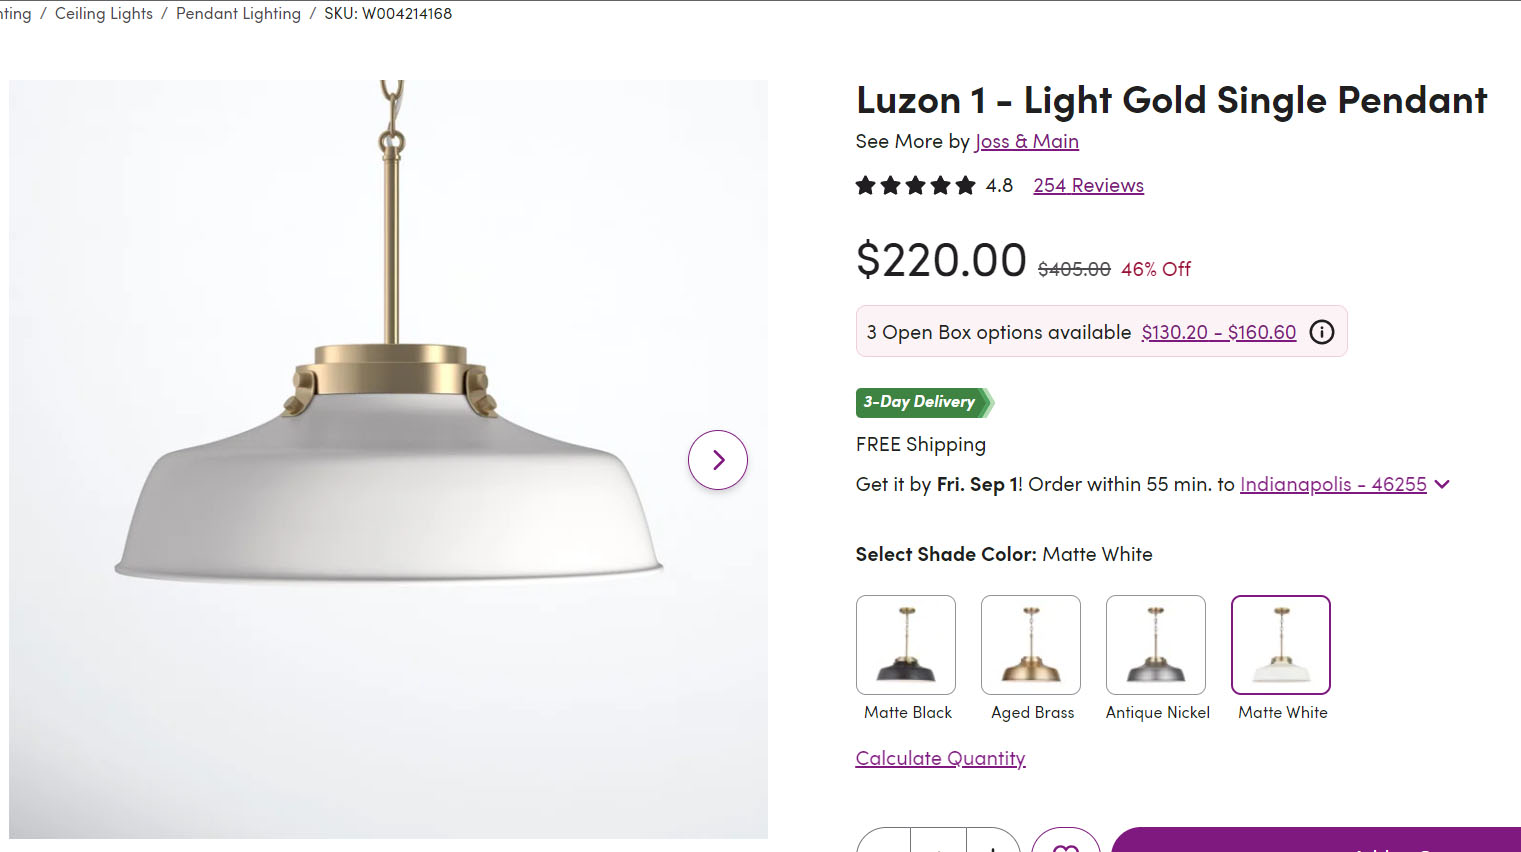
But wait! What about the island?? We didn't put any can lights above the island because I opted for a pair of pendant lights there instead. You could definitely use recessed lighting over an island, too, but it's a great place to add a little style and focused task lighting to your kitchen!
I wanted to keep it affordable, so I kept an eye on our local salvage hoping to find something I liked for a great price - and these fit the bill (literally). They retail for $220 from Wayfair, but I found one at the salvage for $45 and was able to get an open-box twin from Wayfair for $85.
Going in to this, I didn't know exactly what kind of pendants I wanted, but I did have a few guidelines (for both style and function) and these pendants hit them all:
- STYLE // I wanted a style that fit our home (a 90+ year old farmhouse) // Metal bowl shades are a classic that don't feel out of place in older homes. These pendants have a slightly modernized style with the sharper angles at the top, but I still felt good about them.
- COLOR // I wanted a light color to keep the room feeling bright and light. // White shades. Yes please.
- SIZE // I wanted something a little larger scale that would fill the space with only two pendants. // These guys are each 18" across which was the perfect size for our island.
- THE SHADE // I didn't want to see bare lightbulbs. I am passionately against bare bulbs, guys. It's a deal breaker. Not because of how it looks from a style standpoint, but because when you look at a bright exposed bulb - it hurts your eyes! We had exposed bulbs in the chandelier in our dining room and I swore to avoid it in all future lighting. Other metal bowl lights similar to these ones are making a big comeback right now, but a lot of them have super shallow bowls. Which means the lightbulb shows out the bottom. Which means I will not buy them. But these ones are deep enough that, even at my height, I don't have to shield my eyes from lightbulbs. So I was really thrilled to find them! It was an added perk for me that these shades aren't fully enclosed. The bottom is open which gives really great, directional light onto the work surface (plus the lightbulbs will be really easy to change when the time comes).
- ADJUSTABLE HEIGHT // I want to hang them where I want to hang them, ok? So don't try to stop me. // These pendants came with tons of height options we could try out in the space before we installed them.
- Two discounted pendant lights for $130 total.
- About $20 worth of wire.
- We again used items we owned like tools and ran these lights to an existing switch.
- Island Lighting Total: $150
No comments:
Post a Comment