

Have you tackled any of these projects yet? You can see links to the complete series here. In this series, we're seeing what we can make out of 2x4s. I want to keep it cheap, keep it easy, and keep it totally doable for anyone. I know I have a lot of favorite projects, but let me tell you, what we're working on today and tomorrow is my very, VERY favorite project from the whole series. I've split it into two project days and today we'll be starting with the Simple Storage Bin!
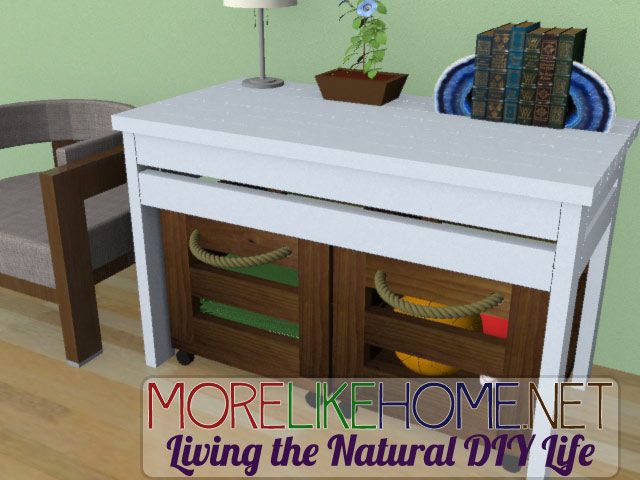
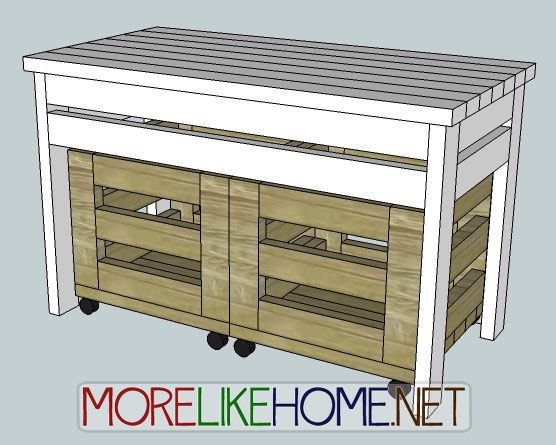
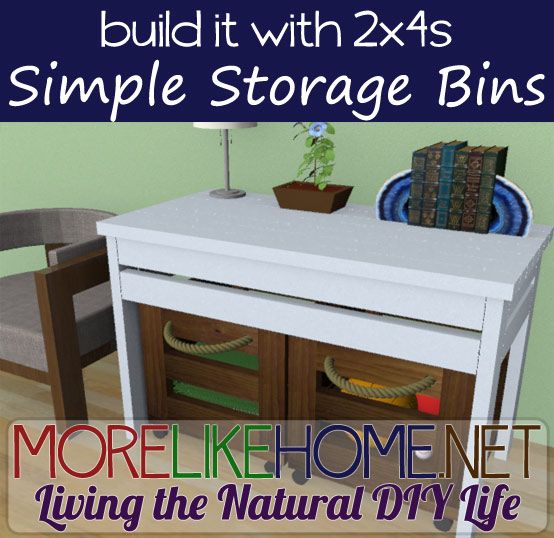
Did I mention how much I LOVE these? Great for tucking away extra blankets for chilly days, wrangling the balls all little boys love to play with, or stashing toys out of the way when guests show up. Tomorrow we'll also be building this great Simple Storage Table - the perfect size for tucking away a pair of storage bins! But for today let's get started with our Simple Storage Bin....
Shopping List:
3 - 2x4s @ 10' long
1 - 2x4 @ 8' long
4 Casters (optional)
Rope or Drawer Pulls (optional)
Tools:
Saw
Drill
2 1/2” screws (or Kreg Jig & 2 1/2" self tapping screws)
4" screws (or Kreg Jig & 2 1/2" self tapping screws)
Wood glue
Wood filler
2x4 Cut List:
(A) - 4 @ 16" (legs)
(B) - 6 @ 14" (front/back)
(C) - 6 @ 18" (sides)
(D) - 6 @ 21" (bottom)
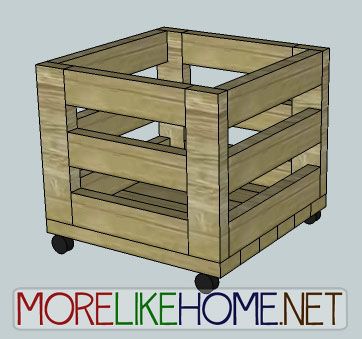
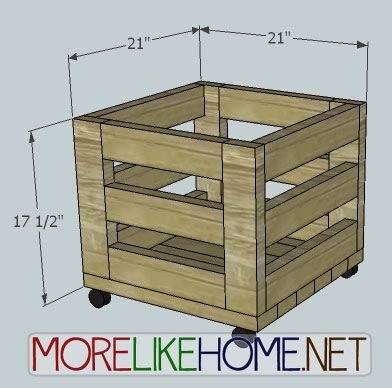
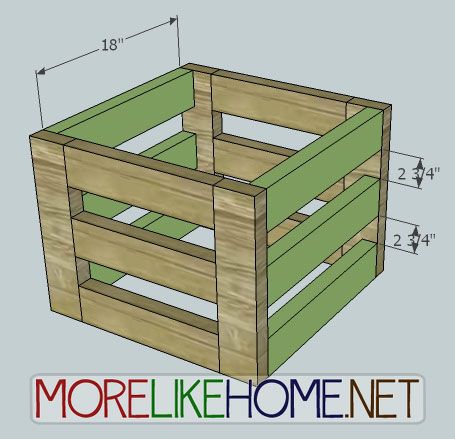
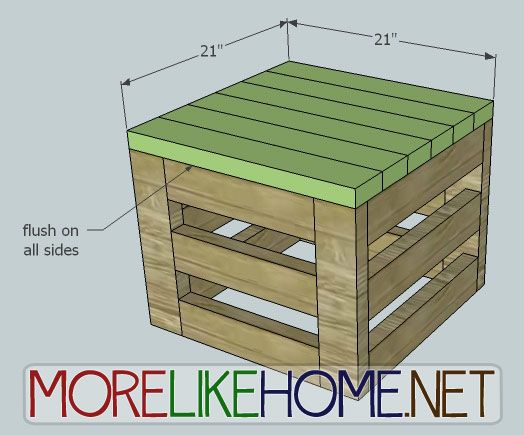
Dimensions: 21" wide x 17 1/2" tall x 21" deep
Please read all the directions before beginning, and cut your pieces as you go, measuring before each cut. Use 2 1/2” screws or pocket holes with 2 1/2" screws unless otherwise indicated. Always use glue. Pre-drill and countersink your screws. I have not built from these exact plans, so measure lots to make sure things work out!
Step 1: Build the Front & Back
Use three front/back boards (B) to connect two of the legs (A) as shown below. One front boards should be flush with the top of the legs, one flush with the bottom, and one centered between with 2 3/4" of space above and below. Attach the front boards to the legs using a Kreg Jig and 2 1/2" pocket screws, or by drilling through the legs and into the front & back boards with 4" screws. Use glue. Repeat to build the back section.

Step 2: The Sides
Now use the side boards (C) to connect the front and back sections you just built. Attach three boards on each side. Everything should be flush across the outside edges. On either side, one board should be flush with the top of the legs, one flush with the bottom of the legs, and one centered in between with 2 3/4" of space above and below it. They will line up with the front/back boards. Attach the side boards using a Kreg Jig and 2 1/2" pocket screws, or by drilling through the legs and into the front & back boards with 2 1/2" screws.
Step 3: The Bottom
Now you can attach the bottom boards to the bottom of your bin. They should sit flush around all the sides. Attach them by drilling through the bottom boards into the sides and legs with 2 1/2" screws and glue.
Step 4: Finishing
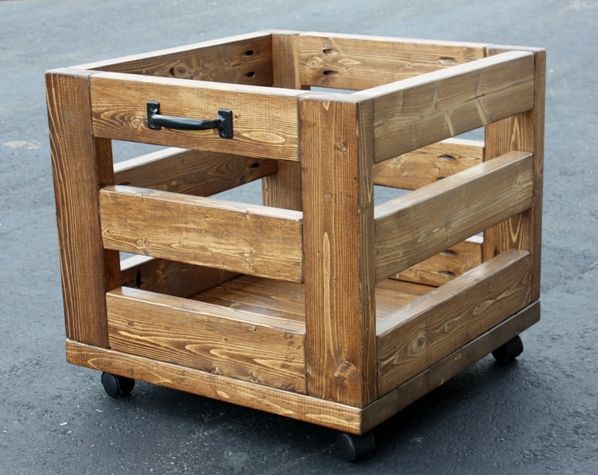
To finish of your storage bin, start by filling any holes and sanding down the entire piece. Now you can finish with any paint/stain/poly you like. Try a nice rustic finish to pair with a sleek table, or a sunny yellow for the kids' rooms. For rolling bins, go ahead and attach a caster below each leg according to the manufacturer recommendations. You can also add a drawer pull or rope pull to make your bin easier to move around.
And be sure to come back tomorrow to build a matching Simple Storage Table to pair with your Storage bins!
Project 2x4 Cost:
$9.60 - 3 2x4s @ 10' long ($3.20 each)
$2.50 - 1 2x4 @ 8' long ($2.50 each)
$12.10 Total
See giveaway winners here.
Project 2x4 Cost:
From Val (via ana-white.com): "I love this storage bin from morelikehome.net, and it was easy to build, too!" Thanks for sharing Val, I look forward to seeing the Storage Table when you complete it!
(via ana-white.com)
And a big thanks to Alex for submitting these beautiful bins complete with Storage Table! Great work!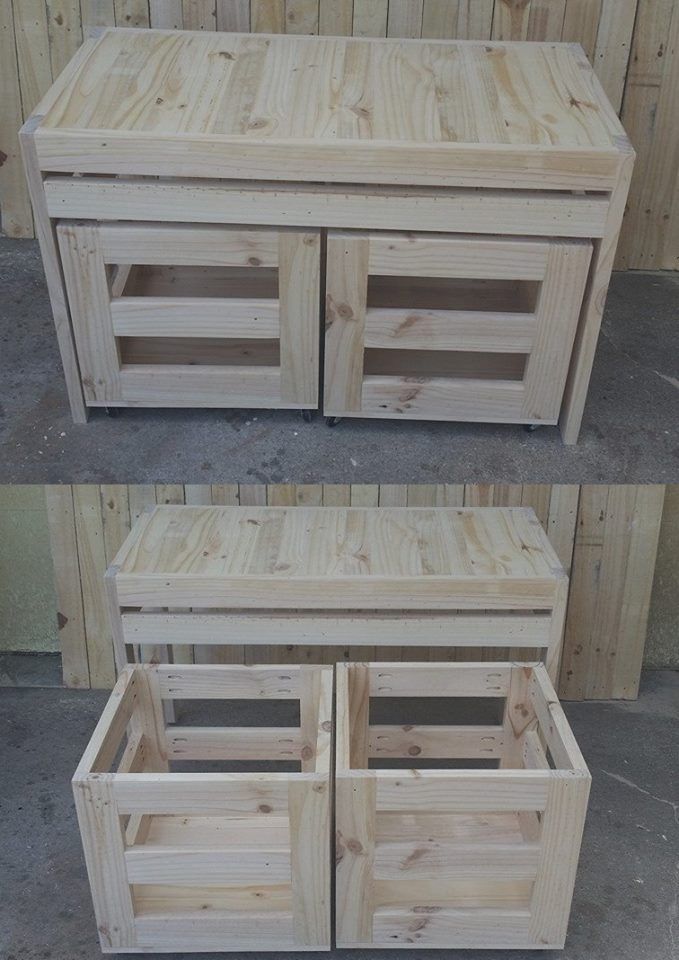

Share on Facebook

Looks like a nice place to keep a boy's pig.
ReplyDeleteI would like that in the garage!
ReplyDeleteThese are so cute!!!!
ReplyDeleteI like the pulls on those!
ReplyDeleteLove these. I've been looking for something inexpensive for storage for my daughter's room. I may give them a try.
ReplyDeleteHi Georgia. These would make great bins for a garage!
ReplyDeleteThey would be perfect for that! I need to make a couple for yard toys this summer. :)
DeleteHello Georgia! I've just completed my first storage bin from your plans, and it turned out beautiful! It was originally intended for garage storage, but it looks so good stained, it'll be going to my art studio/sewing room instead...which, by the way, gives a whole new meaning to the words "war zone"! The second bin and the table will be in there as soon as I can build them. When they're all done I'll be posting them on Ana White's Brag Board. Hope you have a great day! Val from Alberta, Canada.
ReplyDeleteYay! That sounds great! I will keep an eye out for your brag post. I love the idea of using them in a sewing room, too. Work space plus storage! :)
DeleteWow excellent post.Thanks to write this one.
ReplyDeleteWhat stain did you use?
ReplyDeleteIf you're asking about Val's storage bin, this is what she said "Two coats of Early American by Minwax, and one of Varathane's Diamond Finish topcoat, all applied with a rag." Hope that helps! :)
Delete