

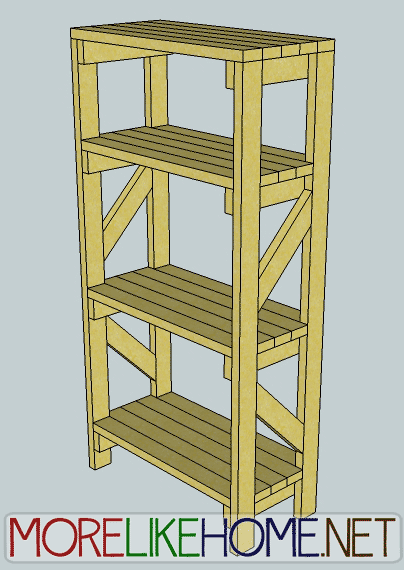
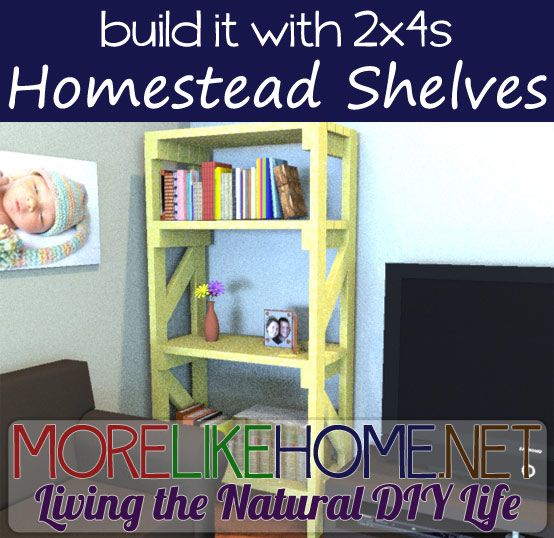
Welcome to day 12! You can see links to the complete series here, and learn about my Lowe's gift card giveaway here. In this series, we're seeing what we can make out of 2x4's. I want to keep it cheap, keep it easy, and keep it totally doable for anyone. Today's project is inspired by the homestead movement. We're going to build some Homestead Storage Shelves!

With the homestead ideas of self-sustenance and natural living, comes lots of bulk food storage. These cheap, sturdy shelves are designed for just that. Perfect for lining the walls around the basement or garage and filling with all your staples. Not into the whole homestead thing? No problem. These shelves work just as well for storing Christmas decorations or seasonal clothes. And if you want to mix things up a little, they can also add a nice industrial/utilitarian vibe around the house. If you're curious about this whole homestead thing, check out The Pioneer Woman or Homestead Revival. And if you're ready to start building you're own shelving units just keep reading!
Shopping List:
10 - 2x4s @ 10' long
2 - 2x4 @ 8' long
Tools:
Saw
Drill
2 1/2” screws (or Kreg Jig & 2 1/2" self tapping screws)
4" screws (or Kreg Jig & 2 1/2" self tapping screws)
Wood glue
Wood filler
2x4 Cut List:
(A) - 4 @ 72" (legs)
(B) - 8 @ 17 1/2" (shelf supports)
(C) - 14 @ 36" (shelf middle)
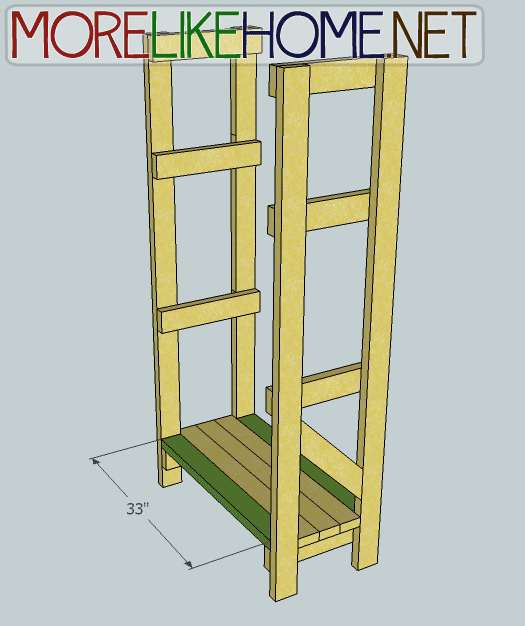
(D) - 6 @ 33" (shelf sides)
(E) - 4 @ 18 3/8" (braces)
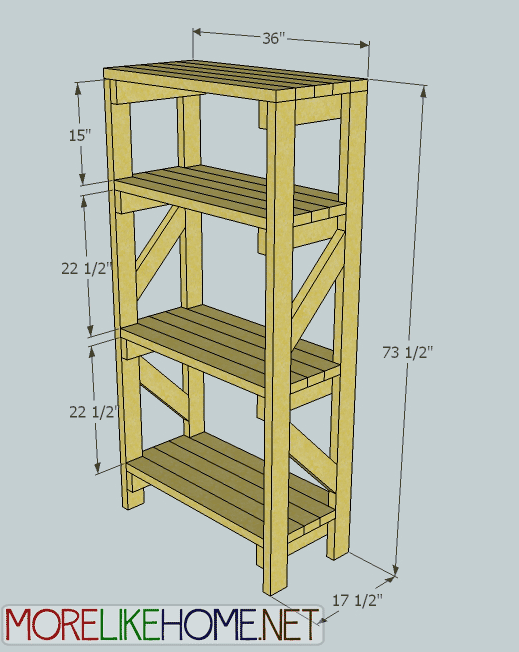
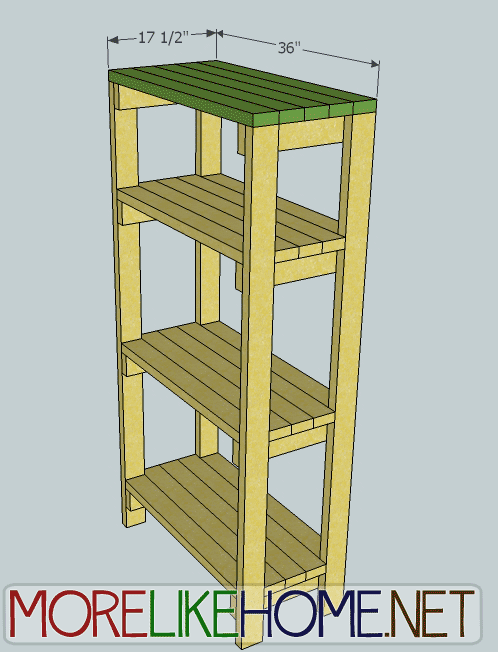
Dimensions: 36" wide x 73 1/2" tall x 17 1/2" deep
Please read all the directions before beginning, and cut your pieces as you go, measuring before each cut. Use 2 1/2” screws or pocket holes with 2 1/2" screws unless otherwise indicated. Always use glue. Pre-drill and countersink your screws. I have not built from these exact plans, so measure lots to make sure things work out!
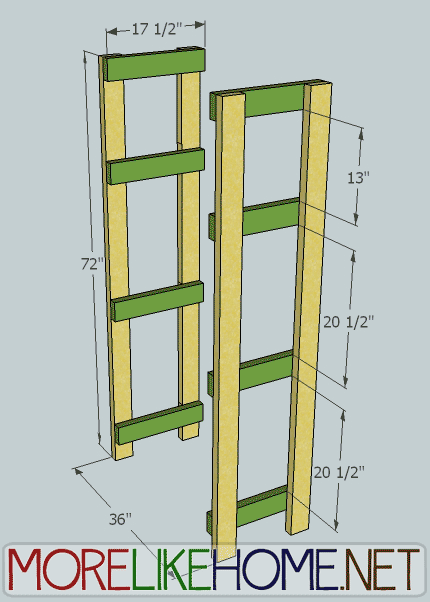
Step 1 - Build the Sides
Use four shelf supports (B) to connect two of the legs (A) as shown below. The top support should be flush with the top and outside edges of the legs. Then the second should be 13" down from there, then third 20 1/2" down from there, and the bottom support 20 1/2" down from there. (or you can space the shelves to fit any specific items you plan to store!) Drill through the supports into the legs and attach with 2 1/2" screws and glue. Repeat to build the other side.
Step 2 - The Shelves
Start by attaching three middle shelf boards (C) on the bottom shelf supports. They should fit between the legs on each side, and you want the ends of the shelves to be flush with the outside edges of the legs. Attach them by drilling down through the shelf into the supports with 2 1/2" screws & glue.
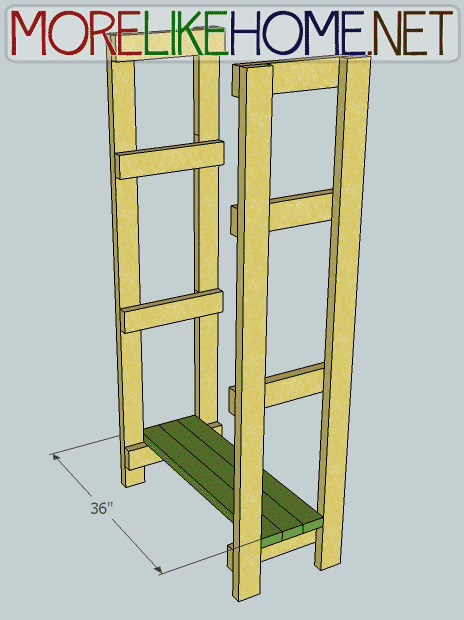
Now attach two shelf sides onto the bottom supports as shown below. One fits in front of the center shelf boards and one fits behind. Each should slide in between the sides and sit against the center boards. Attach them by drilling down through the shelf into the supports with 2 1/2" screws & glue. Repeat these two steps to build the second and third shelves.
Next is adding the top shelf. This shelf is made of five center boards (C). These boards sit on top of the unit and should be flush around the outside edges of the legs. Attach them by drilling down through the shelf into the supports with 2 1/2" screws & glue.
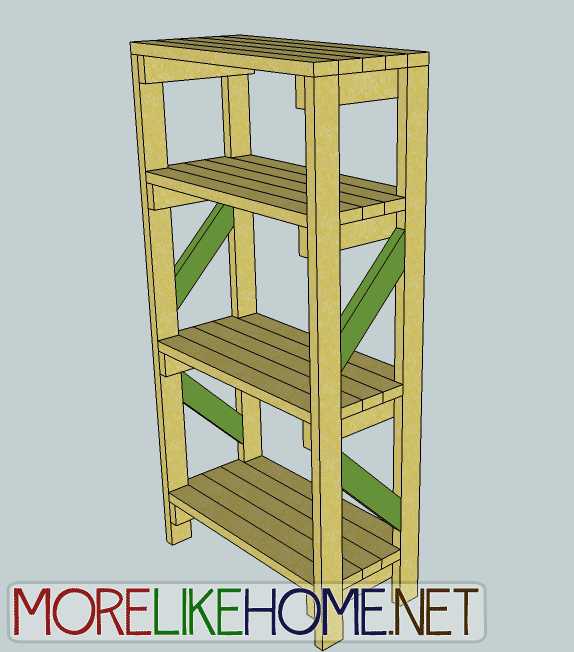
Step 3: The Braces
Now you can add some braces to make your shelves a little sturdier (and add some visual interest). Start by cutting the ends of your brace boards at 45 degree angles as shown below.
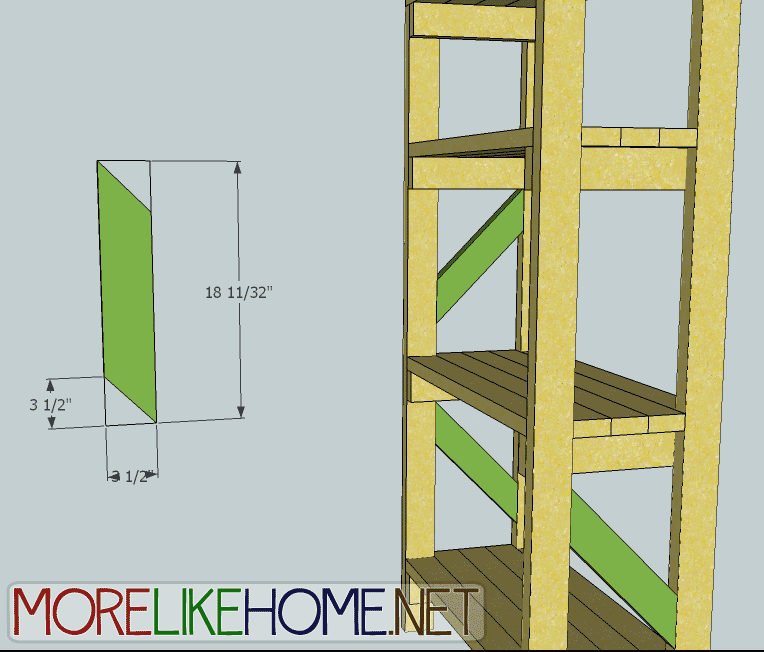
Now attach two boards on each side of the shelving unit as shown below. Attach them by drilling through the legs into the braces with 4" screws & glue.
Step 4 - Finishing
Start by filling any holes and sanding everything down. Then finish with any paint/stain/polyurethane you like. Try a bright cheery color in the basement, white for a clean look, or keep them natural for a modern industrial feel. So many possibilities!
Project 2x4 Cost:
$32.00 - 10 2x4s @ 10' long ($3.20 each)
$5.00 - 2 2x4 @ 8' long ($2.50 each)
$37.00 Total
I Did It!
Jerod modified these shelves to build a narrower unit for his office. It's finished with Minwax Classic Gray Oil Stain. See more photos of this and the rest of his DIY 2x4 office furniture here!

See giveaway winners here.

Share on Facebook

Wish I had seen this 3 months ago when I spent $60 on shelves from a big box store....
ReplyDeleteThank you so much for all these great plans and ideas!
Is that a sketch or a real picture?
ReplyDeleteI am always needing more shelves :)
ReplyDeleteI never seen to have enough shelves.
ReplyDeleteBuilt a modified version of this plan! Loving it, thanks for the inspiration! The Great Laundry Room Overhaul Part 2
ReplyDeleteThat looks great! Thanks so much for sharing! Would you mind if I shared the pics on this post and linked to your blog?
DeleteIf you add a diagonal across the back it will be far sturdier, and not "rack" - lean sideways - with a heavy load.
ReplyDeleteGreat idea! Thanks for the tip!
Deletehow would you modify this if you wanted to put it on casters?
ReplyDeleteYou should just be able to add them to the legs with no modification. If the added height is too much for your space you can trim the legs a bit shorter first. :)
Delete