

Welcome back! You can see links to the complete series here, and enter my Lowe's gift card giveaway here. In this series, we're seeing what we can make out of 2x4s. I want to keep it cheap, keep it easy, and keep it totally doable for anyone. Today project is fun and versatile - and we'll be looking at even more design options for it tomorrow. Today we'll be building a bench and planters!
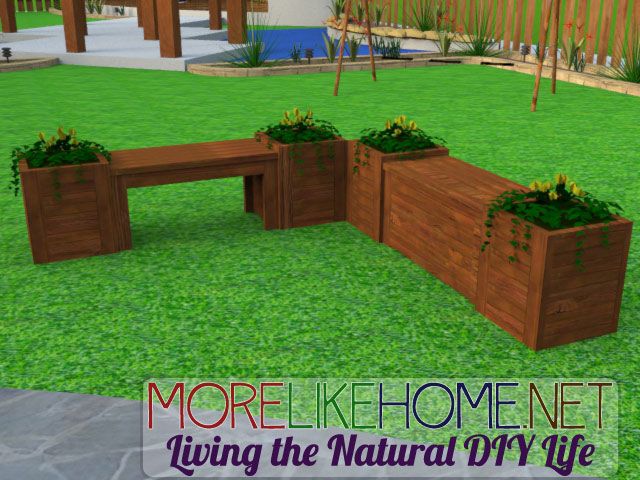
These would be a great addition to any backyard or patio. And they are super versatile! You can build just a planter, just a bench, or a few each to piece together how ever you like! It's never to early (or late?) to think about sprucing up our yards, right? :)

Tools for Both Projects:
SawDrill
2 1/2” screws (or Kreg Jig & 2 1/2" self tapping screws)
4" screws (or Kreg Jig & 2 1/2" self tapping screws)
Wood glue
Wood filler
Bench Shopping List:
3 - 2x4s @ 10' long
Planter Shopping List (this is for one planter, buy double if you want two planters!):
3 - 2x4s @ 10' long 1 - 2x4 @ 8' long
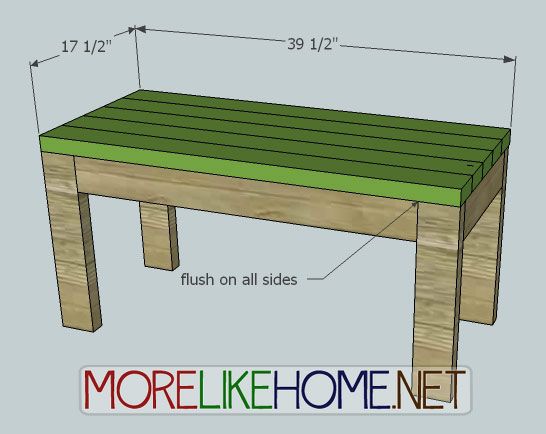
(A) - 4 @ 17" (legs)
(B) - 2 @ 32 1/2" (front/back)
(C) - 2 @ 14" (sides)
(D) - 5 @ 39 1/2" (seat)
Planter 2x4 Cut List:
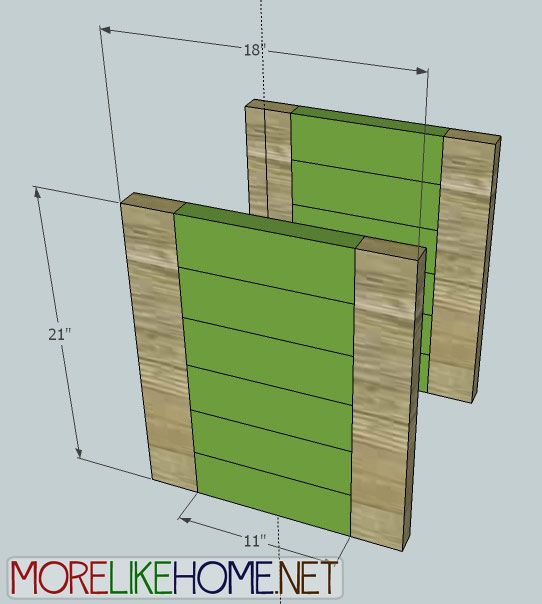
(E) - 4 @ 21" (legs)1(F) - 12 @ 11" (front/back)
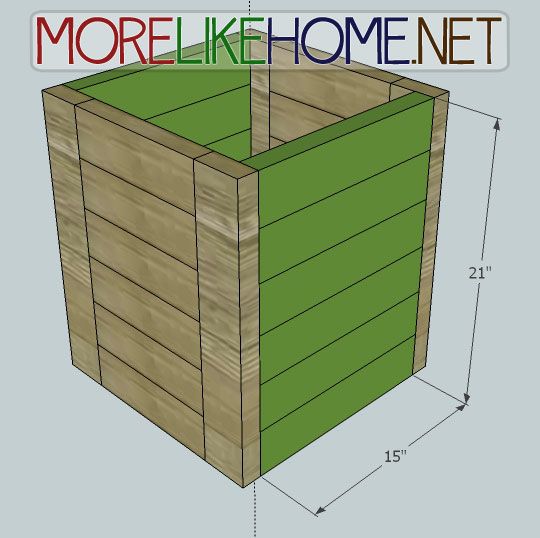
(G) - 12 @ 15" (sides)8
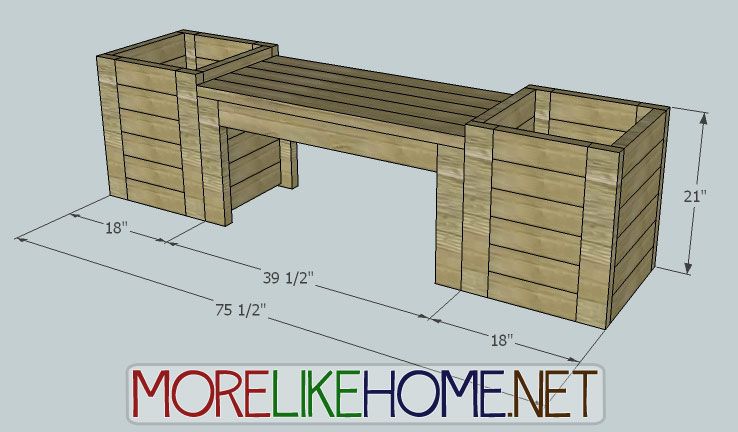
Planter Dimensions: 18" wide x 21" tall x 18" deep
Please read all the directions before beginning, and cut your pieces as you go, measuring before each cut. Use 2 1/2” screws or pocket holes with 2 1/2" screws unless otherwise indicated. Always use glue. Pre-drill and countersink your screws. I have not built from these exact plans, so measure lots to make sure things work out!
Step 1: Build a Bench
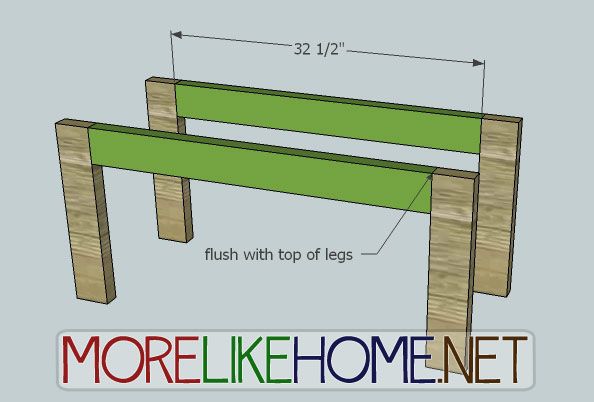
Like how I made that all into one step? :) Start by building the front & back of your bench. Use a front board (B) to connect two legs (A). It should be flush with the top of the legs. Attach the front board using your Kreg Jig and pocket screws, or by drilling through the legs into the front board with 4" screws and glue. Repeat to build the back section.
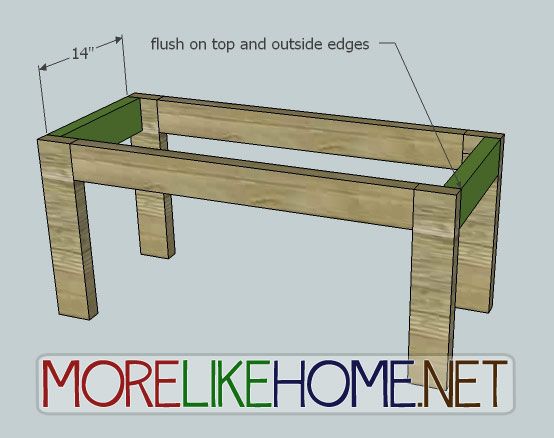
Now connect the front and back sections using the side boards (C). Each board should be flush with the top and outside edges of the front and back sections. Attach the side boards using a Kreg Jig, or by drilling through the front (and back) of the legs and into the sides with 2 1/2" screws and glue.
Now you can attach the seat boards (D). These boards sit side-by-side across the top of the bench and should be flush around all sides. Attach them by drilling down through the seat boards into the sides & legs with 2 1/2" screws and glue.
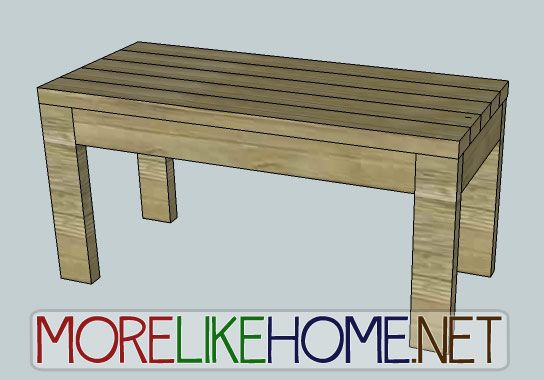
If you just want a bench, you're done! Fill your holes, sand, and paint or stain as desired (Be sure to choose an outdoor product!). But if you want a few planters to go with it, keep reading.... :)
Step 2: Build a Planter
Start by using 6 of the planter front boards (F) to connect two of the planter legs (E). The front boards sit on top of each other and the whole stack should be flush with the top and bottom of the legs. Attach the front boards using a Kreg Jig and pocket screws, or by drilling through the legs and into the front boards with 4" screws and glue. Repeat to build the back section.
Now connect the front and back sections using the side boards (G). You will use 6 on each side, again stacked on top of each other and flush with the top and outside edges of the legs. Attach these boards by drilling through the front and back of the legs into the side boards with 2 1/2" screws and glue.
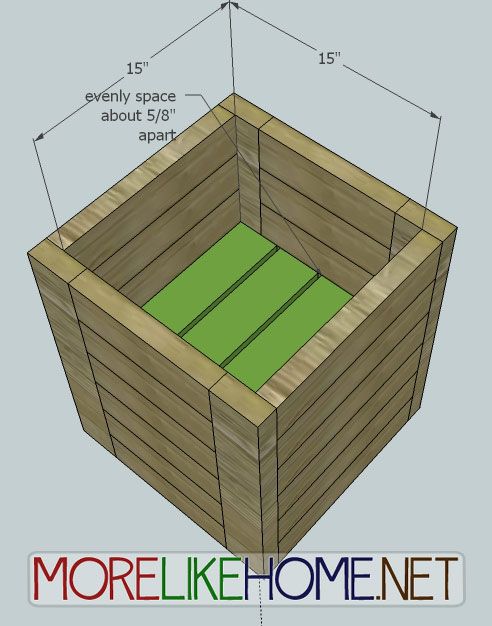
Now you can put a bottom in your planter. You probably don't want to actually put it at the bottom of your planter, because you probably don't need that much dirt in there! Try installing the bottom boards (H) about 8-12" down from the top of the planter, depending on how much room you think your plants will need. Once you choose your depth, attach your bottom boards by drilling through the front & back sections into the bottom boards with 2 1/2" screws and glue. Your boards should be evenly spaced about 3/8" apart to allow a little space for drainage.
Now you can finish your planters. Start by filling any holes sanding everything down, and finishing with paint or stain and polyurethane. Be sure to choose an outdoor product!

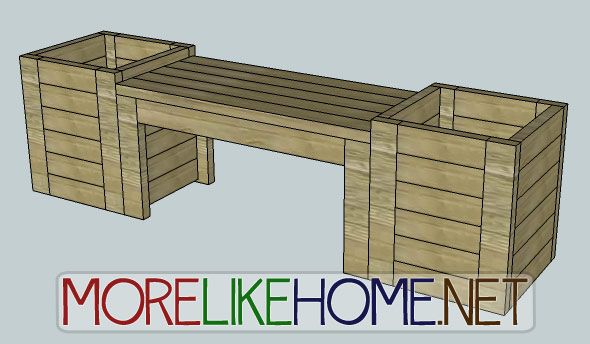
Did you build both pieces? Then go ahead and put them together however you like! Try a simple bench with a planter on each end, or add another bench and planter to make an L-shaped arrangement for a corner. There are so many possibilities.
Get creative with your finishing. Try painting your benches a crisp white and your planters a moody gray or deep navy. Have fun!
Bench Project 2x4 Cost:
$9.60 - 3 2x4s @ 10' long ($3.20 each)
$2.50 - 1 2x4 @ 8' long ($2.50 each)
$12.10 Total
Planter Project 2x4 Cost:
$9.60 - 3 2x4s @ 10' long ($3.20 each)
$9.60 Total
Reader Matt built the bench section for his garden (check it out here). Looks great! Thanks for sharing!


See giveaway winners here.

Share on Facebook

No bunnies in these boxes.
ReplyDeleteI like the idea of the planters,but I would be tempted to leave the plants out and put outdoor toys in.
ReplyDeleteI love these!
ReplyDeleteWhat a great spot for a picture! Love it!
ReplyDeleteI love all your projects, but quick question. What program do you use in the first picture to show a the bench in an outdoor setting?
ReplyDeleteGreat question...the short answer is SketchUp using Shaderlight (https://www.artvps.com/) for the photo render. It's more complicated than that, and almost all the work was done in SketchUp, but those are the only programs I used before adding the watermark with Photoshop. Maybe I'll do a DIY post on it.
DeleteHI Georgia!
ReplyDeleteIt's been a while but your blog to the rescue again! I made the bench for our porch and love it! Pictures below. :-)
Thank you for your hard work on the plans, again!
http://www.mattsdiyhome.com/2014/08/100-pallet-2x4-garden-bench.html
Wow Matt, looks great as always! Thanks so much for the pics! I'll add one to the post if you don't mind. :)
DeleteGreat project however, a few minor changes would help.
ReplyDelete1. Under the Bench Shopping List, "1 - 2x4 @ 8' long" belongs under the Planter Shopping List. (the total length of 2x4's needed for the bench is 29.875' or, 30'. The total length of 2x4's for the planter is exactly 38' which equals three 10' 2x4's and one 8' 2x4).
2. The picture above the shopping list can cause confusion. It would appear as if the totals for the two shopping lists would make one bench and TWO planters.
I am making both the planters and bench now for my daughter's classroom auction and they are turning out great! Thanks for the plans. One question: Is the cost total for the planter supposed to be the total cost for the bench and vice versa?
ReplyDeleteHi, the "total cost" listed for the bench was the total cost of lumber only. There would be additional cost for other items such as screws, wood glue, and paint. Also keep in mind that these plans are from 2012, and lumber pricing has most likely changed since then. :)
DeleteThe same goes for the planter "total cost."
Hope that helps! :)
you mention A,B,C, etc., but i don't see this in the diagram.
ReplyDeleteHi! Those letters reference the cut list at the beginning of the plans. Happy building! :)
Delete