

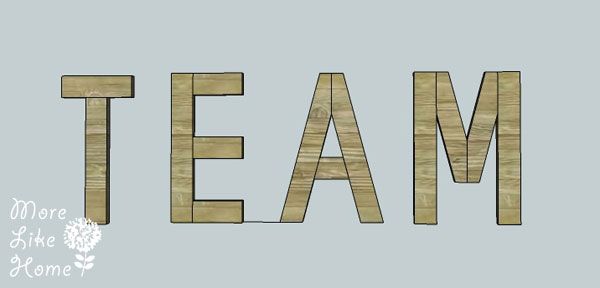
Happy Saturday! You can see links to the complete series here, and get details about my Lowe's gift card giveaway here. In this series, we're seeing what we can make out of 2x4s. I want to keep it cheap, keep it easy, and keep it totally doable for anyone. Today we're taking a little break from furniture to work on something a little more artsy and fun - we're making "EAT" word art!

These oversize letters can make a big impact in your kitchen or dining room. Add a little wimsy to your space and make a fun focal point at the same time! Or if you like the idea, run with it and make up letters to spell whatever you want! You initials can add a sweet personal touch to a collage wall, and your kids' initials could help separate spaces in a shared room. So, are you ready to say "eat"? (or "ate" or "tea")....
Shopping List:
1 - 2x4s @ 10' long 1 - 2x4 @ 8' long
Tools:
Saw
Drill
4" screws (or Kreg Jig & 2 1/2" self tapping screws)
Wood glue
Wood filler
2x4 Cut List:
(A) - 1 @ 24" (E leg)
(B) - 3 @ 8" (E arms)
(C) - 2 @ 25 25/32" (A legs)
(D) - 1 @ 5 5/8" (A bar)
(E) - 1 @ 20 1/2" (T leg)
(F) - 1 @ 11 1/2" (T top)
Dimensions: 50 1/2" wide x 24" tall x 1 1/2" deep

Please read all the directions before beginning, and cut your pieces as you go, measuring before each cut. Use 2 1/2” screws or pocket holes with 2 1/2" screws unless otherwise indicated. Always use glue. Pre-drill and countersink your screws. I have not built from these exact plans, so measure lots to make sure things work out!
Step 1: Build the E
Attach the three E arms (B) to the E leg (A) as shown below. One arm should be flush with the top of the leg, one flush with the bottom of the leg, and one centered in between with 6 3/4" on either side. Attach them using a Kreg Jig and pocket hole screws on the back, or by drilling through the leg into the arms with 4" screws. Use glue.

Step 2: Build the A
*** Note: This crazy size measurement is what it takes for the A to end up exactly 24" tall so that's how Sketchup shows it. 25/32 is essentially 3/4, so just measure to that instead :) ***
Start by cutting the ends of the A legs (C) at 15 degree angles, as shown below. The cut ends should be parallel when you are done.

Now on the top end of each leg measure in 1 3/4" from the acute angle and draw a line down from that point at a right angle to the cut end, as shown below. Cut along the line.

Now attach the two legs together as shown below. The two cuts you just made should sit against each other and be flush across the top and on the front and back faces. Attach them together using a Kreg Jig on the back, or by drilling through one leg and into the the other near the top. Use glue.
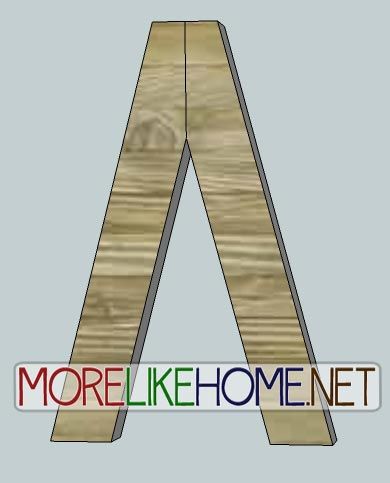
Now make the cross bar (D) for your A. Cut the ends of the bar at 15 degree angles as shown below. This time you do NOT want the ends to be parallel when you are done.
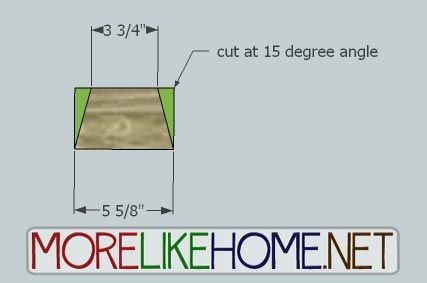
Now fit the cross bar into the A so it is nice and snug. Attach it using a Kreg Jig on the back, or by drilling through the legs and into the bar with 4" screws. Use glue.

Step 3: Build the T
Attach the T top (F) to the T leg (E) as shown below. The leg should be centered on the top with 4" of space on either side. Attach it using a Kreg Jig or 4" screws. Use glue.

Step 4: Finishing
Start by filling any holes and sanding everything down. Now finish it off with any paint or stain you like! An antique/distressed finish would be a nice contrast to a crisp white kitchen.
Or take a modern twist with a bold coat of paint! Once your letters are finished, you can mount them on the wall using picture hanging hardware, or by drilling through them straight into the wall.

Project 2x4 Cost:
$3.20 - 1 2x4s @ 10' long ($3.20 each)
$2.50 - 1 2x4 @ 8' long ($2.50 each)
$5.70 Total
After a request from a reader, I also created plans for the letter M. Check them out here!
See giveaway winners here.

Share on Facebook

Seems fairly simple
ReplyDeleteAnd if you are into martial arts, you could spell "Tae" as in TaeKwonDo. :-)
ReplyDeleteI love it in red!
ReplyDeleteTEA, ATE, FAT, FATE, etc.
ReplyDeleteHa ha, yes! And "F" was very clever! :)
DeleteAny tips on making an M?
ReplyDeleteHmmm, I'd have to do some math & sketching to figure it out. I'll add it to my to-do list. :)
DeleteThanks! I made the E and A for my kids now I'm gonna need an M
DeleteSorry it took a while, but it's finally done! Enjoy! :)
Deletehttp://www.morelikehome.net/2014/03/letter-m.html
Could you give me dimensions for FAITH? I would greatly appreciate your help. Thank you and God bless you for your time.
ReplyDeleteHi! Good news - FAITH will be easy using the same pieces from this list! For "F" make the E without the bottom line. For "I" just use the tall line from the E. And for "H" make the tall line and middle line from the E and add another tall line to the other side. Have fun! :)
DeleteHi. I know this is a old post. Anyway you could make the Every letter and post cut directions?
ReplyDelete