
Today we are going to do a fun project for the bedroom. You can see links to the complete series here, and read details about my Lowe's gift card giveaway here. In this series, we're seeing what we can make out of 2x4s. I want to keep it cheap, keep it easy, and keep it totally doable for anyone. This is one of my biggest projects in the series, so I'm going to split it in to two days, starting with the headboard section today.
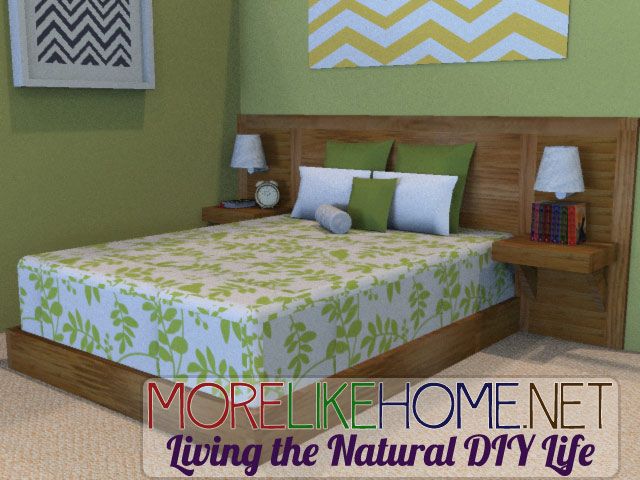
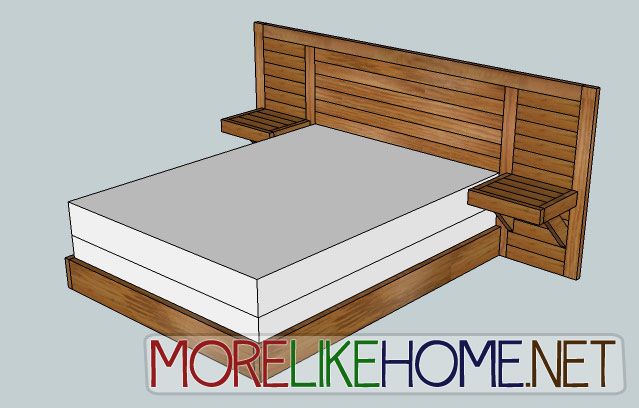
This simple, modern style bed has a unique long & low headboard with built-in nightstands (that we'll tackle tomorrow!). The plans are for a queen size bed, but could easily be adapted to other sizes. This headboard would make a statement in any room, but if you adjust the measurements to fill an entire wall in your bedroom it would be a show stopping feature! Let's get started with the headboard.
Shopping List:
12 - 2x4s @ 10'
long
Tools:
Saw
Drill
2 1/2” screws (or Kreg Jig
& 2 1/2" self tapping screws)
4" screws (or Kreg Jig
& 2 1/2" self tapping screws)
Wood glue
Wood filler
2x4 Cut List:
(A) - 12 @ 60"
(center panel)
(B) - 2 @ 42" (center posts)
(C) - 24 @ 16" (side panels)
(D) - 1 @ 99" (top trim)
(E) - 2 @ 45 1/2" (side trim)
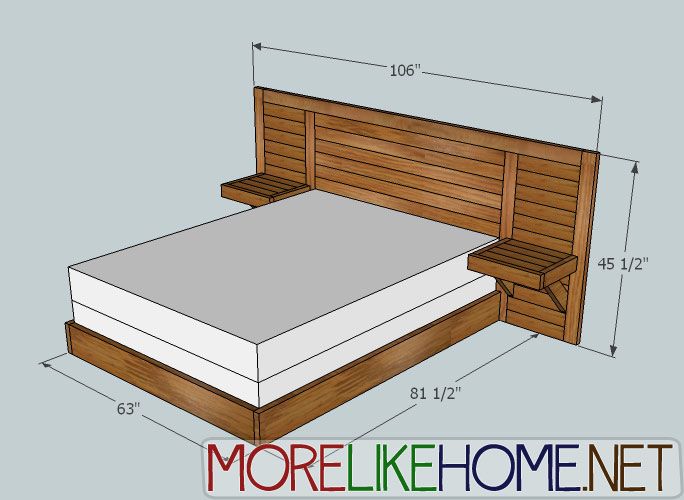
Dimensions: 106" wide x 45 1/2" tall x 1 1/2" deep (headboard only)
Please read all the directions
before beginning, and cut your pieces as you go, measuring before each cut. Use
2 1/2” screws or pocket holes with 2 1/2" screws unless otherwise
indicated. Always use glue. Pre-drill and countersink your screws. I
have not built from these exact plans, so measure lots to make sure things work
out!
Step 1: Build the center section.
Use the center panels to connect the center posts. Keep all edges flush. If you have a Kreg Jig, you can attach all the center panels together first to create one solid piece, then attache the center posts. If not, just attach the boards one at a time. You can use a Kreg Jig to attach the panels, or drill through the legs with 4" screws and glue. **I designed this headboard to reach all the way to to floor, but when you build it consider leaving some space if there will be an outlet or anything behind the headboard. If you need access space, you can leave off some center panels at the bottom of the headboard. Just be sure to measure how high your mattress will reach and don't leave out any boards above that point. You don't want any gaps showing above your mattress! Also, if you don't want a wide headboard you can stop at this point for a simple queen size headboard. If you have a different size bed, adjust the center panels accordingly.**

Step 2: Add the side sections.
Now you can add the side panels. If you have a Kreg Jig you can start by attaching 12 panels together side-to-side for each section, the attach them all at once. Otherwise just attach them one at a time, keeping all edges flush. Attach them to the center post using your Kreg Jig and 2 1/2" pocket screws and glue. If you don't have a Kreg Jig it will be a little trickier but you can still do it. You'll need to screw everything together from the back by angling your screws so they go through the panels and hit the posts. Use glue, too. **If you want to change the overall width of your headboard like I mentioned earlier, do it by adjusting the width of these side panels. The center panels is the size of the bed (queen size) and the sides are where you get all the extra horizontal space.**

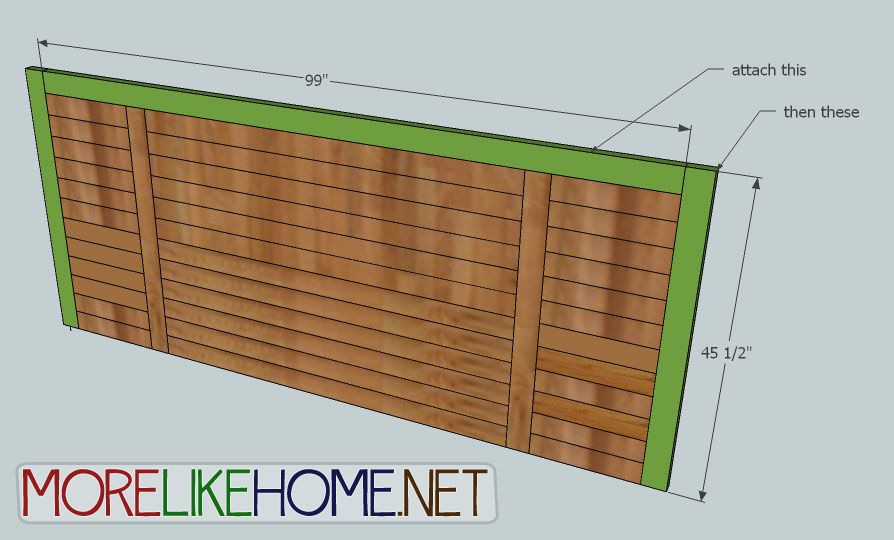
Step 3: Headboard Trim
Now you can attach the trim pieces starting with the top trim (D), followed by the side trim (E). Keep all edges flush. You can attach these with your Kreg Jig or with 4" screws and glue.
Step 4: Finishing??
If you just want to build the headboard, you're done building! Go ahead and finish it. Start by filling any holes and giving the whole thing a good sanding. Then finish with whatever paint/stain/polyurethane you want. To install the headboard, anchor it securely to the wall at the head of your bed.
Want to build the nightstands and bed frame too? Hold off on the finishing and come back tomorrow for the rest of the plans!
Project 2x4 Cost:
$38.40 - 12 2x4s @ 10' long ($3.20 each)
$38.40 Total
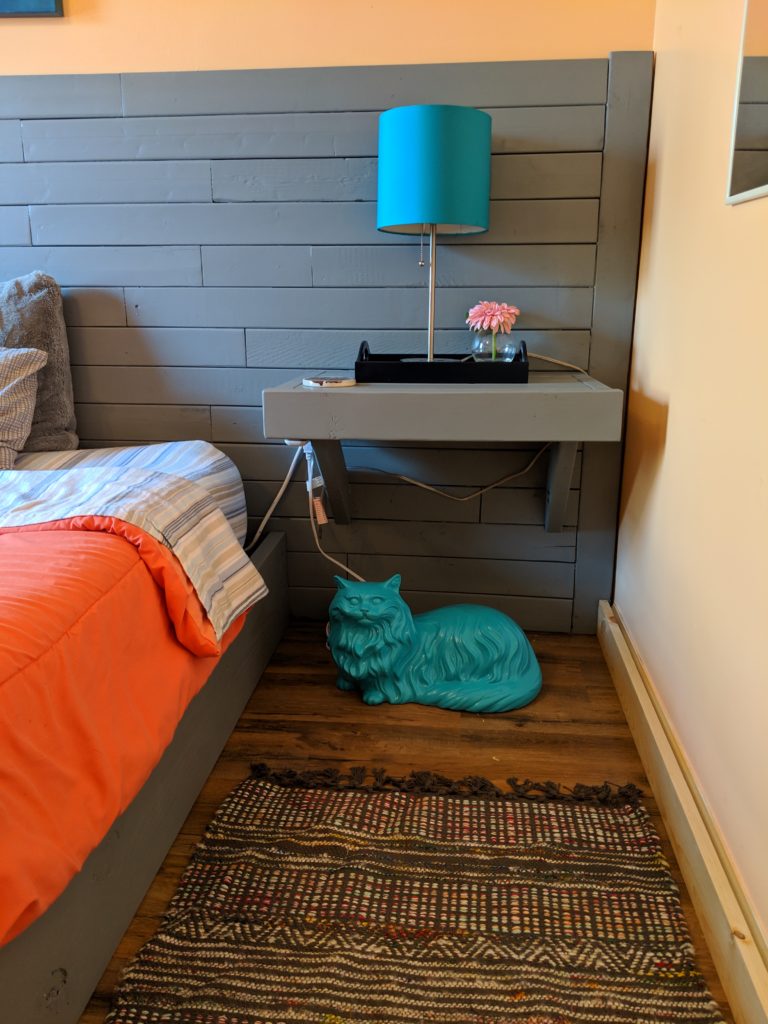
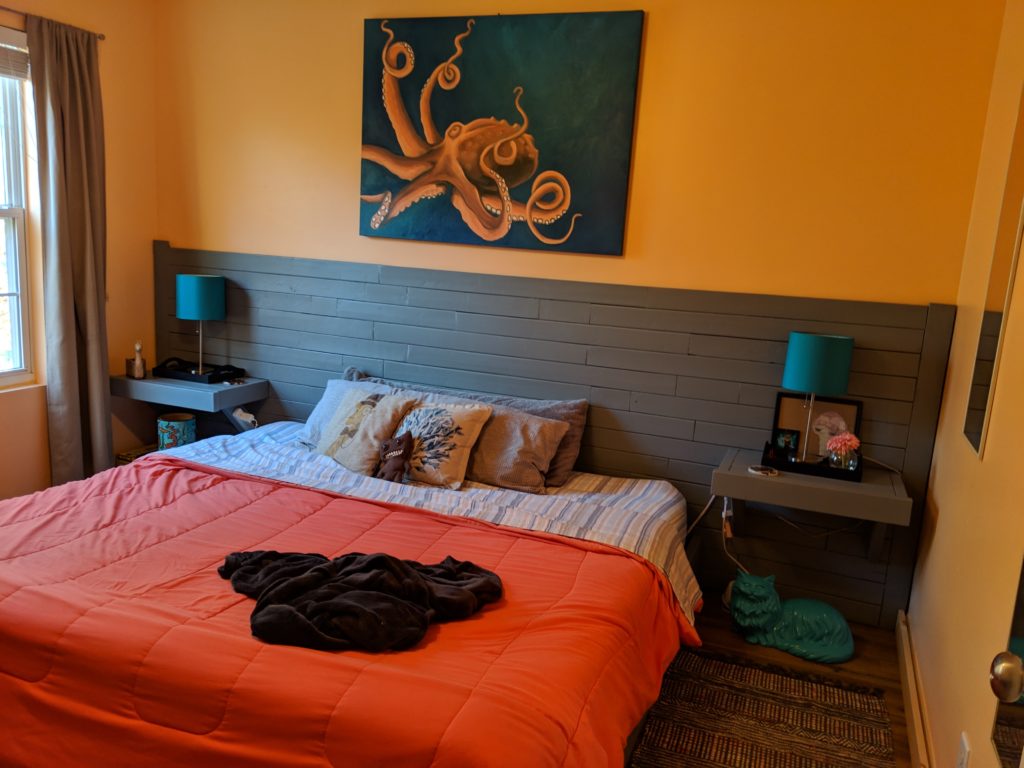
Thanks to Sarah for sending in this sweet 2x4 headboard! Love the gray, and love how she reused old lumber. You can see more pics in her post about her bed and her bedroom.
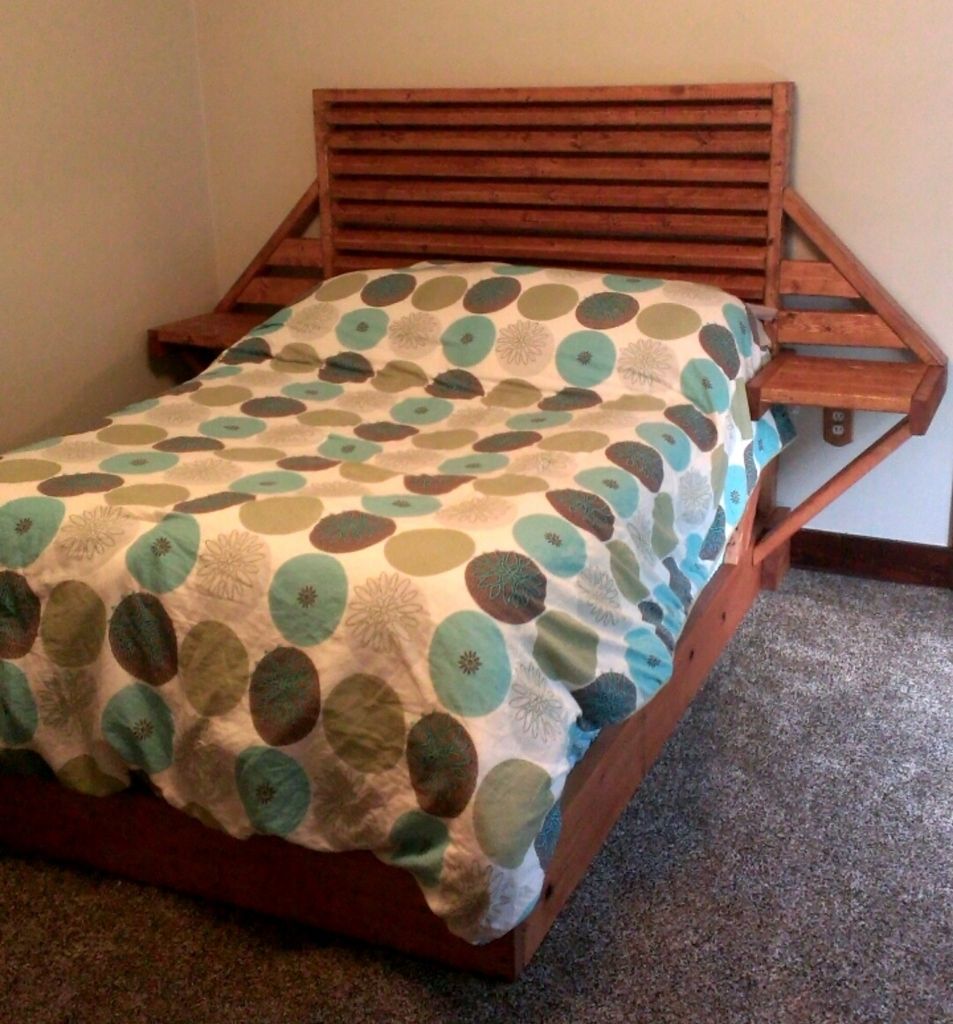
Dusty submitted this great twist on the Simple Modern Bed. The 2x4s running across the headboard are slanted to add a great texture, and the nightstands were installed with custom slanted supports. Great job and thanks for the pic!
See giveaway winners here.

Share on Facebook

I love the built in end tables. So functional!
ReplyDeleteIt will sound silly, but I live having the space under the end table for a waist can or my shoes or slippers.
ReplyDeleteNice fancy bed.
ReplyDeleteCan't wait to see the nightstand plans. They're a nice touch.
ReplyDeleteHello I am visiting via the Nester's 31 days series. Your series is so inspirational and leaves me with such great DIY ideas.
ReplyDeleteI too am participating in the series. My topic is "Decor To Adore~ finding your style". I would like to invite you to stop by anytime.
Have a beautiful day and a wonderful fall season.
I love what you are doing! I'm a military wife, mom and a homemaker. Your plans are giving me things to occupy my time when my hubby is deployed and the kids in school. Not only that, but with you're creativeness, I can make our home HOME without breaking the bank!! Kudos!!
ReplyDeleteI'm so glad! :) The reason we started building was to make HOME on a budget. And it's fun! Enjoy!
DeleteThat looks like a shutter headboard--how cool!
ReplyDeleteYour little boy is adorable!!!!!
ReplyDeletelove this project! I hope to give it a try soon.
ReplyDeleteJust found your blog and I'm loving the 2x4 furniture. A question though. The shopping list indicates 12 2x4x10's. Shouldn't that be 13 of them since we need 12 @ 60" and 1 @ 99"?
ReplyDeleteYou can do this project with 12 2"x4"x10'. Each 60" cut is half one board, so that accounts for six of the 12. I would suggest cutting the other boards like this:
Delete1 - (99"), (16")
2 - (42")x2, (16")
3 - (45 1/2")x2, (16")
4,5,6 - (16")x7 each
So what do I do for the California King? It has the twin box springs.
ReplyDeleteDo you have plans for a King Size?
ReplyDeleteA king size mattress is 76" wide (a queen is 60") so you just need to add 16" to all the boards in the center section of the headboard (and to the bed end and slats if you're building the frame, too http://www.morelikehome.net/2012/10/day-6-build-simple-modern-bed.html). Hope that helps! :)
Deletewhat type of wood can you use for this project?
ReplyDeleteThis is made with 2x4s, which are typically pine. You can use any type of wood you can find! :)
DeleteWhat if you use one by threes to make it not so bulky and heavy would it work? If so can you tell me what the cut list would be for a king-size
ReplyDeleteI expect it would work, but haven't tried it to say for sure. :)
DeleteA king size mattress is 76" wide (a queen is 60") so you just need to add 16" to all the boards in the center section of the headboard (and to the bed end and slats if you're building the frame, too http://www.morelikehome.net/2012/10/day-6-build-simple-modern-bed.html). Hope that helps! :)
I stumbled upon your series of 2x4 posts while looking for some plans for living room furniture, but when I saw this I knew what I needed to do for my bed. I guess I'll just have to pick up some extra lumber when I'm at the store.
ReplyDeleteI'd love to hear how it turns out! Have fun!
DeleteI finally got the bed built. I used your design for inspiration and used a bunch of 1x4s rather than 2x4s for the headboard and night tables.
Deletehttps://photos.app.goo.gl/yJDhCRtWpxGG2qPCA
It's beautiful! Good job! Is the bed base DIY as well? It looks great with the headboard. :)
DeleteHow is the headboard attached to the wall?
ReplyDeleteHi! You need to drill through the headboard into the wall, and make sure you hit the studs in the wall. Drill down low enough on the headboard that the holes will be pretty well hidden by the mattress or under the nightstands. Good luck!
DeleteFinally finished my version of this bed!
ReplyDeletehttp://thewilsonbuzz.com/2019/05/my-bedroom/
http://thewilsonbuzz.com/2019/02/the-bed/
This looks so good! I love the gray, and love how you re-used what you had. Great job! I'd love to share your bed if you don't mind! :)
DeleteShare away! I'm totally in love with my bed. Thank you for posting the plans!!
DeleteThe dimensions are 106". Is there a way to do this exact project for a queen size with a smaller width? i am wanting to do this today but it is too long
ReplyDeleteHi! These plans are actually made for a queen bed, so you have a few options depending on your space. You could either:
Delete1. Omit the nightstands completely and leave the "wings" off. Just build the center section and have a basic headboard. (Reduces the width to 67")
2. Omit one side's nightstand and "wing." This would give you a headboard with nightstand on just one side and reduce the width to 86.5"
3. Keep nightstands on both sides but reduce the width of each one to fit your space better. To do this, you would just change the length of each side panel board to whatever length you wanted (and then adjust the top trim board accordingly).
Hope that helps!