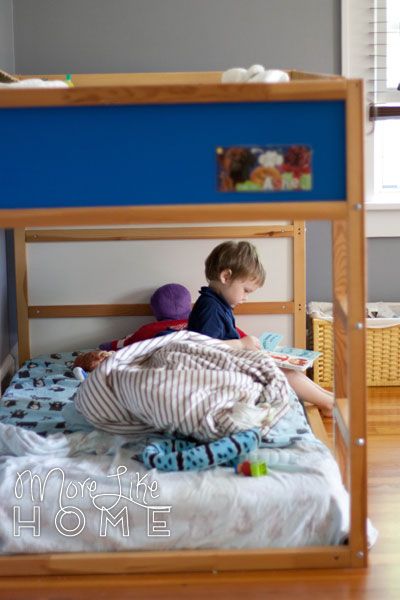
Next to the bed we keep our basket of board books (these are books the baby can pull out, too!) and a box of wooden blocks (also baby-friendly).
Showing posts sorted by relevance for query organization. Sort by date Show all posts
Wednesday, September 14
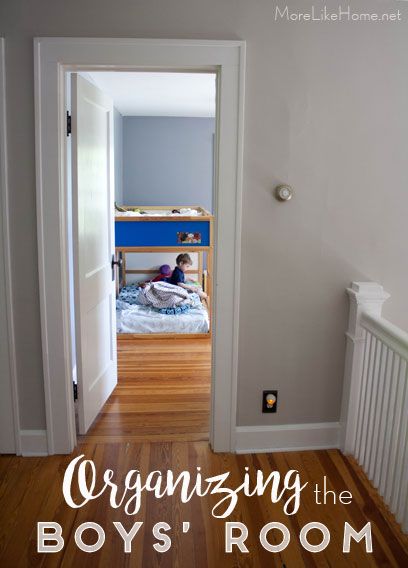
Organizing the Boys' Room + Free Printable Toy Labels!
We have to make a choice. Keep the toys under control, or be overrun. We're doing our best to choose the former, and we've found two main weapons in this battle - limiting the number of toys we keep, and finding a way to organize/manage the ones we have. Most of the toys are stored in the boys' room, so that's where we've been targeting our organization tactics.
We want them to have plenty of space to play with the toys we have. Because toys do their job better when the boys have room to spread out and stretch their imaginations. Keeping fewer toys stored on the floor helps, and so does our Ikea bunk bed.
Next to the bed we keep our basket of board books (these are books the baby can pull out, too!) and a box of wooden blocks (also baby-friendly).
Friday, January 18
12 Things You Should Be Buying at Ikea
You probably know by now how much I love Ikea. You might also know Ikea is a big store with thousands of products that can overwhelm even the most enthusiastic shopper. Well I'm here to help with that! I've spent enough time there that I know my way around, where all my favorite products are, and which products are worth the trip! There are a few things I've bought over the years that are my tried-and-true favorites. The items I go straight to Ikea for that have impressed me with both quality and price.
So I've made a list of my 12 must-have items at Ikea!
1. Pillow Inserts
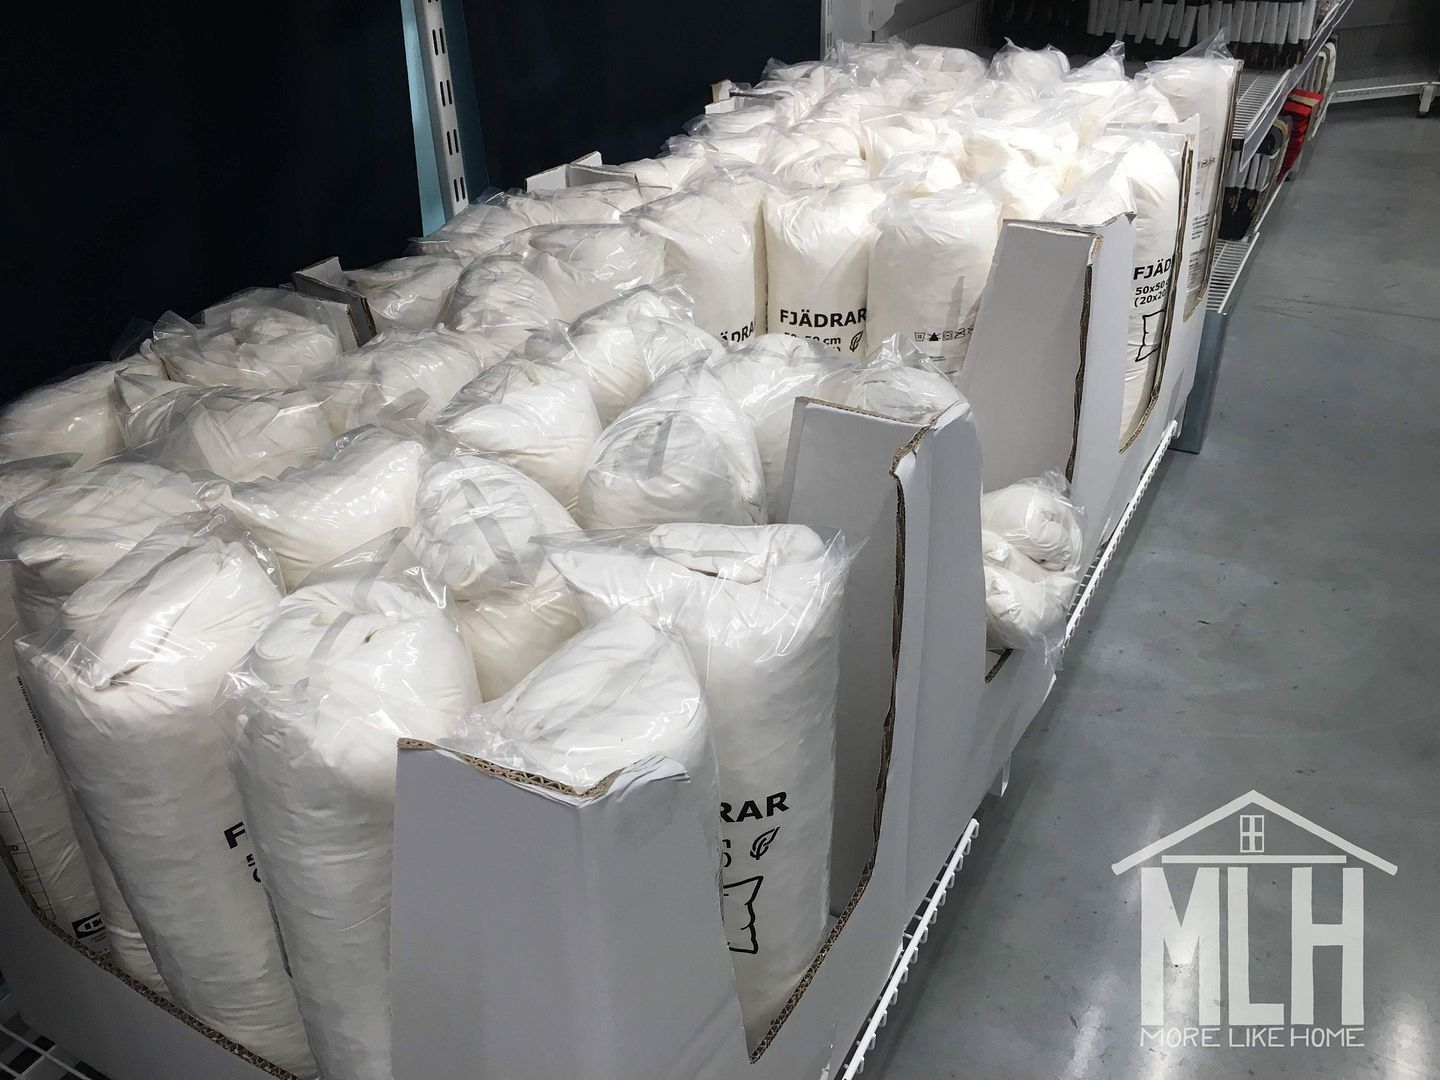
It's no small feat to keep your pillow covers looking plush and amazing, but a good pillow insert doesn't need to break the bank! Ikea carries polyfil inserts for just $3 and fluffy down-feather inserts for $6! It's a steal!
So I've made a list of my 12 must-have items at Ikea!
1. Pillow Inserts
It's no small feat to keep your pillow covers looking plush and amazing, but a good pillow insert doesn't need to break the bank! Ikea carries polyfil inserts for just $3 and fluffy down-feather inserts for $6! It's a steal!
Sunday, January 13
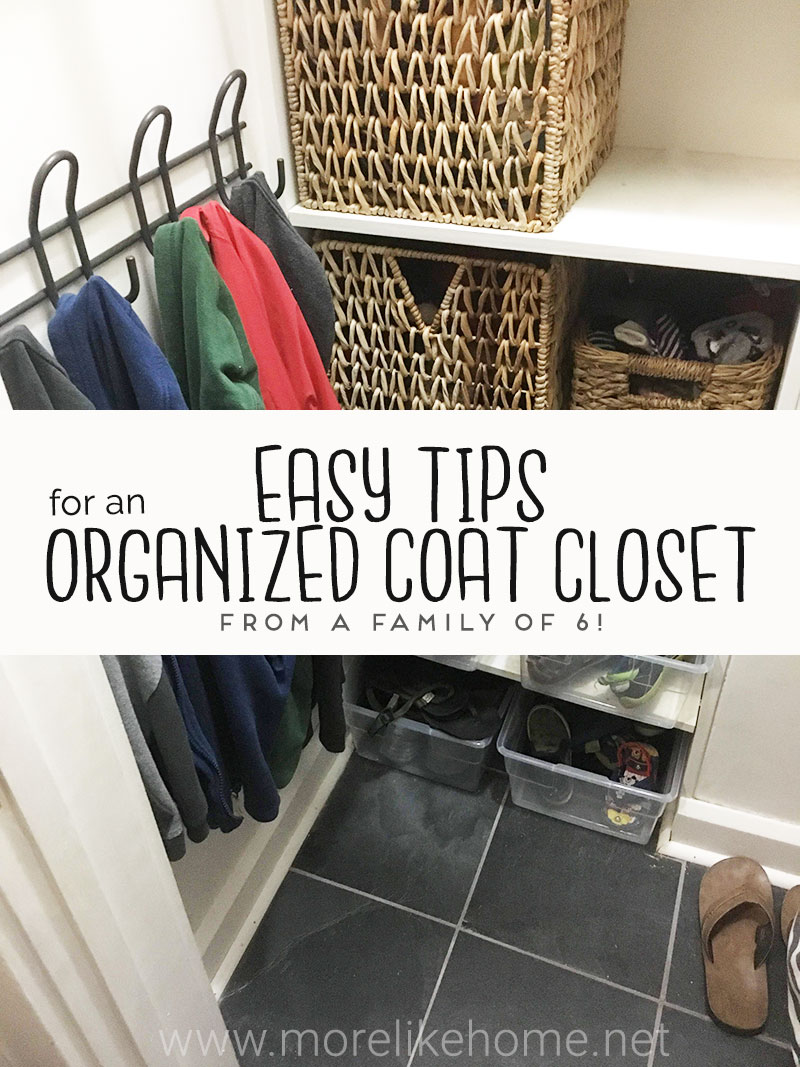
7 Coat Closet Organization Tips (from our family of 6!)
Something about a new year always has us itching for a fresh start! I'm ready to organize,
declutter, and simplify (along with another huge overhaul you can read about here). And I started with this little coat closet that
sits just inside the door.
Two years of coats on the floor and piles of shoes was all this momma could handle. I did some very basic "organizing" last year with a few baskets I brought in the move plus a couple empty diaper boxes (yup.). It was enough to get us by for a while, but I finally had to face the fact that it just wasn't serving our family as well as it could. The good news? It was a super simple fix and it didn't cost much!
Wednesday, August 5
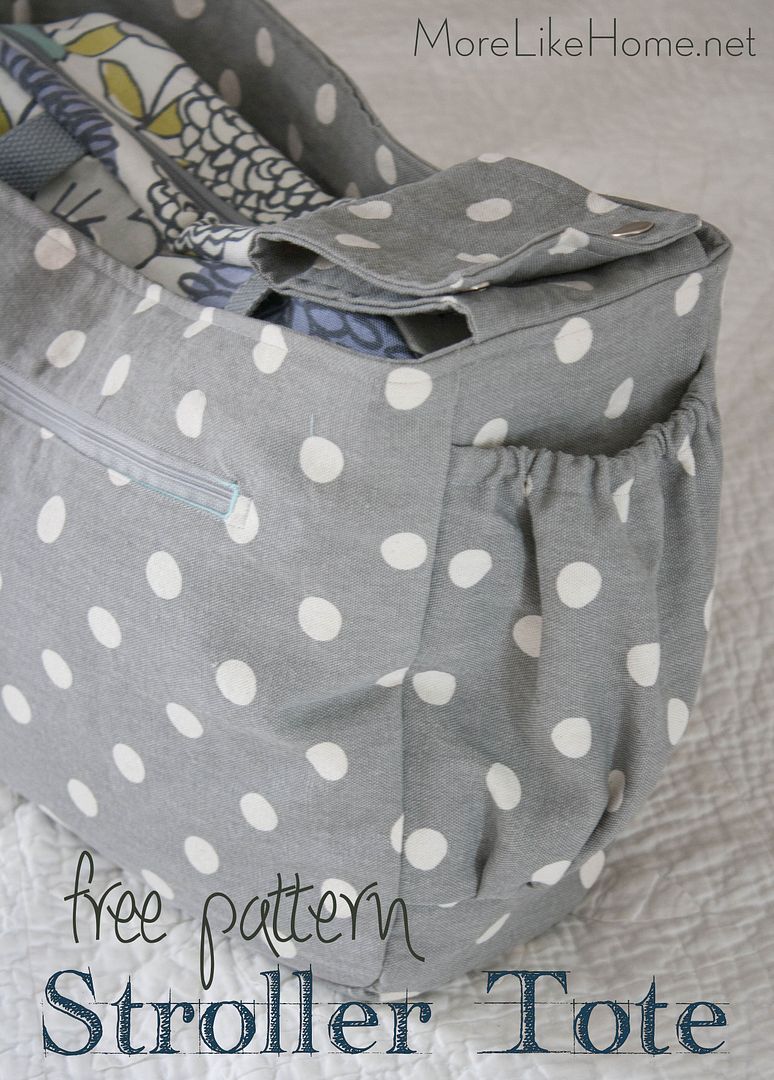
Stroller Tote {free pattern & tutorial}
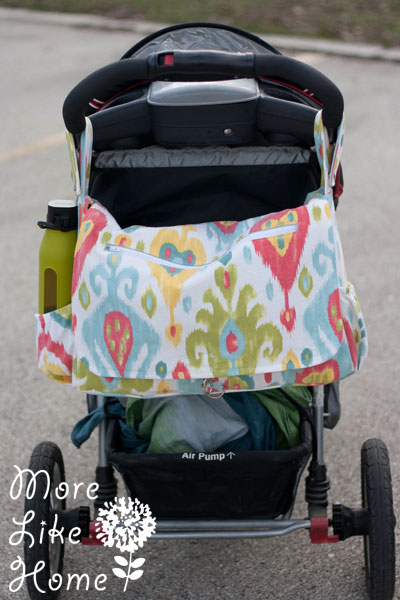
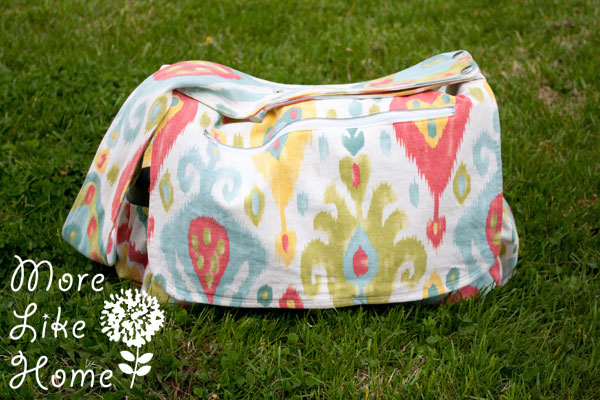
One of our most popular posts lately has been the Stroller-Friendly Diaper Bag tutorial. You guys have been loving it for the same reasons we do - it's super versatile with tons of storage space, and of course it attaches to a stroller in seconds to keep your hands free when you're out and about. But a custom request in my etsy shop has led to a cousin bag - the Stroller Tote!
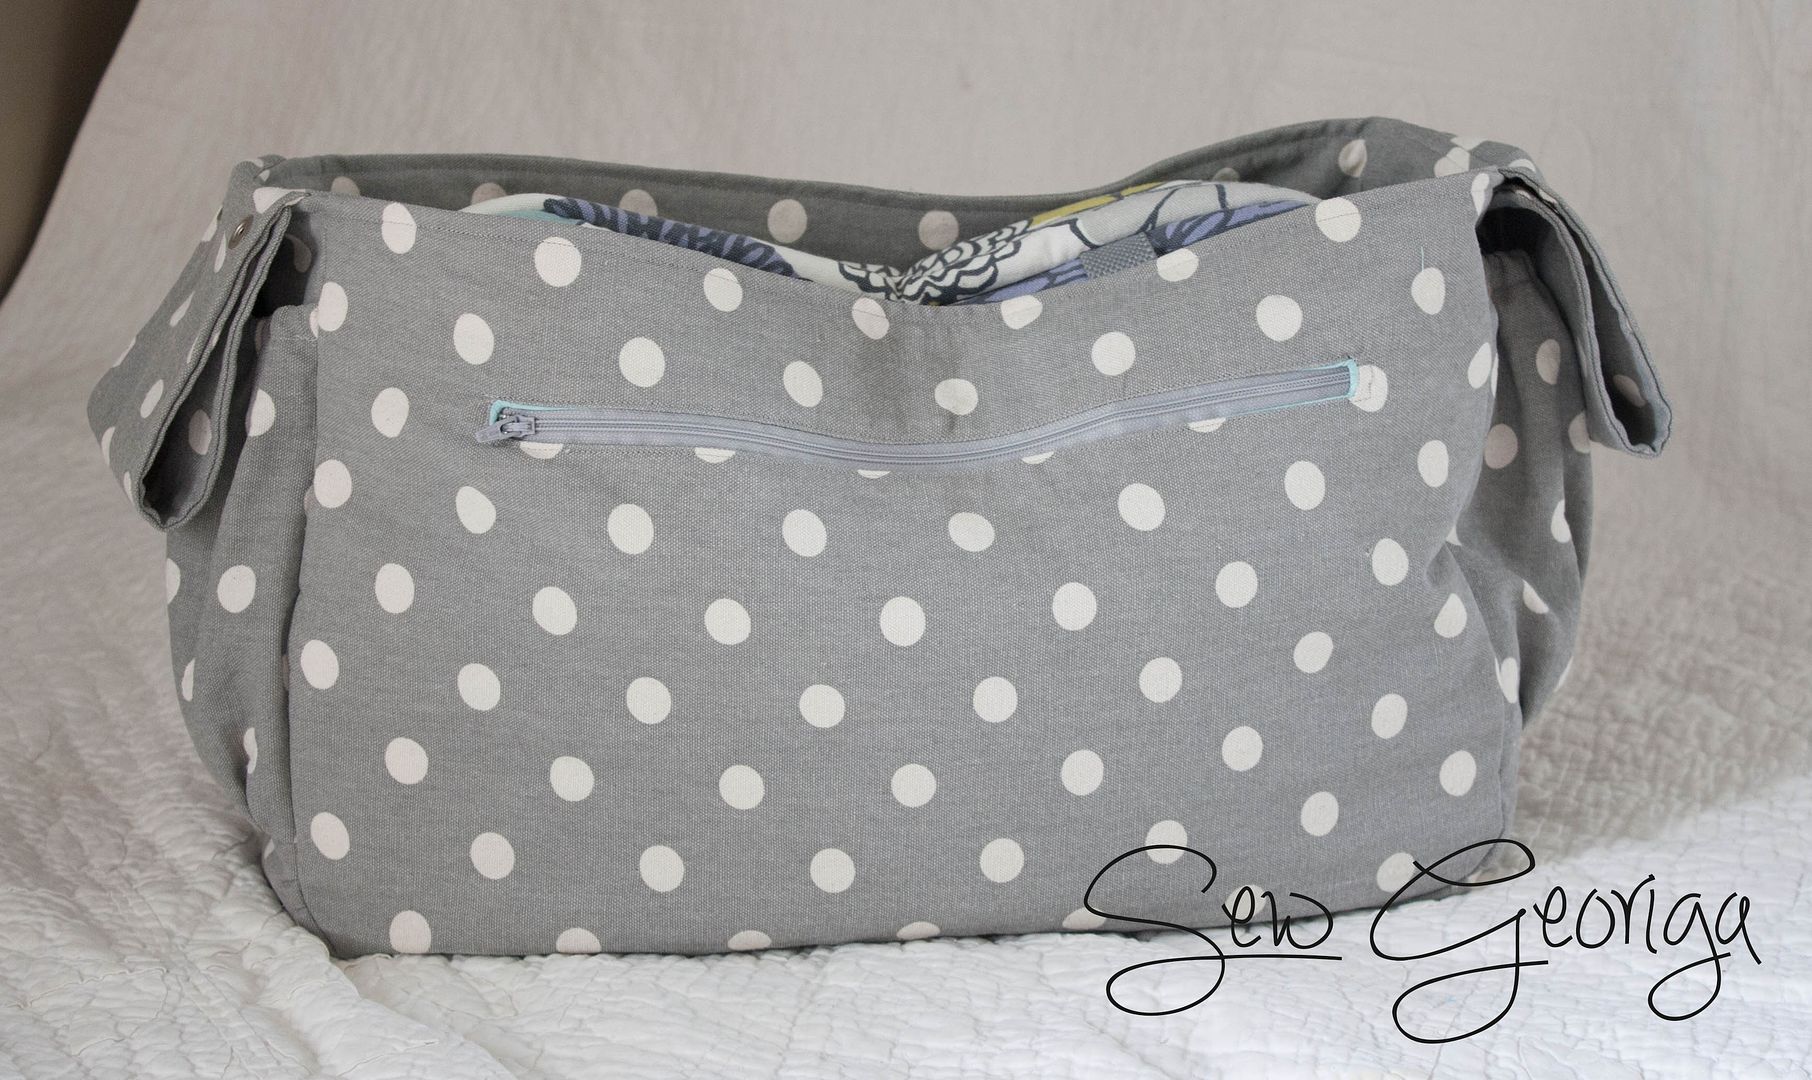
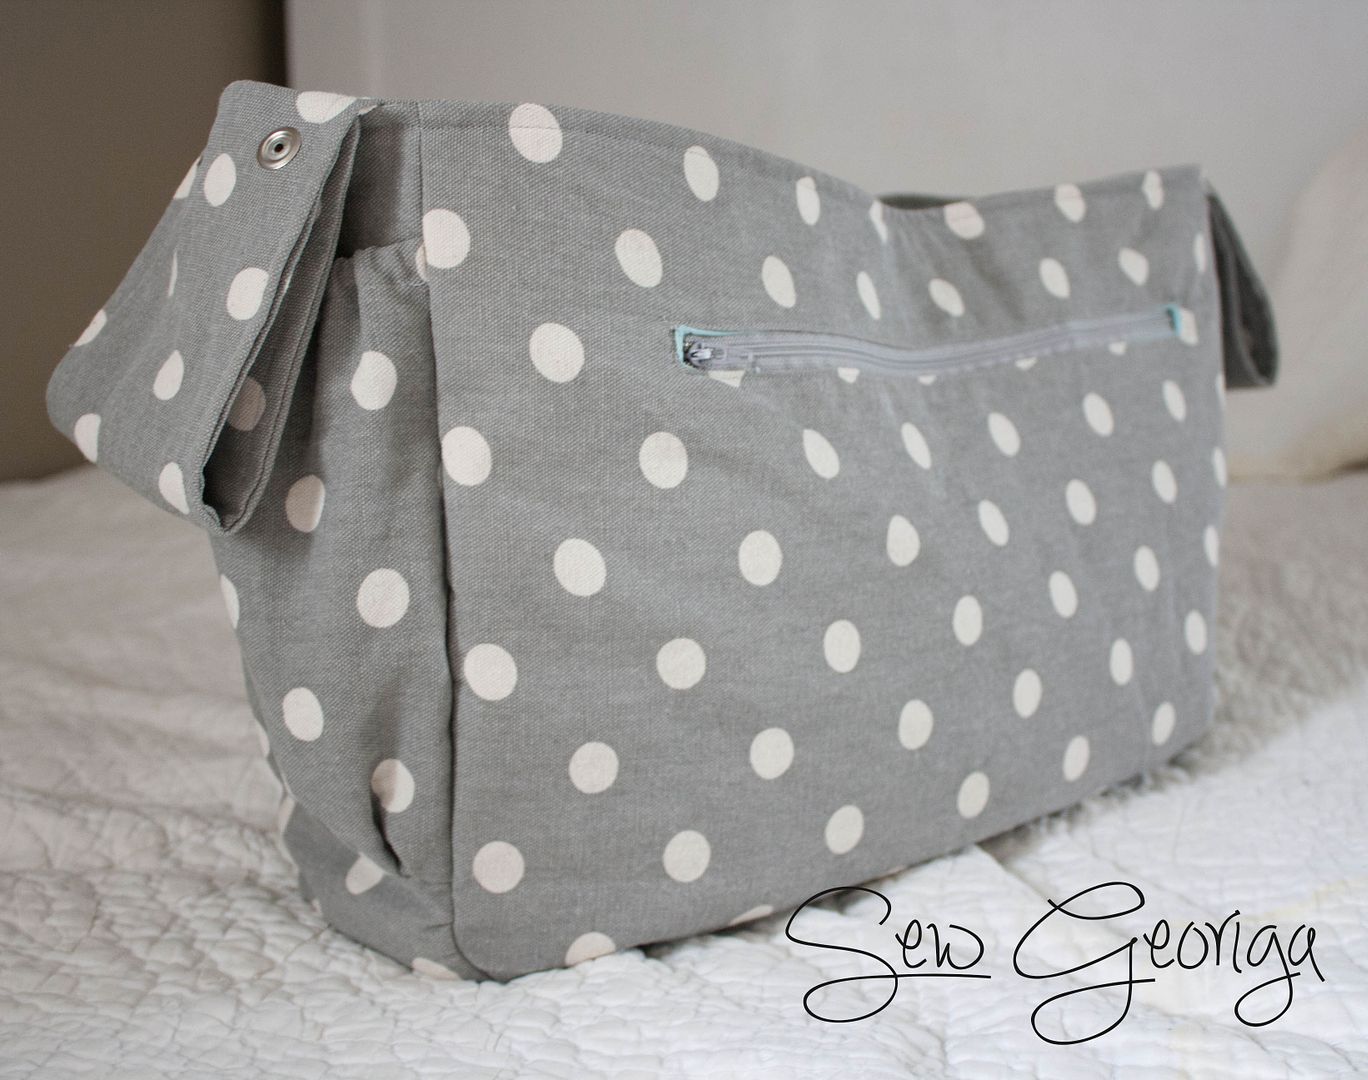
This tote is like the original in that it attaches easily to a standard stroller, but instead of being a full diaper bag it's simply an open tote that is a full-time stroller bag (it doesn't have the option to convert to a messenger style bag... but of course you could add a shoulder strap if you want to. DIY, guys!)
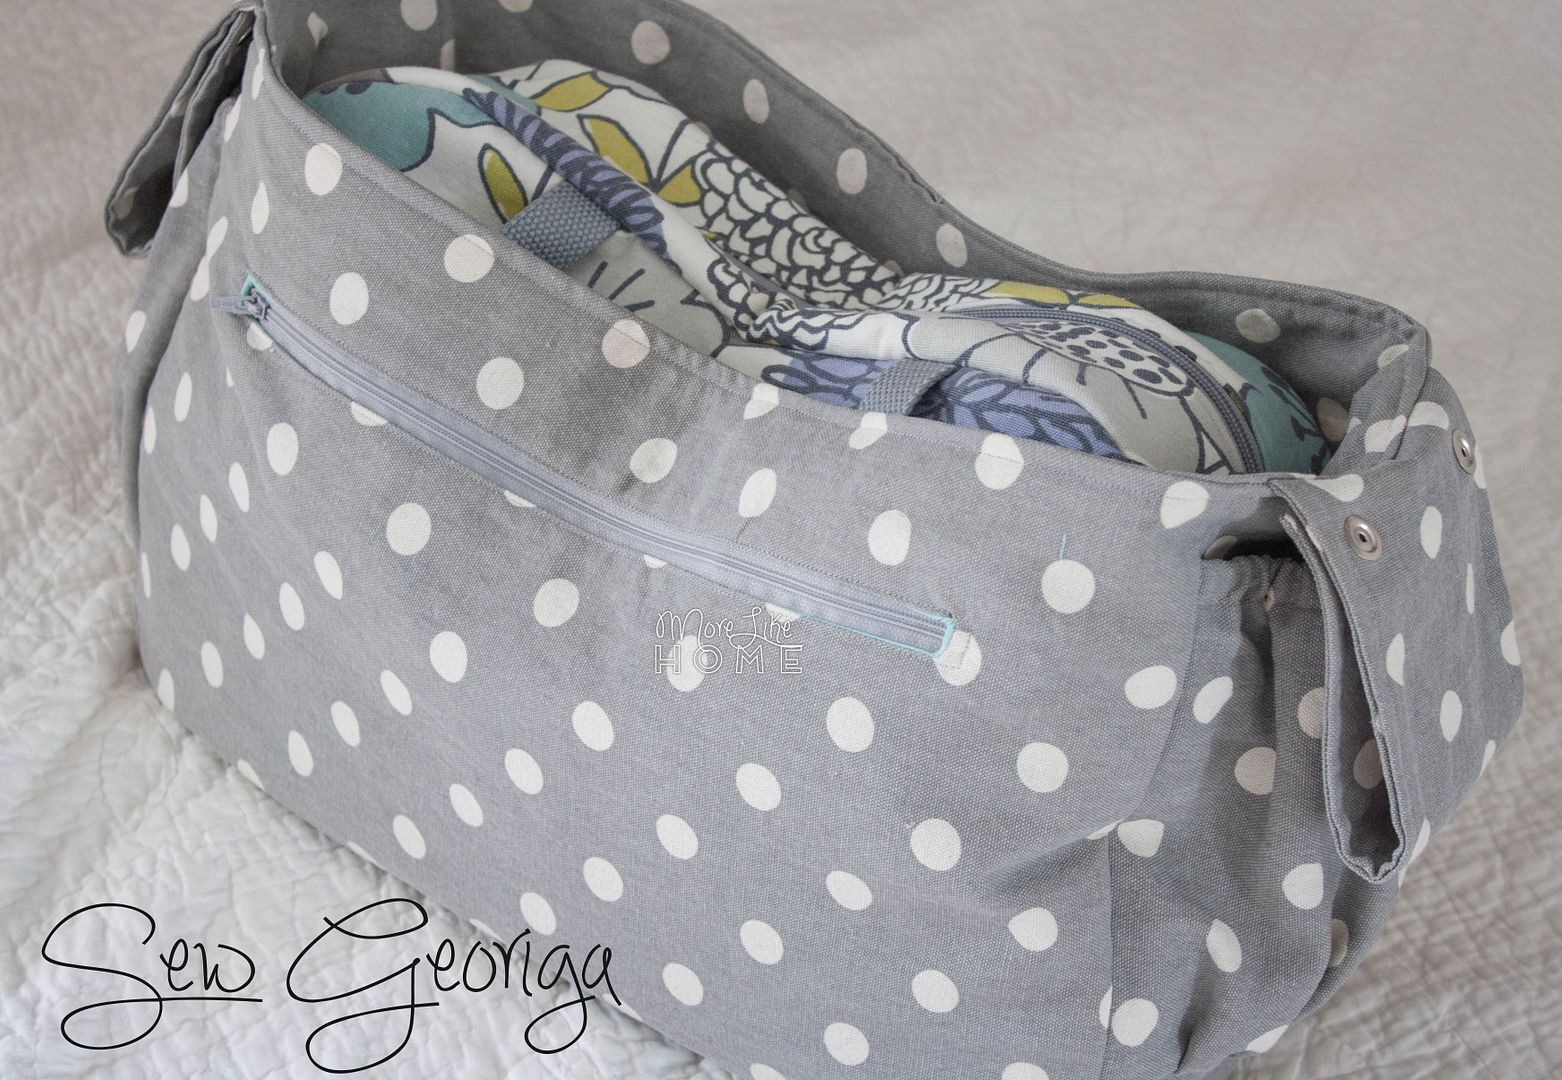
This is perfect for anyone who already has a diaper bag they love because you can just tuck your favorite bag inside the tote. Plus you can leave the tote attached to the stroller so it's ready to go any time. If your kids are a little bigger (like our four year old who doesn't really need a diaper bag anymore but still needs a stroller sometimes) this is a great option to tuck in a jacket, some snacks, and a sippy cup for while you're out.
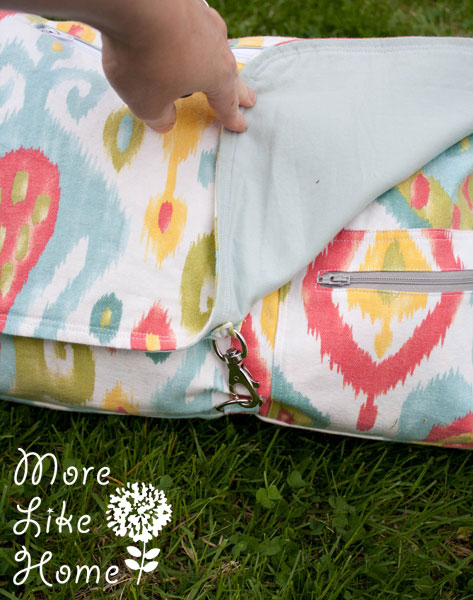
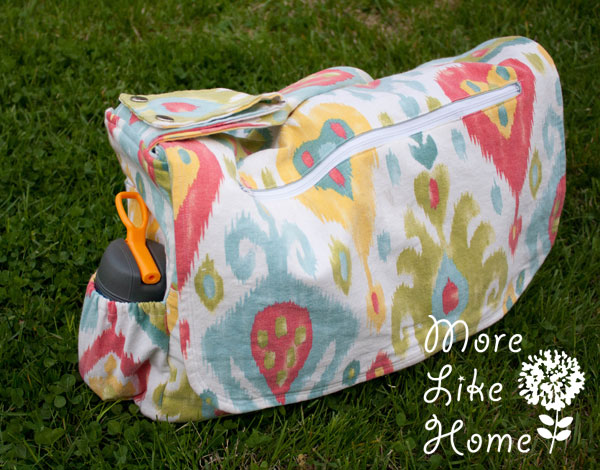
We've had several beginners make our stroller-friendly diaper bag already with great success (check out some of their finished projects here), but this is a simpler pattern with fewer parts (and fewer steps!) that's good for anyone feeling overwhelmed with all that goes into the original stroller bag. As-is, it includes two water bottle pockets and two hidden zipper pockets (one inside and one outside), but as always feel free to customize it any way you like! If you're a beginner and feeling nervous you could skip all the pockets and just make the shell, or if you want more organization go ahead and add some extra pockets!
This pattern is for personal use only. I'm happy to offer all my plans and tutorials for free but I've put a lot of work and planning into these stroller bags & totes, so please don't ask others to pay for the work I've done. Thanks! :)
This tote is like the original in that it attaches easily to a standard stroller, but instead of being a full diaper bag it's simply an open tote that is a full-time stroller bag (it doesn't have the option to convert to a messenger style bag... but of course you could add a shoulder strap if you want to. DIY, guys!)
This is perfect for anyone who already has a diaper bag they love because you can just tuck your favorite bag inside the tote. Plus you can leave the tote attached to the stroller so it's ready to go any time. If your kids are a little bigger (like our four year old who doesn't really need a diaper bag anymore but still needs a stroller sometimes) this is a great option to tuck in a jacket, some snacks, and a sippy cup for while you're out.
We've had several beginners make our stroller-friendly diaper bag already with great success (check out some of their finished projects here), but this is a simpler pattern with fewer parts (and fewer steps!) that's good for anyone feeling overwhelmed with all that goes into the original stroller bag. As-is, it includes two water bottle pockets and two hidden zipper pockets (one inside and one outside), but as always feel free to customize it any way you like! If you're a beginner and feeling nervous you could skip all the pockets and just make the shell, or if you want more organization go ahead and add some extra pockets!
This pattern is for personal use only. I'm happy to offer all my plans and tutorials for free but I've put a lot of work and planning into these stroller bags & totes, so please don't ask others to pay for the work I've done. Thanks! :)
What you need:
- 2 yards duck cloth, canvas, or similar weight fabric I used the same fabric for the outer fabric and lining. If you want a coordinating lining instead you could get 1 yard each of two different fabrics. You could also make the bag reversible just by adding an extra set of water bottle pockets to the bag lining.
- 1/2 yard quilting cotton for the hidden pockets
- 1 1/2 yards medium weight fusible interfacing
- 12" of 1/4" wide elastic
- 9" zipper
- 12" zipper
- 4 sets of heavy duty snaps
Wednesday, October 4
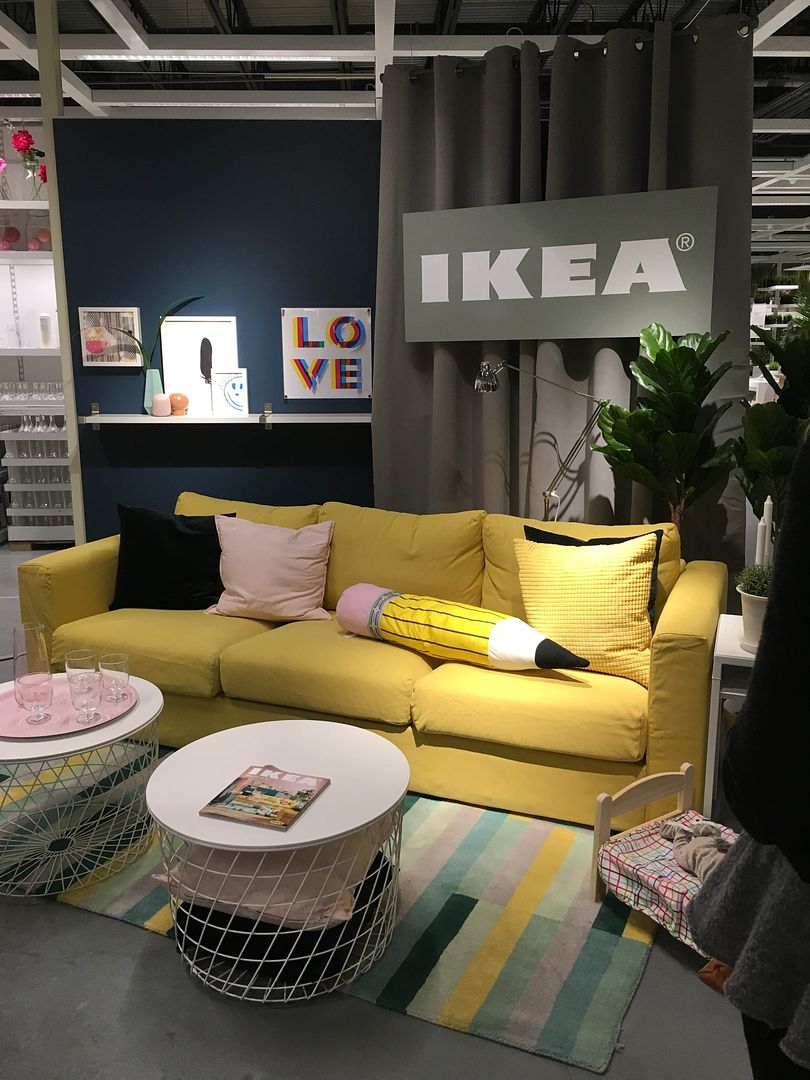
Ikea Fishers Preview & Opening Day Details!!!
This morning I got a chance to tour the new Ikea in Fishers, IN that's scheduled to open next week and guys, it's amazing. So get ready for tons of sneak peak pictures, info, and details about their opening ceremonies next week including some insane giveaways and door prizes! (Plus a peek at their Christmas items at the very end - they sell out fast!)
P.S. A couple other local bloggers are sharing their scoop, too! Check out Chaos is Bliss, Susan B. TV, and the City Moms for more.
Let's start with the giveaway goodness:
Monday, April 15
Spring Cleaning - Freezers and Baby Clothes (free printable!)
Time for spring cleaning! I can't say I've ever done legitimate "spring cleaning" before. I'm generally more of a clean-it-when-it-gets-dirty person and having my whole house deep cleaned at one time just doesn't happen. But I think the season has combined with my pre-baby nesting to create the perfect storm! I'm ready to tackle all the forgotten corners of this house! Since this is my first time jumping in, I decided to get a little guidance in the form of a free printable checklist (you can print a list here, and check out all their other free organization printables here. It's a gold mine. And I made my own printable freezer inventory sheet - we'll get to that in a minute.)
print your own spring cleaning schedule at Life Your Way
Wednesday, October 19
Day 19 - Bulletin Boards
For me, part of making my home look great is organization. Before I can organize things like toys or dishes, I first need to organize my thoughts so I can get started right. One thing that helps me do that is the bulletin board in my office where I can pin up inspiration pictures, reminders, things I'm working on, and even bills I need to pay. Let's just say the saying "Out of sight, out of mind" totally applies to me and I need things out in the open so I remember to work on them. So today we'll be looking at ways to make these super handy pieces look good!
I'm still working on making our office/guest room look great while having great function, and my bulletin board is a perfect example of this. I found a Pottery Barn bulletin board that I loved, so I made a knock off out of an old bulletin board I already had. You can see the full project here. What I ended up with was a board that looks great, and is still super functional.
I have one other bulletin board, and it's a big one. It's actually in Baby B's room! Auntie B found a huge bulletin board the church was going to throw out and, being the artist she is, she took it home to make it beautiful. She painted this fun birdie picture on it for the nursery.
It fits perfectly in the otherwise unusable space between the two doors in the nursery and adds some great color to the room. It will also be wonderful once Baby B starts making art because we will have someplace to pin it up! Auntie B is going to paint a growth chart up the side of it when she visits, too. It's going to be great!
Here are some other great bulletin board ideas I found on pinterest:
Could you benefit from adding a bulletin board at home to keep your thoughts focused? Or do you already have one that could use a makeover? Or maybe you've already tackled a project like this - I'd love to hear the details!
Tuesday, July 1
Stroller Friendly Diaper Bag {free pattern & tutorial}
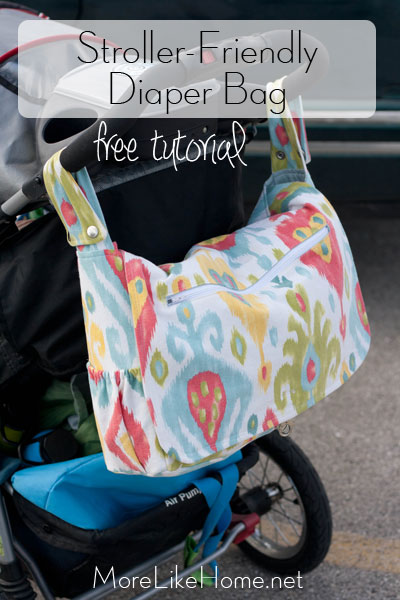
Ok, peeps. Get ready. We're about to make the sweetest, most versatile, storage-packed diaper bag in all of time and space. And the best part? It's totally stroller friendly!
That's right. All the storage & organization you need attaches securely to the handles of a standard stroller.
And back again to a hands-free stroller bag!
If you're planning any summer outings you won't want to leave home without this. It's great for anytime you'll be doing lots of walking and don't want to lug a bag around. In fact these pics are from our trip to the zoo on Big Brother's birthday! Plus with it securely snapped on the handles, the under-stroller basket is open for lunch boxes, jackets, or baby carriers.
The shoulder strap is permanently attached on one end so you can't lose it. When you're ready to wear your bag, just snap the shoulder strap on at the other end and you're ready to go.
Want to put it back on the stroller? Snap the stroller straps and tuck the shoulder strap inside the bag or into one of the back pockets. It will be there when you need it later!
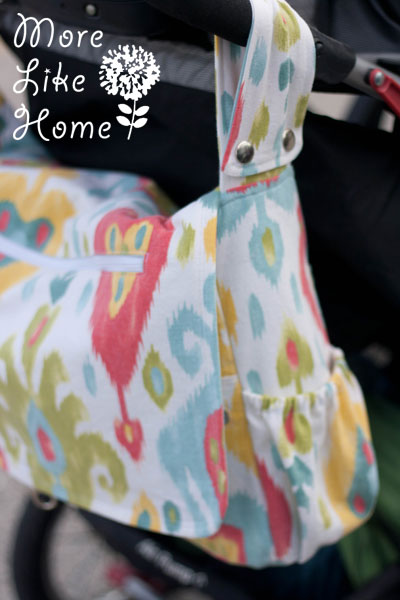
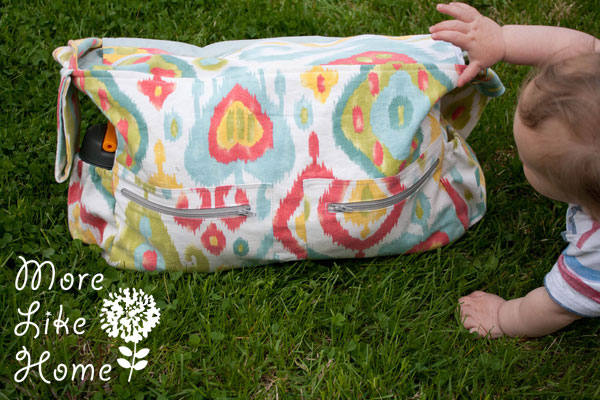
The water bottle pockets on the side are perfect if you don't have cup holders on your stroller.
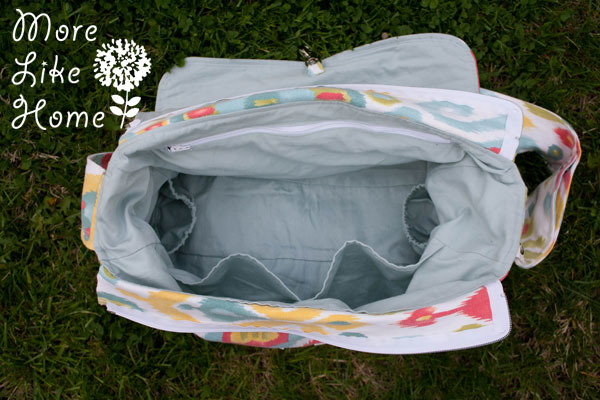
And did I mention tons of storage? The finished size is 16.5" wide, 11.5" tall, and 4" deep with twelve pockets! Let's take a closer look. The front flap has a zipper pocket built in.
When you lift the flap there are two smaller zipper pockets on the front.
Baby Brother not included.
Under the flap there is also a zipper closure. Flaps are super convenient when you need to be in and out (and when it's hanging on the stroller!), but we all know nothing is worse than a diaper bag tipping over and spilling EVERYWHERE. One zip and you know your stuff isn't going anywhere. Problem solved.
And inside that zipper? So. Much. Room. For all the stuffs. This is a pack-it-in-the-morning-and-go-all-day kind of bag. We fit everything we needed for an entire day at the zoo!
And you can keep it all organized with a whole mess of pockets. Two open pockets on the front, another zipper pocket on the back, and two more elastic water bottle pockets on the sides. Be still my organizing heart.
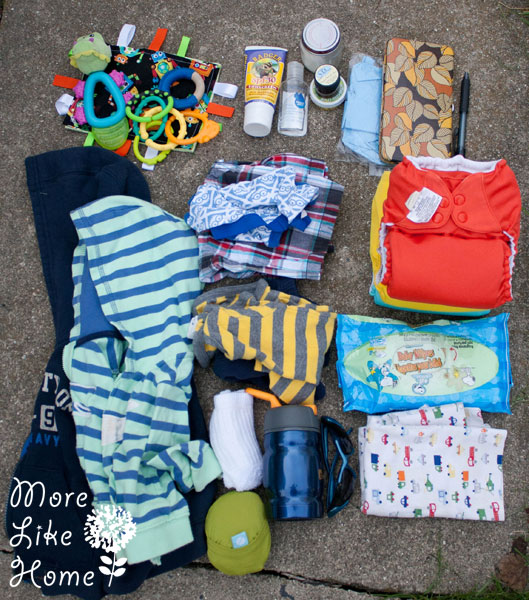
This is what I had in my bag today: baby toys, sunscreen, hand sanitizer, bug repellant, coconut oil (great for diaper rashes!), disposable diaper bags, wallet, pen, jackets for the brothers, back-up pants & undies for big brother, full backup outfit for baby brother, three double-stuffed cloth diapers, wipes, extra socks, roll-up grocery bag, water bottle, sunglasses, and burp rags. For serious, you guys, this bag is in it to win it.
That's right. All the storage & organization you need attaches securely to the handles of a standard stroller.
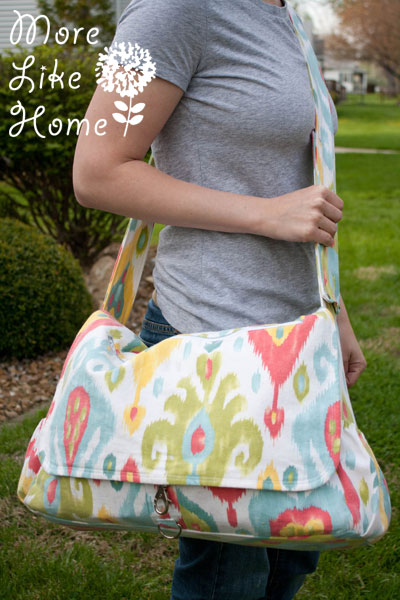
With just a few snaps it converts to a convenient messenger style diaper bag. Haul those baby stuffs in style, mommas!
And back again to a hands-free stroller bag!
If you're planning any summer outings you won't want to leave home without this. It's great for anytime you'll be doing lots of walking and don't want to lug a bag around. In fact these pics are from our trip to the zoo on Big Brother's birthday! Plus with it securely snapped on the handles, the under-stroller basket is open for lunch boxes, jackets, or baby carriers.
The shoulder strap is permanently attached on one end so you can't lose it. When you're ready to wear your bag, just snap the shoulder strap on at the other end and you're ready to go.
Want to put it back on the stroller? Snap the stroller straps and tuck the shoulder strap inside the bag or into one of the back pockets. It will be there when you need it later!
The water bottle pockets on the side are perfect if you don't have cup holders on your stroller.
And did I mention tons of storage? The finished size is 16.5" wide, 11.5" tall, and 4" deep with twelve pockets! Let's take a closer look. The front flap has a zipper pocket built in.
The flap also has a clip for when you want it to stay closed. Big Brother has decided his personal mission is to keep it clipped at all times.
There are water bottle pockets on each end (with elastic tops to keep your drinks snug).
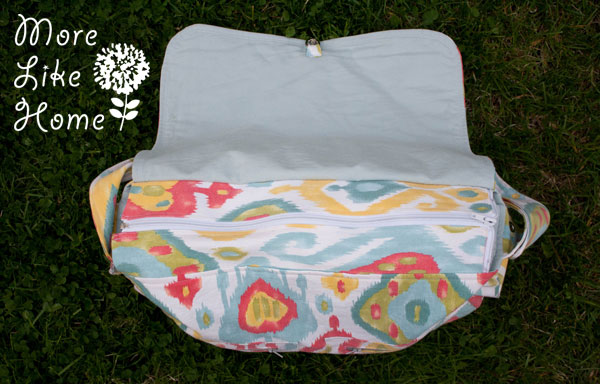
When you lift the flap there are two smaller zipper pockets on the front.
Baby Brother not included.
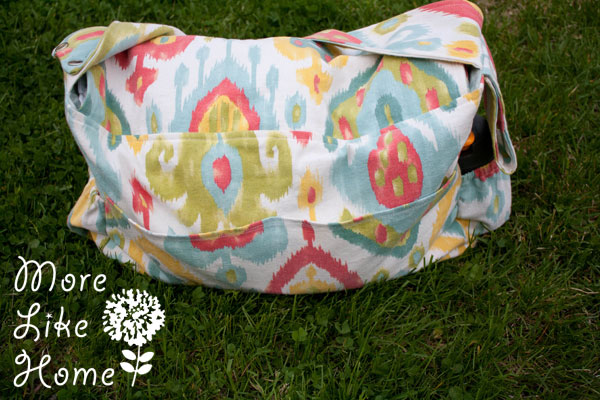
On the back there are two open pockets - perfect for keeping a burp rag handy!
Under the flap there is also a zipper closure. Flaps are super convenient when you need to be in and out (and when it's hanging on the stroller!), but we all know nothing is worse than a diaper bag tipping over and spilling EVERYWHERE. One zip and you know your stuff isn't going anywhere. Problem solved.
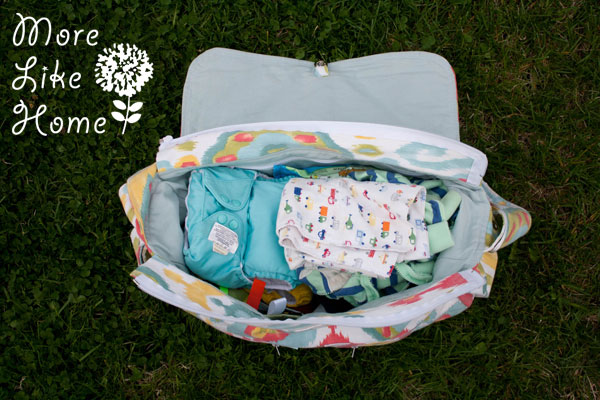
And inside that zipper? So. Much. Room. For all the stuffs. This is a pack-it-in-the-morning-and-go-all-day kind of bag. We fit everything we needed for an entire day at the zoo!
And you can keep it all organized with a whole mess of pockets. Two open pockets on the front, another zipper pocket on the back, and two more elastic water bottle pockets on the sides. Be still my organizing heart.
This is what I had in my bag today: baby toys, sunscreen, hand sanitizer, bug repellant, coconut oil (great for diaper rashes!), disposable diaper bags, wallet, pen, jackets for the brothers, back-up pants & undies for big brother, full backup outfit for baby brother, three double-stuffed cloth diapers, wipes, extra socks, roll-up grocery bag, water bottle, sunglasses, and burp rags. For serious, you guys, this bag is in it to win it.
Monday, May 12
Brainstorming with Sherwin-Williams
I've been thinking for a while now about how to bring our nursery up to speed. You know, since it's not actually a nursery anymore. It's been sort of thrown together and shifted around to grow with Big Brother, which has resulted in a kind of not functional-totally blah space. But its days are numbered because Sherwin-Williams is sponsoring a Big Boy Room makeover! They are giving us a chance to try out their Emerald™ paint and primer in one. It's the best paint with advanced stain blocking technology. But they really had me with its exceptional washability. A certain little boy has been known to color on the walls, so easy clean-up is an important factor for his own personal canvas... I mean bedroom. Besides testing out a great new paint, we'll also be using some really fun color selection tools.
But before we talk about where we're headed, let's look at where we've been. The colors and layout worked really well when we got it ready for our first bundle of squish. I still look at this picture and think, "Awwww, my baby's room!"
But times change. Tan walls are super boring when the room is for such a vibrant little fella (plus our second little fella will be moving in before too long!). With a room that's just 9' x 11' we need every inch to pull its weight both with function and style. So we're making some plans:
Room for two little boys to sleep is the easy(ish) part. We can flip Big Brother's bed to make a loft on top and room for a second mattress underneath. This is assuming that Big Brother can safely scale the ladder before Baby Brother moves in (hence the "ish"), but that's looking pretty promising since he already climbs up and perches on the top rail. That's also called "giving your mother a heart attack."
Now on to the more pressing issues. Number one is the books. We need a place to stash them and this basket just isn't cutting it. Something like a small bookcase/nightstand might be the perfect fit.
Toy storage has also become an issue. Keeping in mind the room is small with two doors and two windows (which we are so thankful for) this is pretty much the only place that works. But our current set up of... wait for it... a small bookcase, three milk crates, and a tiny recycling bin... is bursting at the seams. We'll definitely be adding some hefty storage to hold all this and hopefully more.
The dresser is working for now with two drawers for each boy and one shared for socks and jammies. I feel like they'll probably need more drawers when they are bigger (and have bigger clothes), but we're probably just going to stick with this for now and cross that bridge when we come to it.
We'll be updating the curtains or at least adding a second panel to each window. Or we might hang some art to better fill the space by the windows instead.
The other big problem in this room are the colors. The walls are totally lifeless. And then there is every other color imaginable on the curtains, green bedding, and a blue canopy. Want to see more?
BOOM. It's rainbow and then some. Some better organization and storage will calm this area down, and some new paint should help tie everything together.
So let's have a little fun and see what kind of color this room needs!
First I played around a little with the Sherwin-Williams Chip It!® tool which can instantly turn any picture into a paint palette using more than 1,500 Sherwin-Williams paint colors. It works kind of like Pinterest because you can pick any picture on the web, hit your Chip It!® button, and Sherwin-Williams will create a palette with up to 10 colors that match. I played around with this art print hanging in their room. It was fun, but ultimately I didn't have one single picture that embodied everything I want for the room... so I had even more fun with the next tool!
Color Visualizer will turn your computer into a virtual design studio. With this tool you can actually put colors on the walls to see how they work together! They have stock photos like this you can work with:
Or you can upload your own photos to see how colors work in your actual room! We had some fun with this.
We knocked a few things out pretty fast, but there were a few front runners. We decided we definitely wanted to go with a grayish blue since it felt very boy but could still work as a neutral backdrop. We toyed with the idea of blue under the chair rail and light gray above, but that felt too formal for a little boy's room. We're still tossing around the idea of a green canopy to tie it into the bedding, but a little boy would be so sad to lose his moons (the white spots on the blue canopy) so I don't think we can do it.
SW 6230 Rainstorm, SW 6162 Ancient Marble
SW 6230 Rainstorm, SW 6199 Rare Gray
Then we went even a little crazier with blue all around. But with such a small room I was afraid this would feel too small and dark, so it was knocked out of the running
SW 6230 Rainstorm
So we tried a compromise and dressed up the one-wall look with some horizontal stripes.
SW 6230 Rainstorm, SW 6162 Ancient Marble
SW 7617 Mediterranean
When it was all said and done, SW 6230 Rainstorm and SW 7617 Mediterranean were our runaway favorites. So we ran down the street to our friendly neighborhood Sherwin-Williams store to grab the swatches and see how they played out in real life. We especially wanted to make sure whatever we chose went with the wood trim throughout the house. We taped up our favorites, along with the lighter and darker shades of each. Then the hard decision making started. We felt like our original two would feel a little too dark, but we still wanted a lot of contrast. So we were really drawn to the second from the bottom, SW 6221 Moody Blue. (I also got some light gray/white chips and we decided that a really light almost white would work best)
So we gave it a try in the Color Visualizer. It was great as an accent wall!
SW 6221 Moody Blue, SW 7010 White Duck
And then we had another idea to make things more exciting... stripes on the storage wall, anyone?
SW 6221 Moody Blue, SW 7010 White Duck
We made that little mock up and it was love at first sight. So that's the plan - one wall blue, two walls white, and one wall striped. We can't wait to share the finished product with you guys! In the mean time feel free to visit Chip It!® or Color Visualizer to create your own perfect color combinations. For even more tips and ideas you can check out Sherwin-Williams on Pinterest, Facebook, and Instagram.
But wait... there's more! Sherwin-Williams is giving away a $50 Sherwin-Williams gift card! To enter, all you have to do is answer this question:
What room would you make over with Sherwin-Williams?
Good luck and happy painting!
Sweepstakes Rules:
No duplicate comments.
You may receive (2) total entries by selecting from the following entry methods:
1. Leave a comment in response to the sweepstakes prompt on this post
2. Tweet (public message) about this promotion; including exactly the following unique term in your tweet message: “#SweepstakesEntry”; and leave the URL to that tweet in a comment on this post
3. Blog about this promotion, including a disclosure that you are receiving a sweepstakes entry in exchange for writing the blog post, and leave the URL to that post in a comment on this post
4. For those with no Twitter or blog, read the official rules to learn about an alternate form of entry.
This giveaway is open to US Residents age 18 or older. Winners will be selected via random draw, and will be notified by e-mail. The notification email will come directly from BlogHer via the sweeps@blogher email address. You will have 72 hours to respond; otherwise a new winner will be selected.
The Official Rules are available here.
This sweepstakes runs from 5/12/2014-6/1/2014.
Be sure to visit the Sherwin-Williams brand page on BlogHer.com where you can read other bloggers’ posts!
Subscribe to:
Posts (Atom)