

Day 11! You can see links to the complete series here, and learn about my Lowe's gift card giveaway here. In this series, we're seeing what we can make out of 2x4's. I want to keep it cheap, keep it easy, and keep it totally doable for anyone. Today's project is for the kids - we're building a simple lemonade stand!
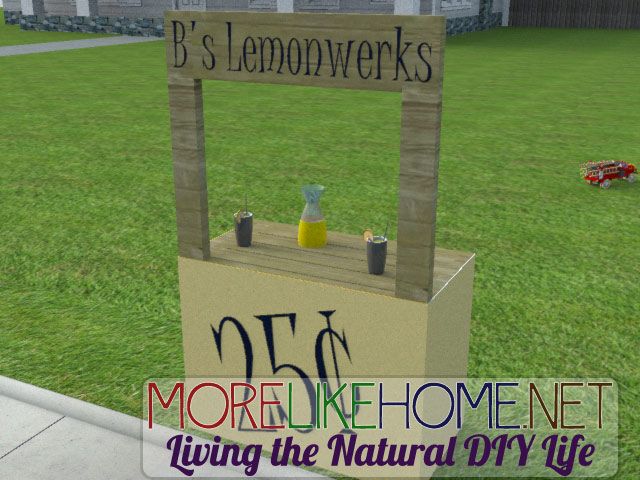
This is easy to put together and sized just right for your little ones to sell their wares. Ready to squeeze in one last lemonade stand before winter?
Shopping List:
3 - 2x4s @ 10' long
2 - 2x4 @ 8' long
2 yards fabric
Tools:
Saw
Drill
2 1/2” screws (or Kreg Jig & 2 1/2" self tapping screws)
4" screws (or Kreg Jig & 2 1/2" self tapping screws)
Wood glue
Wood filler
2x4 Cut List:
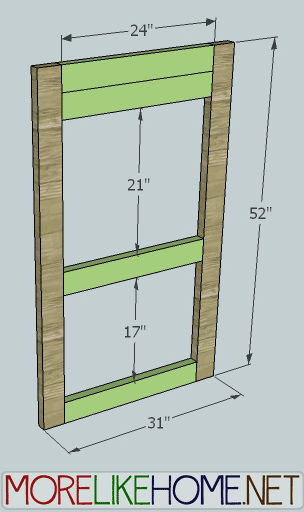
(A) - 2 @ 52" (front legs)
(B) - 5 @ 24" (front/back boards)
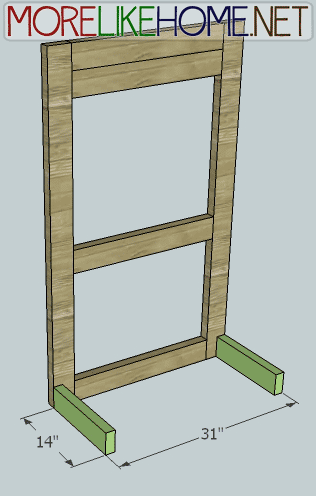
(C) - 4 @ 14" (side boards)
(D) - 4 @ 28" (countertop)
(E) - 2 @ 24" (back legs)
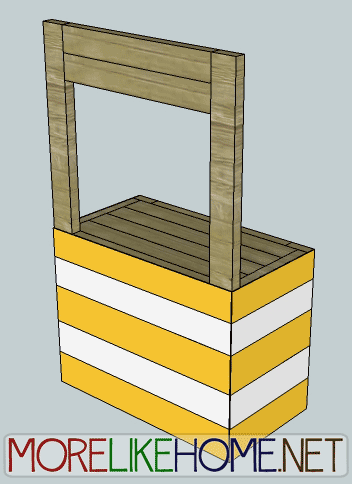
Dimensions: 31" wide x 52" tall x 17" deep

Please read all the directions before beginning, and cut your pieces as you go, measuring before each cut. Use 2 1/2” screws or pocket holes with 2 1/2" screws unless otherwise indicated. Always use glue. Pre-drill and countersink your screws. I have not built from these exact plans, so measure lots to make sure things work out!
Step 1: Build the Front
Use four of the front boards (B) to connect the front legs (A). The first should be flush with the top of the legs and the second should be right below it. The next should be 21" down from there. The last one should be flush with the bottom of the legs (and 17" below the previous board). You can attach them using a Kreg Jig and pocket hole screws, or by drilling through the legs and into the front boards with 4" screws and glue.
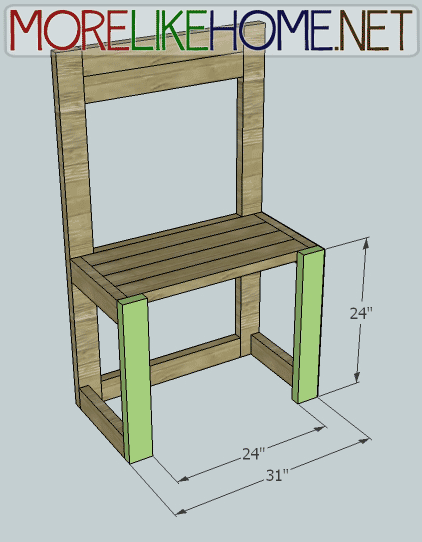
Step 2: The sides
Attach a side board (C) to the bottom left corner of the front section you just built. It should be flush with the bottom & outside edges of the front leg. Repeat to attach another side board to the bottom right corner.
Step 3: The Countertop
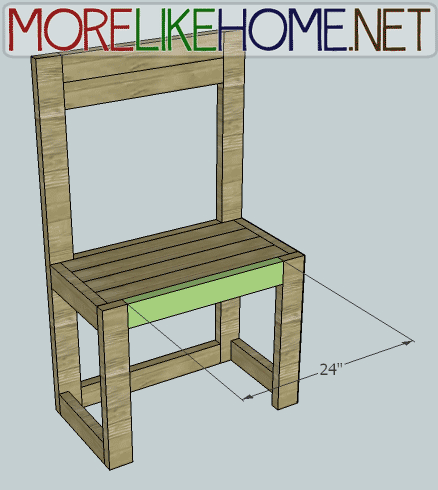
Attach the countertop boards (D) to two of the side boards (C) as shown below. Everything should be flush across the top. Drill through the side boards into the countertop boards with 2 1/2" screws & glue (or use a Kreg Jig & pocket screws).
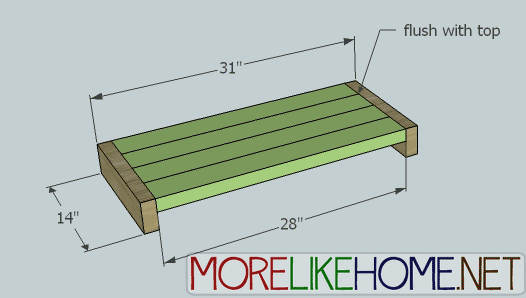
Now attach the countertop to the front frame as shown below. Line up the countertop flush with the top edge of the middle front board. Drill through the front into the countertop with 2 1/2" screws and glue.
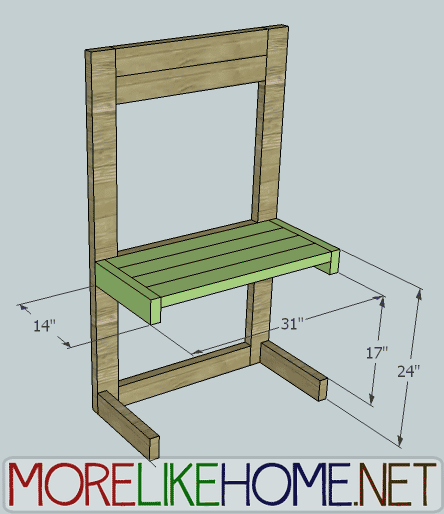
Step 4: Build the Back
Attach the back legs (E). They should be flush with the top & outside edges of the side boards. Drill through the legs into the side boards with 2 1/2" screws and glue.
Attach the remaining back board (B) between the back legs as shown below. Drill through the back board into the countertop with 2 1/2" screws and glue.
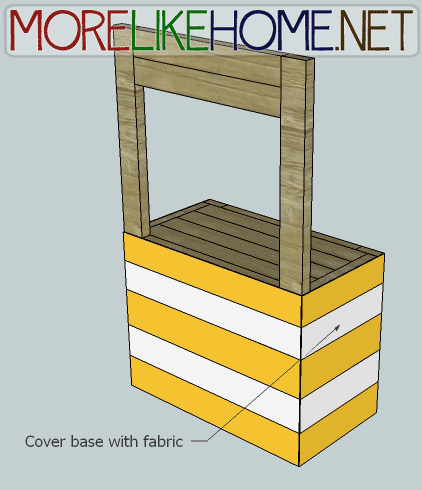
Step 5: Finishing
Start by filling any nail holes and sanding everything down. If you want to paint or stain your lemonade stand go ahead and do it now. Or maybe let the kids have some fun painting it themselves! The top section is perfect for painting a sign. Use a fun fabric and a stapler to cover the base.
Project 2x4 Cost:
$9.60 - 3 2x4s @ 10' long ($3.20 each)
$5.00 - 2 2x4 @ 8' long ($2.50 each)
$14.60 Total

See giveaway winners here.

Share on Facebook

Very Cute!
ReplyDeleteAre you going to make one for the baby?
ReplyDeleteI'll have to file this one away until we have kids...
ReplyDeleteWhat kid doesn't want a lemonade stand?!
ReplyDeleteThis would be perfect for a ticket booth, too!
ReplyDeleteSuper! Great tutorial - particularly the illustrations! : )
ReplyDelete