

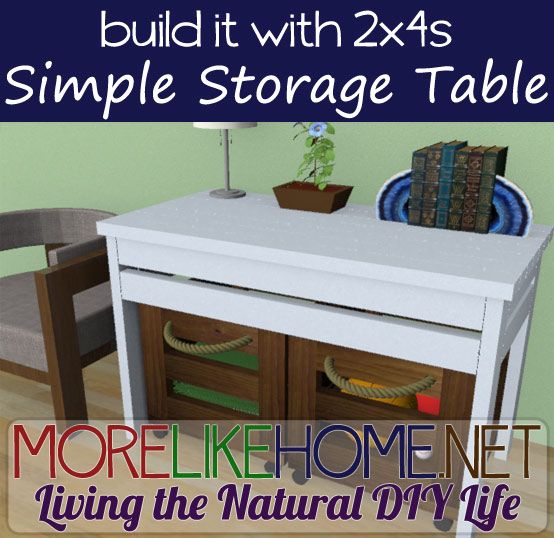
Can you believe we are halfway through October already?! You can see links to the complete series here, and learn about my Lowe's gift card giveaway here. In this series, we're seeing what we can make out of 2x4s. I want to keep it cheap, keep it easy, and keep it totally doable for anyone. Today we're working on the second half of my favorite project in this series. Yesterday we built a Simple Storage Bin, and today we are going to build the coordinating Simple Storage Table!
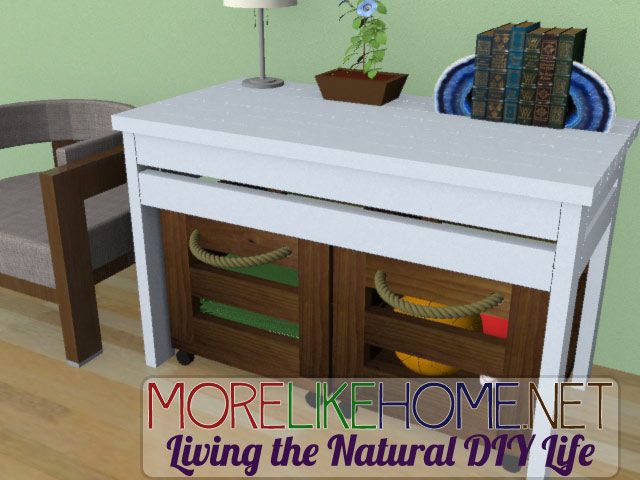
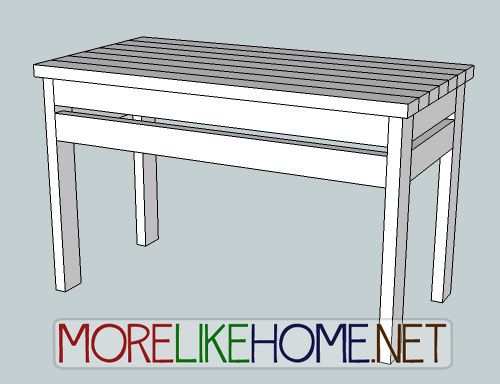
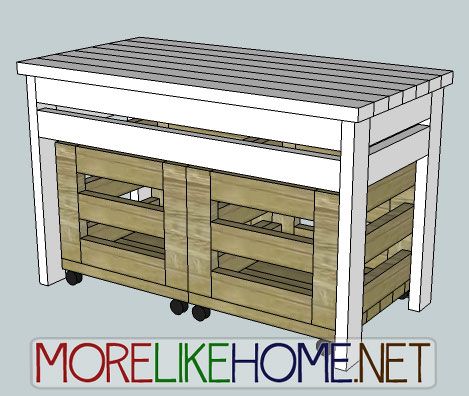
This table has a sleek and simple style, and is perfectly sized for tucking a pair of Simple Storage Bins underneath. It would make a great console for the entryway, living room, or even in the bedroom! Ready to get started?
Shopping List:
6 - 2x4s @ 10' long
1 - 2x4 @ 8' long
Tools:
Saw
Drill
2 1/2” screws (or Kreg Jig & 2 1/2" self tapping screws)
4" screws (or Kreg Jig & 2 1/2" self tapping screws)
Wood glue
Wood filler
2x4 Cut List:
(A) - 4 @ 28 1/2" (legs)
(B) - 4 @ 16" (sides)
(C) - 4 @ 43 1/2" (front/back)
(D) - 1 @ 20" (support)
(E) - 7 @ 48" (table top)
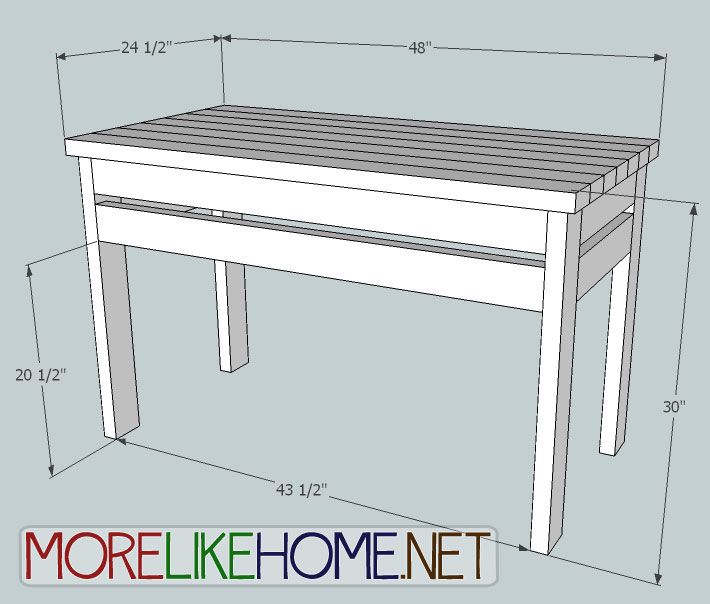
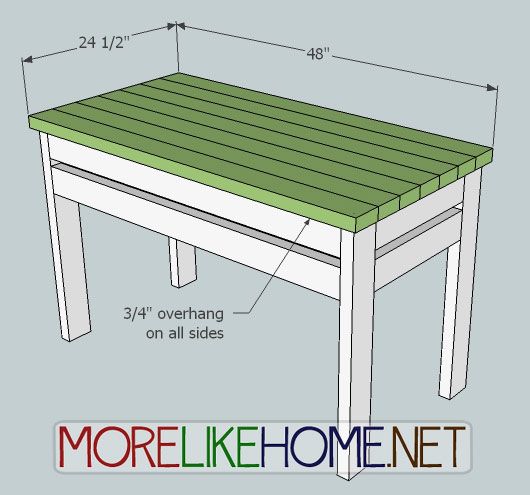
Dimensions: 48" wide x 30" tall x 24 1/2" deep
Please read all the directions before beginning, and cut your pieces as you go, measuring before each cut. Use 2 1/2” screws or pocket holes with 2 1/2" screws unless otherwise indicated. Always use glue. Pre-drill and countersink your screws. I have not built from these exact plans, so measure lots to make sure things work out!
Step 1: Build the Sides
Use two side boards (B) to connect two legs (A). The top side board should be flush with the top of the legs, the bottom one should be spaces 1" below the top one. Attach these using a Kreg Jig, or by drilling through the legs and into the side boards with 4" screws and glue. Repeat to build the other side section.

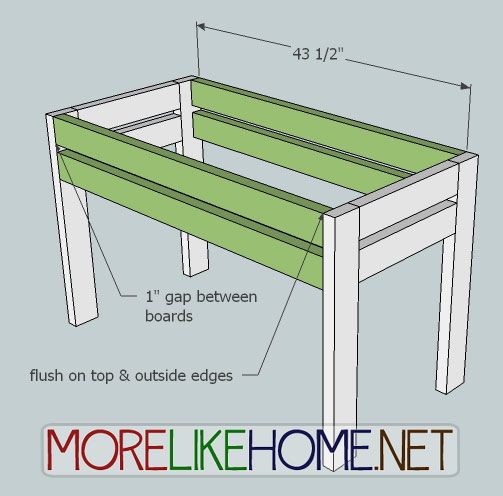
Step 2: The Front & Back
Now use the front/back boards (C) to connect the two end sections. In the back, one back boards should be flush with the top of the legs and the other should be spaced one inch below the top one. Attach these using a Kreg Jig, or by drilling through the legs and into
the front/back boards with 2 1/2" screws and glue. Repeat to build the front.
Step 3: Support
Attach the support board (D) between the top front and back boards. It should be flush with top edges of the front/back boards and centered with 21" of space on each side. Attach it with your Kreg Jig or by drilling through the front/back boards and into the support board with 2 1/2" screws and glue.

Step 4: The Table Top
Now you can add the table top boards. The top boards should all sit side-by-side centered on the base with 3/4" overhang on all sides. Once your boards are lined up and centered, attach them by drilling down through the table top boards and into the front, back, side, and support boards with 2 1/2" screws and glue.
Step 5: Finishing
Start by filling any holes and sanding everything down nice & smooth. Then just finish with any paint/stain/poly you want! Try pairing a sleek white table with some rustic Storage Bins.
And be sure to build a few Simple Storage Bins to tuck underneath.
Project 2x4 Cost:
$19.20 - 6 2x4s @ 10' long ($3.20 each)
$2.50 - 1 2x4 @ 8' long ($2.50 each)
$21.70 Total
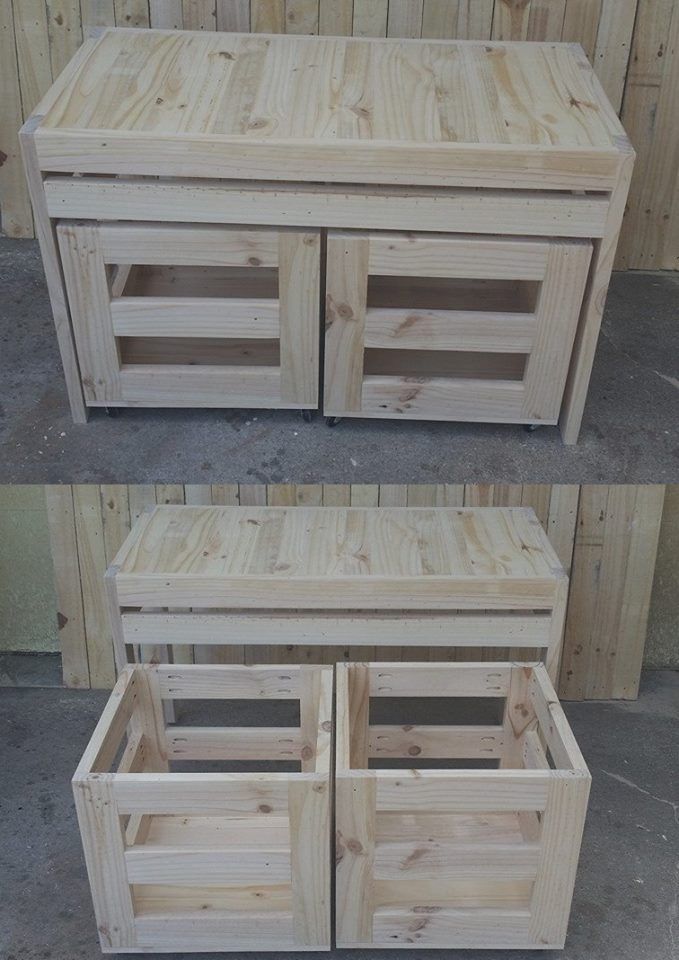
A big thanks to Alex for sending in this beautiful Storage Table complete with Storage Bins! Great work!
See giveaway winners here.

Share on Facebook
I often find open bins awkward because they use up valuable "flat space." However, bins with lids are also awkward because you have to clear off all the "junk" on top before you can get in them. This is a great solution to both problems!
ReplyDeleteI was wondering when we would see the table.
ReplyDeleteI like the looks of this!
ReplyDeleteI love the look of the white against that wall color.
ReplyDeleteHave you actually made this table? Looks like it would be easy although is there a way to attch the top from underneath?
ReplyDeleteI haven't yet. I really want to, but we're stuck waiting for warmer weather! :)
DeleteIf you have a Kreg Jig you could use it to attach the top from underneath by making pocket holes in the side boards and support board. Otherwise you could just angle screws through those boards into the top boards underneath where they won't be seen, but you'll have to be careful not to poke through the top. :)
I came across this plan awhile back and knew I had to build it. I used reclaimed pallet 2x4's and ran them through my planer to clean them up, and did some slight modifications to the top. Turned out great! Thanks for the great plans! Awesome site!!! Alex
ReplyDeleteThank you! I'm so glad you liked it. :) And thank you for the beautiful picture on my facebook page, you did a wonderful job!
DeleteJust built this table yesterday! Thank you so much for sharing the plans!!! I also "modified" it a bit since we had some scrap materials around and I needed it to be a little more narrow! I used 1x4's for the top, 1x2 strips for the bottom shelf and used dowels to put sides together when I realized I didn't have any 4" screws! Thanks again!
ReplyDelete