Showing posts with label living room. Show all posts

Friday, May 1

DIY Magnolia-Style Throw Pillow Tutorials

For the first 12 years of keeping my own home, I was constantly on the lookout for the perfect throw pillows. You know what they always say, right?

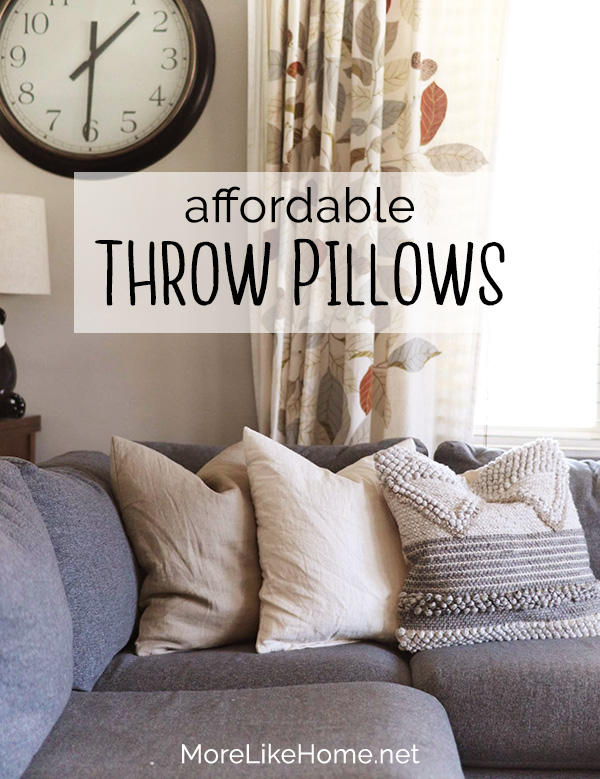
"Throw pillows are the best way to add personality and color to your living room!" 
"You can change your pillows to totally change the space!"

But I went through a dozen different living room pillows over the years, and every time I felt like I was buying "the closest thing I can find" and never quiiiite exactly what I was looking for. Because I thought I couldn't find exactly what I was looking for. Like I was some pillow conundrum and the pillows I wanted just didn't exist. It was frustrating. Frustrating because all the pillows I tried never really felt right. And frustrating because I would spend money on new pillows only to find I didn't like them any better. But it turns out I just didn't know what I was looking for. These pillows were full of personality, but the personality I was trying to force into my living room wasn't my own.

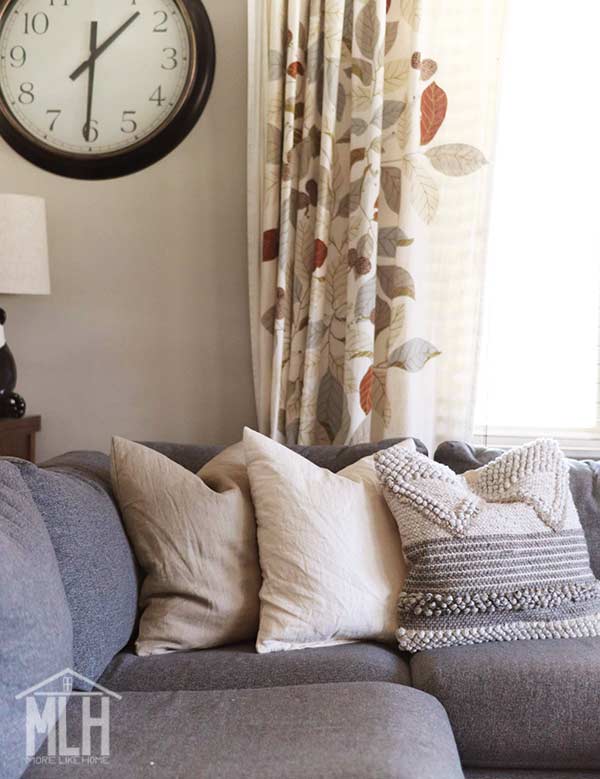
See this couch? This finally feels like Georgia's couch


Turns out I needed to learn a few important things about myself so I could make better pillow choices:
  1. I. like. plain. I think the main reason I was never happy with all my patterned pillows is because it turns out I just don't really like patterns. Or colors. I like things plain and simple. It's embarrassing how long it took me to learn this about myself. But it's amazing how much more peace I can create for myself in my home now that I've tuned into it.
  2. Texture is so much more important than colors and patterns to me. It adds all the interest I crave in the simple, muted tones I love.  
  3. Pillow covers are way cheaper than investing in new pillows every time I change my mind (and they're super easy to make with any fabric I like). I invested in several FJADRAR down pillow inserts from Ikea (only $6 each!) and I've never looked back! It's super easy to switch in Christmas pillow covers without using any storage space for whole pillows.
Now that I know what I like and why I like it, I understand better why I'm so drawn to the Magnolia Market pillows. They use neutral colors with a truckload of texture to keep things interesting. But those prices... oh man... I just can't. We have four boys to feed here, folks. Which is what led me on my original hunt for similar pillows at affordable prices.

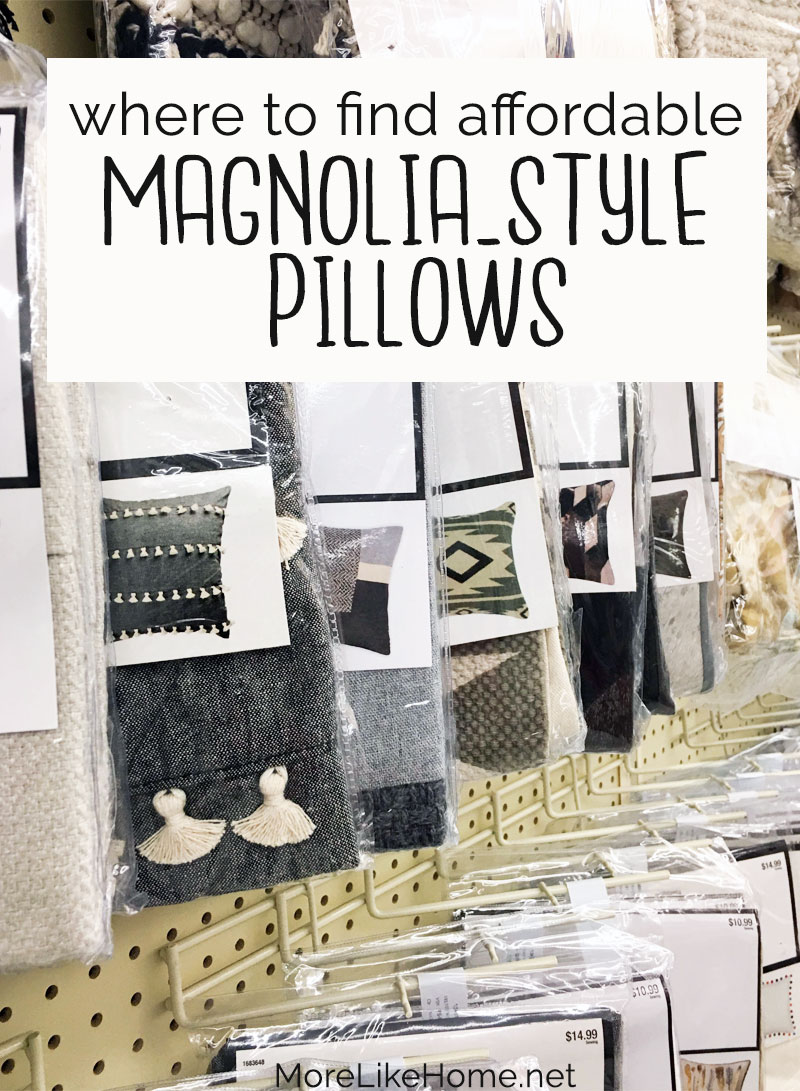
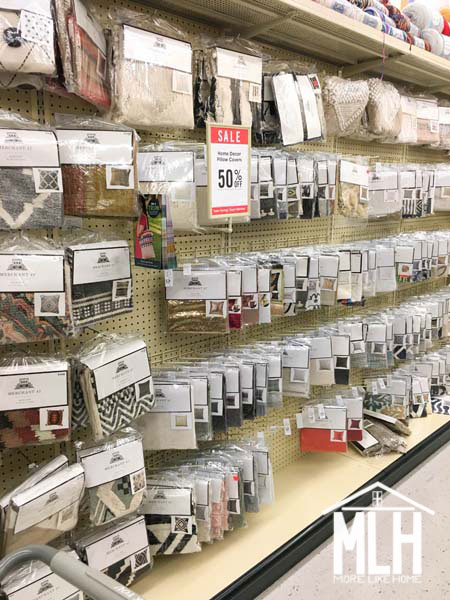
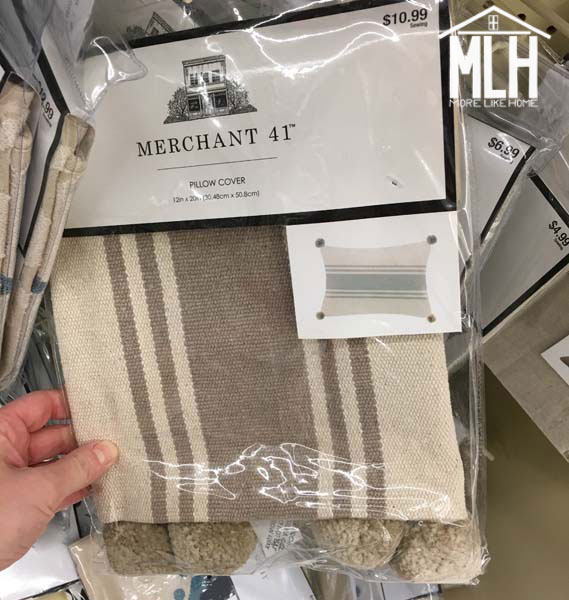
You can check oy my original list of affordable Magnolia-style throw pillows here.

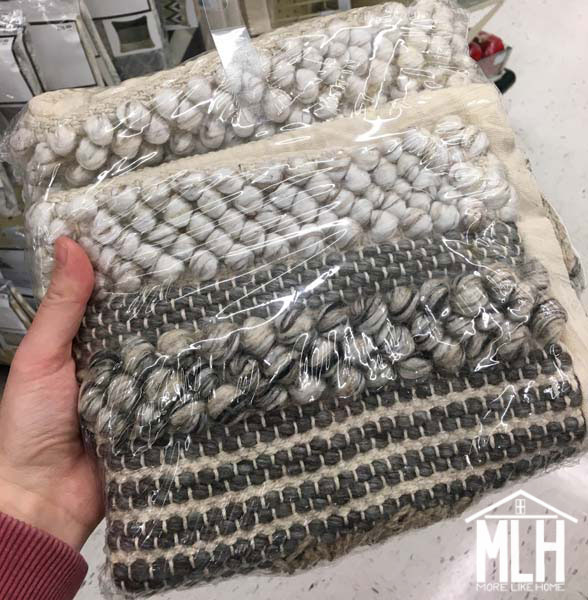
You can find all the pillows on my couch on that list (spoiler: that super-textured one on the right was under $8 for the cover!). At the end of that list, I kind of brushed over a few options to make your own DIY pillow cases that have a Magnolia-eque vibe, but now seems like the perfect time to revisit that and share a few of my favorite DIY pillow cover tutorials! I mean, most of us are cooped up right now anyway and making things is a great way to beat the Quarantine Blues.

Before we start, most of these tutorials call for a basic, blank pillow cover that you'll basically be decorating in various ways. I love Ikea's VIGDIS pillow covers (that's what's on my couch and they're only $8 each!) but if you don't have an Ikea nearby, these pillow covers on Amazon look pretty similar for $10 each (but be warned - I haven't purchased these and can't vouch for their quality). You can also make your own pillow covers really easily with my pillow cover tutorial.
Have fun!


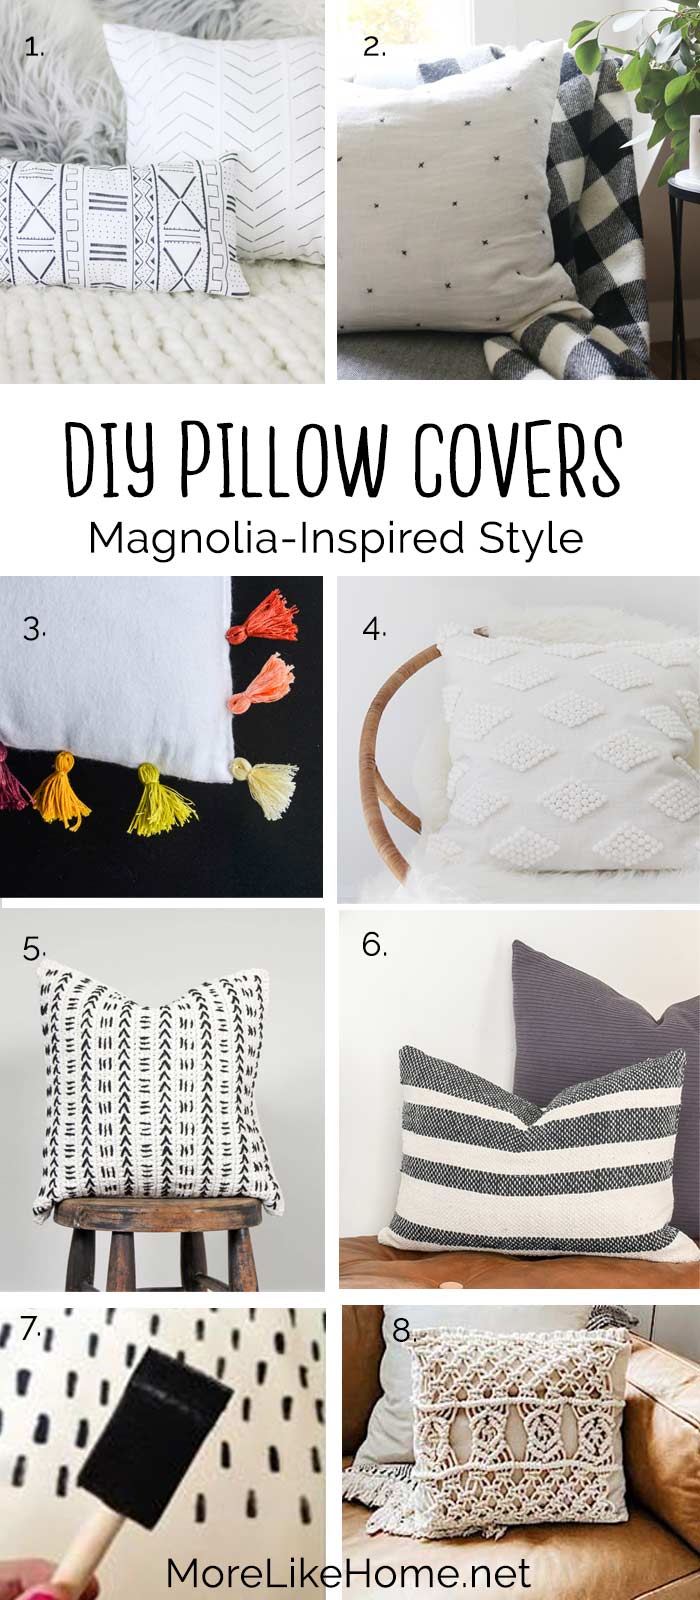
  1. This tutorial from Lily Ardor shows you how to make a faux mudcloth cover with a fabric marker!
  2. This pillow inspired by the Hearth and Hand collection is my hands-down favorite in the lineup! A few simple stitches totally elevates a pillow cover to a new level. You can find the tutorial at Jones Design Company.
  3. These DIY tassel pillows by Rachel Schultz are adorable. You can play up the colors for a kids room, or keep it more neutral for a living room. Or not. If you love color, go for it! And if you love the tassels, you might also want to check out these yarn pom pom pillow covers.
  4. This pompom pillow by Almost Makes Awesome is a beautiful, understated way to add texture to a plain pillow cover. But be warned - those pompoms are glued on so it probably can't be washed. 
  5. Any crochet lovers in the crowd? This faux-mudcloth pillow cover is actually crocheted! I don't know if I have the patience for it, but I love it! You can find the tutorial at Make and Do Crew.
  6. This pillow cover is actually made out of one of the cheap woven throw rugs from Five Below! It gives this pillow a wonderful texture (my fave!) and you don't need to buy a base pillow case for this one! The tutorial is at Little House of Four, and she also has a tutorial for some cute tea towel pillow covers
  7. You can paint a pillow cover with fabric paint!
  8. You guys know I love macrame, right? And it's totally making a comeback! This macrame pillow cover by Emily Faith is a great way to add a little macrame texture to your space. There are dozens of tutorials for other styles on youtube!
I'll leave you with these two things. First, a boy pretending to be a book:


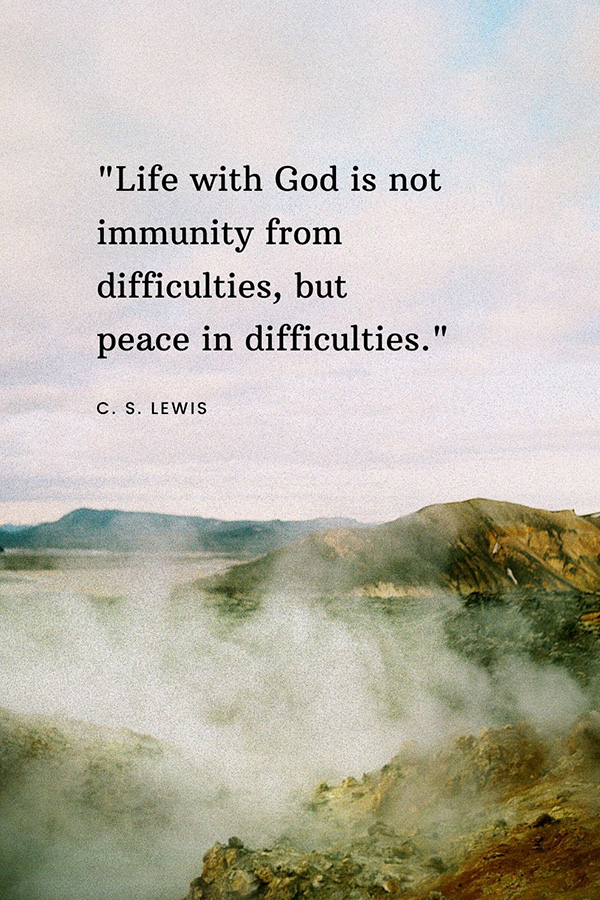
And second, a reminder from good old C. S. Lewis about finding peace in difficult times:


What's your throw pillow style? Do you like things plain and neutral like me, or do you go for something a little more exciting? And here's the big one - how long did it take you to find your style? 30 years? Anyone? Just me?

Tuesday, February 18

Easy $10 Fireplace Door Upgrade

One of the first things I loved about this house was the fireplace.  And now that we've given it a few updates? I love it even more. It's come a long way since move-in day, and we've done it all on a super small budget. I know I sound like a broken record, but you CAN create a home you love without spending a fortune. If you take one thing away today, let it be that.

If you take away a second thing, it can be this handy hack.

So let's check out the fireplace, because it's looking better than ever with it's snazzy new fireplace door! Except it's not actually a new fireplace door. It's the same old door with a fresh new look that cost under $10!


But before we jump into this latest update, let's throwback a few years. At this point we had painted the walls a light gray, but that was our only change so far:


Guys, small changes really do add up. It feels so much more cohesive and fitting to this old farmhouse now than it ever did back then. Partly because of the updates and partly due to my minimizing and learning to style the Cozy Minimalist way (so. much. stuff. on that old mantle). Here's a quick rundown of what we've done so far:

Thursday, September 5

How to Style a Mantle in 4 Easy Steps

It started after Christmas.


The lights came down, the tree came down, and then all the regular decor came down. I had just finished reading the Cozy Minimalist book and I was so ready to simplify. The room, the decor, the toys, and all the stuff. And the first step was to calm the room. Remove all the extra.

Take a breath.

Then carefully decide what deserves to come back in. 

We wrapped the mantle ourselves and added the faux shiplap!

Tuesday, March 5

Affordable Magnolia-Style Throw Pillows

The internet has been all a-buzz about Joanna Gaines' sneak peek of her new Spring pillow line for Loloi Rugs. They are stunning. My couch would cry tears of joy to have such pillows. But then I found out... Loloi pillows average around $75 each. Spending freeze or not, that's gonna be a hard pass from me. Even on the Magnolia website a beautiful pillow will set you back anywhere from $40-130! 


There just has to be a better way. So I did a little searching and rounded up a few budget-friendly Magnolia-esque pillows just for you!

Check out my follow-up post with DIY Magnolia-style pillows!


I'm using some of these on my own couch!


My first mega-deal is in-store, but if you keep scrolling I have a few online options and even some DIY options down near the end. If you find a deal too good not to share, let me know in the comments!!

1. Hobby Lobby
This was by far the best deal and best selection I've found. And it was totally a surprise! I didn't even know they had this pillowcase selection until I stumbled across it (ironically while searching through their upholstery fabrics for something to DIY a magnolia pillow). Hobby Lobby doesn't sell online, but if you have a store nearby you're in for a treat. And nothing beats being able to hold an item in your hand before buying!


At our store this section was right next to the upholstery fabrics and the pillow forms. And the best part? When I went Saturday, the whole section was on sale for 50% off! Hobby Lobby runs a rotating list of sales so, even if you missed it this time, you can keep an eye out for the pillowcases to hit 50% off again. Because they will. And if you don't want to wait, they always have a "40% off one item" coupon on the website that's almost as good.

Enough chit chat, let's get to the pillow goodness. I took pictures of the ones I loved most, but there were dozens more to choose from! Hold on to your hats, folks. You're not going to believe these prices. 

1.  $14.99 ($7.50 on sale!) with tons of thick yarn and beautiful texture (a hallmark of magnolia pillows!)

2.  $10.99 ($5.50 on sale!) super-clean farmhouse-style stripes on a medium-weight fabric (higher-end feel than thinner fabrics!) with pom poms to boot. I love this one so much.

Friday, February 8

Mountain Dresser Tutorial {Easy Dresser Update!}

This is the story of a dresser.

I don't know where or how long ago its story begins, but I can tell you how this dresser came to me. A free, broken-down, ugly little duckling. And I can tell you how it came to be one of my very favorites.

Along the way I'll show you how to create this subtle-but-stunning mountain silhouette pattern on your own favorite dresser! Perfect for any adventure or wanderlust fans out there. Spoiler: this is exactly how it became my favorite. And I'll even show you how to repair a dovetail drawer. So get ready for lots of DIY goodness!


Several years ago a friend called me up with an offer I couldn't refuse - she was moving and had an old tumble-down dresser that wasn't worth dragging along. The paint job was rough and one drawer was in pieces but she new I loved a good project piece. I could have it if I just got it out of the way.

 
 This is how it looked once the drawer was fixed... and for the next 5 years.

Let me tell you, it's so good to have friends who know you like that.

After I finally refinished the drawers.

Thursday, September 6

Living Room - Post Nesting

After all my talk about the living room while we were waiting on baby #4, the little squirt showed up early and I never got around to sharing all the updates we actually made! Turns out babies have no respect for my blogging time. None at all. Well, never fear, because today I'll show you just where we ended up (you can see full pics of where we started in this post).


Let's just go down the list:

Wednesday, July 11

DIY Mantle Revamp (how to wrap an outdated mantle with new wood)

Part 1 of my nesting-driven fireplace makeover was adding a shiplap accent around the top, but it still looked a little sad with a glossy black painted mantle. Not my jam, and not working with our farmhouse vibe. So part 2 of the process was returning the mantle to a beautiful wood finish!

You can find all the "before" photos and the rest of our nesting plans here


I would have loved to restore it back to the original wood, but that just didn't turn out to be a feasible option for us. There was nick in the corner of the mantle where we could see at least four layers of paint - black, green, brown, and beige - and we still couldn't see the wood!


Whether we sanded it or stripped it, we would be looking at a huge mess. So we decided to start with a clean slate and wrap the entire mantle with new wood. It worked out great!


I love how it plays with the new shiplap for a more casual farmhouse vibe. And you can do it, too! This is also a great option if you want to cover a concrete or brick mantle to add a little contrast to you fireplace. Want to give it a try?


Tuesday, June 19

DIY Shiplap Fireplace

Sometimes I just need a little kick in the pants to get a project done. Or a little bun in the oven. I've wanted to update our fireplace ever since we moved in (two years ago) but it wasn't until this spring when I was in full pregnancy nesting mode that I finally decided "I AM DOING THIS. RIGHT NOW." Naturally the "I" translated to "husband" because we were in the late-pregnancy stage of nesting. And he isn't one to let his round wife balance on a chair with a nail gun. He's a keeper.

And so, with a little help, we managed to check it off my nesting to-do list just in time before our newest guy was born. (you can see my entire living room nesting to-do list here, and how we wrapped the mantle here) One of my favorite details is the faux shiplap we installed above the fireplace.


I love the texture and charm it adds to the living room. I've always dreamed of a casual, cozy space for our family to gather, and I feel like this was a step in the right direction.


Here's a little "before" action. Just drywall painted the same gray as our walls.


Now it's even lighter, brighter, and totally beautiful. And I really need a full-fireplace photo. Not gonna lie, I probably shot close up because the floor was a hot mess. But I don't really remember. Because newborns don't sleep. It's all a blur.


The best part is the whole project only cost about $15 for wood! We also had to buy nails for our nail gun (I lost that price in the newborn-blur). But we saved a few dollars on paint by using the leftover from our cabinets... which doesn't quite match exactly, but that's a problem for another pregnancy.

Thursday, February 15

Nesting Questions: Living Room Edition

Warning: I'm about to throw a whole tornado of nesting at you. You have been warned.

I shared some living room ideas and questions in my insta-stories a couple weeks ago, but thought this would be a good chance to get a little more visual aid going on plus a better way to gauge your feedback. And... ask even MORE questions because I feel like there is so much to do in here. SO...


We haven't touched the living room besides painting it when we moved in. Furniture is pretty much where we dropped it, and I hadn't hung a single thing on the walls (not even curtains) except the star above the fireplace... which I put on a nail that was already there. But now I'm nesting and IT'S TIME. So here's the rundown (I'd love to hear any thoughts in the comments!)

Let's start with a little layout to get our bearings. If you're facing the fireplace there are built-ins on the left with the tv:


And this is the wall to the right. A yard sale dresser and two nine-year old ikea chairs. Plus a bunch of random decor looking for homes.


Then we have the couch and recliner, and a long window seat under the windows to the right.

This couch was our first purchase for our first home. And it was the cheapest one Big Lots had to offer!

It's nice blank slate at the moment, but I'm ready to cozy it up! So here's the deal:

1. This dresser.
We use it as an end table and it's full of diapers and wipes. But it's in dire need of a pick-me-up coat of paint. Right now I'm thinking about black or white (neutral, and goes with everything so we can move it around the house if we want), or a deep green (to get some color in this gray room!).


I'm thinking something in this family, using leftover paint from the forest mural we painted in the boys' room.

http://one-thousandoaks.com/2016/11/10/little-explorer-boys-bedroom-reveal/

But wait, there's more! We have a pair of white Ikea chairs by the dresser that I'm considering recovering with this fabric. So take this into consideration. But don't answer yet, we also have curtains down at #5 that might totally clash with this. Whoops! And I use the word "white" loosely. They were white before we had three boys.


2. The Fireplace.
First, the mantle was already painted black when we bought the house, and it hasn't grown on me. It has a few chips where we can see that it's also been painted beige and blue at some point! So I'm thinking of wrapping it with stained wood to warm up this gray space.

Fireplace part-the-second, I want to wrap the top of the fireplace with shiplap to add a little texture and interest and Joanna.

And finally, husband wants to swap out the brass doors for black, but I don't hate the brass? I'm taking a friend's advice and withholding judgement on that one until the mantle is done, but I'd love to hear your thoughts!


3. The Seating.
This is long-term goal, but we're trying to plan for it now. We have a three seat couch and a recliner, plus a window seat and the two ikea chairs we can pull in when we need to. Which gives us four comfortable/handy seats everyday, plus a handful of extras when we need them. But we're a family of five-going-on-six. Math says we're already over our best-seating limit. We want our family to all plop down comfortably together, which has me thinking about a sectional. Maybe something like this Vimle sectional from Ikea:


But we still have some measuring and layout planning to mess around with. It's a good size room, but I don't want to make it feel small. And the recliner stays forever. I'd even love to add some throw pillows to the window seat and a couple floor cushions.... but I also know I'll have to pick them all up every.single.night. Because small boys. Guys, balancing kids vs. home decor is hard.

P.S. My husband and brother-in-law took the liberty of coming up with their own solution to the seating crisis:


4. The Lighting.
No ceiling lights. And without the Christmas tree it's basically a cave in here at night. And before you say it, I already asked and Husband says we can't leave the tree up all year. Party pooper. So I've had my eye on a couple floor lamps that could work over behind the ikea chairs:


...but I'm also thinking directional lamps like these might not do a whole lot to brighten the room, pretty as they may be, and I'm having a hard time finding an option I like with a shade. Anybody have one you love?

5. The Curtains.
Turns out I'm super curtain-picky. Which is probably why I still don't have curtains in most of the house. But I did hang an old set in the dining room that I've had since we were first married (you can see a pic of them from our first house here). I still love them, and I have one more set stashed away that I could use behind the couch. They are the leafy ones on the right. More earth toned and relaxed.

INGMARIE ikea curtains VS. old discontinued ikea curtains

But I also have new ikea love to hang in my bedroom. They're the floral pattern on the left that's a little brighter and more fun. All I know for sure is these are the only two curtains I like so I'm using one of them again. Don't try to stop me. (unless, like, you have a set of curtains you think I'll love. then go ahead and try.) You guys seem to favor the one on the right (thanks for getting involved with our posts!!) especially saying it would be nice to have the living room match the dining room. But here's the thing. I have no qualms about buying another set of the floral curtains to make the dining room match the living room if that's the better choice. So think about it, peeps.

6. A Rug
Like, should we have a rug? It sounds nice for the winter. But it also sounds harder to clean than wood floors. Here, again, is that darn children/decor balance. I'm also super rug-picky and currently have no contenders. I just know it can't be white and it can't be too modern. And I like wool.

7. The Walls
I have this print from GraceLaced framed and ready to hang behind the couch. And I have a couple ideas for above the dresser/ikea chairs:
  1. a small gallery with a DIY macrame wall hanging (from this tutorial by My French Twist), a letter board, and... something else? Maybe a pic of the kids? 
  2. OR one larger item, like this canvas map from Hobby Lobby:

Now someone tell me what to do. My nesting instinct to get this house ready (whatever that means) collides perfectly with my already indecisive tendencies. So I'm a flurry of needing to get things done but not being able to decide what to do. In the meantime I've cleaned out our entire basement.

Keep in mind my keyword here is cozy. I just want to make a warm and inviting home - one my kids love to come home to and where visitors feel welcome. But it has to have light gray walls and not be dark like a cave.

P.S. I have a great little helper who loves to pitch in. He even made me breakfast this morning.


Let me know what you think! Thanks, peeps! Here's a quick recap:
  1. The Dresser - black, white, green, or something else?
  2. The Fireplace - wood mantle? shiplap at the top? replace the cover?
  3. The Seating - sectional: yay or nay?
  4. The Lighting - black lamp, gold lamp, or keep looking for one with a shade? And I'm just going to throw this out there... Christmas lights???
  5. The Curtains - floral like the bedroom, or leaves like the dining room? Or go floral in the dining room, too?
  6. The Rug - ummm?
  7. The Walls - simple gallery or a statement piece?

Wednesday, June 29

Seamless Crown Molding with Caulk

One of the great features of our new (but very old) house is the original crown molding in the living room. We love the character and charm, but settling had caused some significant gaps around the molding. Fortunately this has been one of the easiest fixes we've tackled in the house - the problem was solved with a tube of caulk and an evening on a ladder!


See how the crown is separated from the ceiling? I mean, I know it's an old home, but this was making it look really old.


And in some places, like around the fireplace, there was a gap both above and below the crown. It looked sloppy and honestly kind of dirty. Not exactly the vibe we were going for.


So we bought a tube of molding caulk. The flexible/crack-proof promises have me hoping it will hold up long-term. But most importantly, it's a paintable caulk. I've make the mistake of using regular caulk on other projects and I'll tell you now, there is no. way. to paint that stuff. Make sure your caulk is paintable. K?


Friday, February 6

Easy DIY Branch Key Holder

Today we're looking at phase two of our entryway mini makeover. Heavy on the mini. Part one involved upping our coat rack game with more, bigger hooks (see how we did it here) but this part focuses on a much smaller problem that caused much more grief. They keys.


We've spent seven years of married life keeping our keys in a bowl. Then Baby Brother learned to climb. Nothing is safe. After countless times swiping our keys, losing them for days at a time, and setting off our car alarm (apparently we're slow learners?) we finally decided it was time to move them somewhere higher. We figured hanging them would be the best option to get them out of reach but still easily accessible for us. I looked at a few key holders but nothing felt like a good fit, so I decided to just make our own with a branch straight out of our backyard.


Here's all you need to make your own:

Wednesday, February 4

Easy DIY Coat Rack {entryway mini makeover)

We spent a little time this week on a few easy projects to upgrade our little entryway. Our "entryway" is actually just the corner of our living room (which is also our dining room and open to the kitchen) so when it looks sloppy, basically the whole house looks sloppy. Now that winter is here we've found that our few little coat hooks just were not up to the task at hand. You guys, so. many. coats. All on the floor. (you might also like our new DIY coat racks!)


So task #1 was cutting back the number of coats. That helped quite a bit. The next item on the agenda was upping the number of coat hooks so that we could each have a space for our own coats, plus a little room for guests.


But first let's review. This is how our entryway looked for the first 3 years we lived here (you can see how the whole living area was set up here).


About a year and half ago we finally spiffed it up a bit when we added a new entry table with baskets to hide the shoes (plans to build your own are here).


Cue trip to Ikea. I'd been keeping an eye out for new hooks (the ones we had originally were discontinued) so when we went to Ikea last month I made sure to check the coat rack section. It left me pretty disappointed. But then I spotted these guys in the bathroom section! Two hooks in one, room at the top for scarves or purse, and pretty to boot? I'll take six, please.


We decided this time around to attach the hooks to a board instead of straight into the wall. This gives it a more built-in look and allows us to anchor the whole board to a stud (no need to worry about plastic anchors or the hooks ripping out of the drywall). I cut two 26" pieces from a 1x6" board (of course you can do whatever size fits your space best) and Big Brother helped me paint them white. And Baby Brother kept touching the paint. If you're feeling too relaxed today, try painting indoors with small children. It's perfectly nerve wracking. Once the boards dried I attached one hook right in the middle of each board, then one about 6.5" away on either side.


My stud found a stud and used 2" drywall screws to attach the board (and made sure it was level). We added 2 more screws on the other side to make sure it won't pull away from the wall and to make it look more balanced, but the ones in the stud will be doing most of the work here.


We did two rows of the hooks so the kids can reach to hang up there own. The top set we put as high as we could comfortably reach, and the bottom set we put high enough that the boys' coats wouldn't drag on the ground (and tried to keep them low enough that they weren't totally inaccessible behind our coats).


It's looking much better... but how will it look with those rowdy coats?


They boys' hooks are working perfectly. Big Brother loves having his own hook with a special spot for his scarf.


And even our coats are pretty neat and contained. Whew.


Do you have an actual entryway or do you have to squeeze it in a corner too? What are your favorite ways to keep it tidy and organized?
Subscribe