
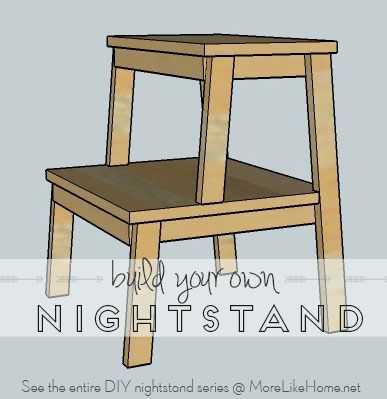
We're already on day twelve of our nightstand series! If you need to catch up you can check out the entire series here. Today's plan is for a unique, open storage design. It's easy to build, affordable, and a great way to add a little fun style to your room.

This is not an actual step stool and I do not recommend letting it bear your weight!
I spotted a step stool being used as a nightstand in the 2015 Ikea catalog and loved the idea, but not the small shelf provided by the bottom step. I altered the design in my plan to feature a full-depth bottom shelf so there's no worry of books tipping off such a narrow ledge.
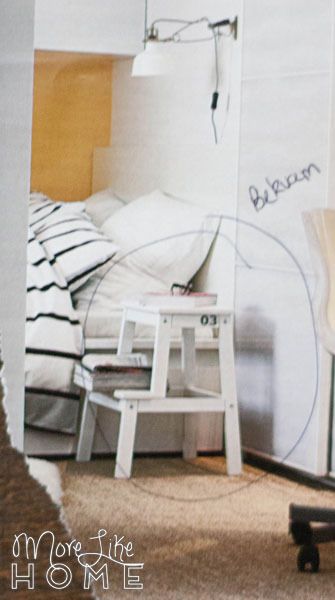
image via Ikea catalog
Shopping List:
2 - 1x2 @ 8'
3/4" plywood (look for a small "project board" 3x3' or 2x4' because you don't need very much)
wood filler
wood glue
1 1/4" screws
2" screws
Kreg Jig with 1 1/4" and 2 1/2" pocket screws (optional)
Finished Dimensions: 17" wide x 19 1/2" tall x 16" deep

Remember to always double check your measurements before you cut. Use 1 1/4" screws unless otherwise indicated. Pre-drill your holes and countersink your screws. Always use glue before you screw the boards together (you don't have to let it dry first), I'm not going to list it in every step, but it's a good idea to glue everything! Be safe, and have fun!
Cut List:
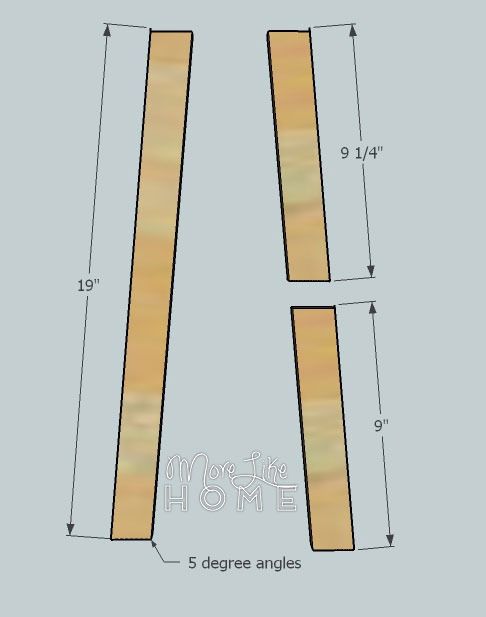
(A) 2 - 1x2 @ 19" (back legs)
(B) 2 - 1x2 @ 9 1/4" (front leg A)
(C) 2 - 1x2 @ 9" (front leg B)
(D) 4 - 2x2 @ 15 1/2" (front/back trim)
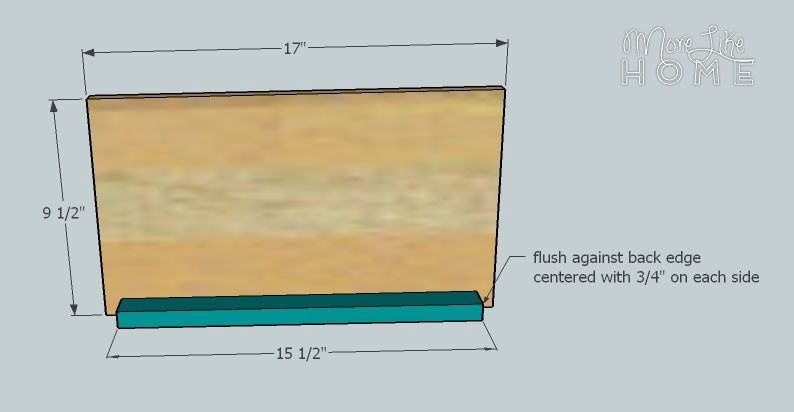
(E) 1 - plywood @ 17 x 9 1/2" (top shelf)
(F) 2 - 1x2 @ 7 3/4" (side trim top)
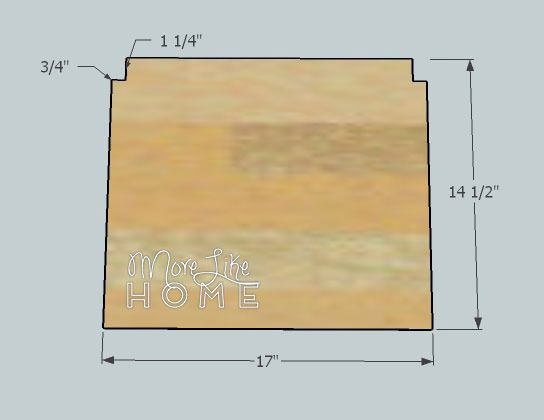
(G) 1 - plywood @ 17 x 14 1/2" (bottom shelf)
(H) 2 - 1x2 @ 12 3/4" (side trim bottom)
Start by cutting the ends of each leg board (A, B, C) at a 5 degree angle. Make sure the cuts are parallel (like this /=/).
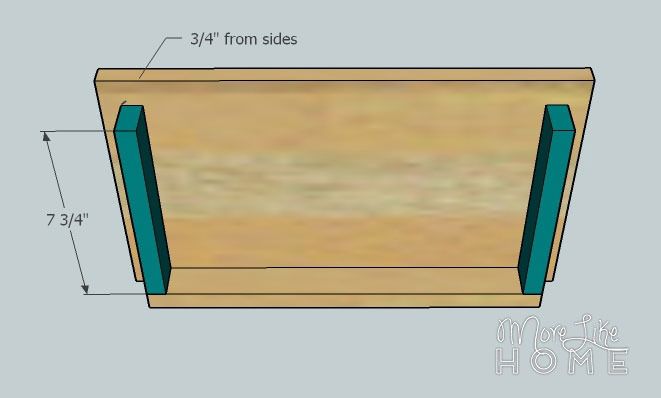
Attach the back trim board (D) to the top shelf (E). It should be flush against the back edge and centered with 3/4" space on each side. You can use 2" screws to drill up through the trim into the shelf, or 1 1/4" screws to drill down through the shelf into the trim. 2" screws are a little trickier to wrangle, but you won't have any holes to fill on top that way.
Attach the top side trim (F) in the same way. They should be set in 3/4" from the outside edges of the shelf, which will make them flush with the outside edges of the back trim. You could also drill through the back trim into the ends of the side trim for good measure.
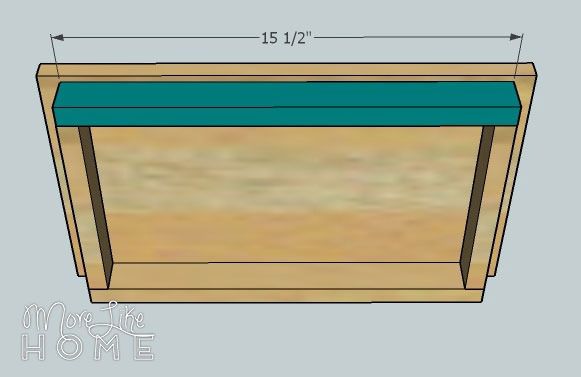
Attach a front trim board (D) across the front ends of the side trim. Attach it the same way you did the back & side trim, plus add a screw through the front trim into the side trim for good measure.
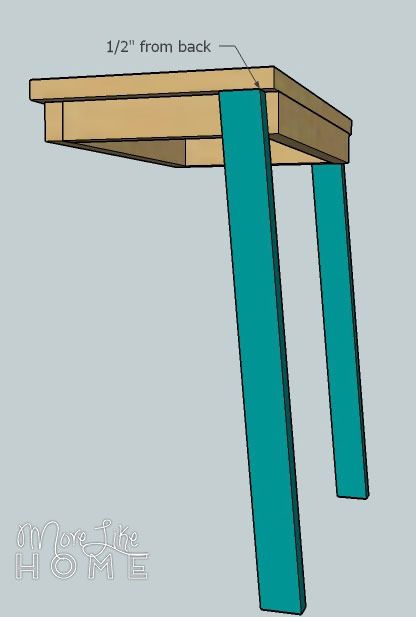
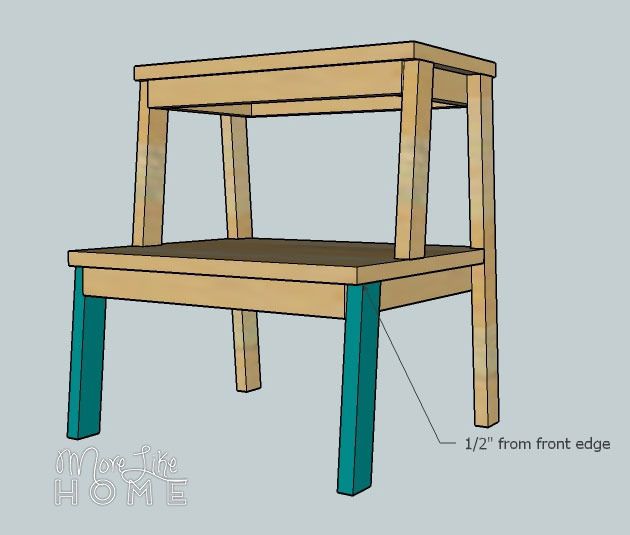
Attach the back legs (A) as shown in the picture below. Make sure the legs point back, and set each leg in 1/2" from the back edge of the top shelf. Drill through each leg into the side trim.
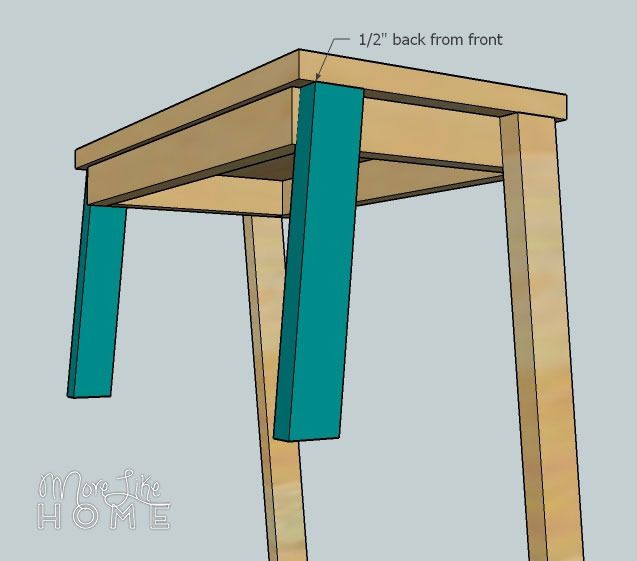
Attach the top front legs (B) the same way, but make sure they point forward and are set back 1/2" from the front edge of the top shelf.
Use a reciprocating saw (or you could very carefully use a circular saw) to notch out the back corners of the bottom shelf (G). The notches should reach in 1 1/4" from the back and 3/4" from the sides.
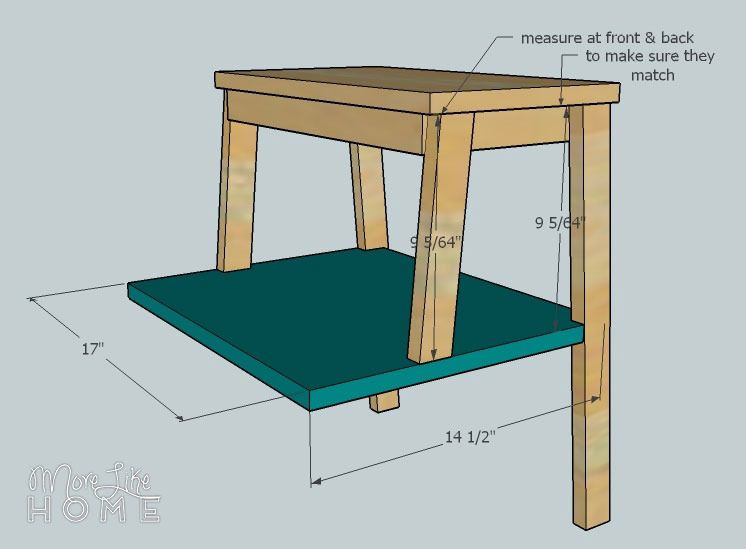
The notched shelf should slip into the parts of the table you've assembled so far. The notches hold the back legs, and the front legs sit on top of the shelf (see pic below). To make sure the shelf ends up level, measure the distance between the shelves at the front and back of the top shelf and make sure the measurements match. Attach the shelf by drilling up through the bottom of the shelf into each front leg, then drill through the side of each back leg into the side of the shelf.
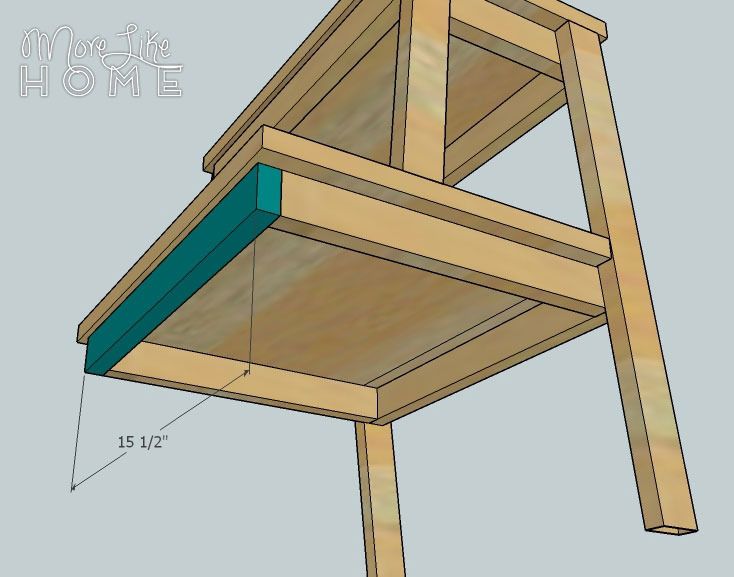
Attach another back trim (D) between the back legs, right under the shelf. The back edge of the trim should be flush with the back edge of the shelf. Attach it the same way to attached the trim for the top shelf.
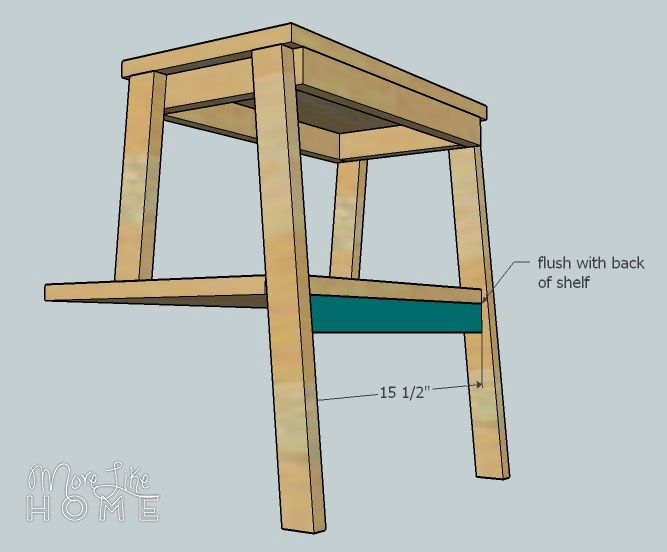
Attach the bottom side trim (H) the same way, making sure it is set in 3/4" from the sides of the bottom shelf.

Attach the final front trim (D) the same way you did for the top shelf.
Now attach the second set of front legs (C). Make sure they point forward and set them back 1/2" from the front edge of the bottom shelf. Drill through the legs into the side trim.
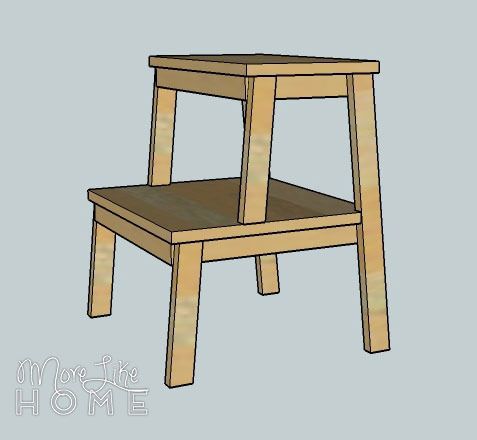
Your finished nightstand will look like this. It's also great as and end table or for stacking shoes and bags by the front door! Don't have a miter saw to make the angle cuts? Or just don't want to? No problem. Keeping the legs straight is an easy way to change the look of the nightstand for even more style options.
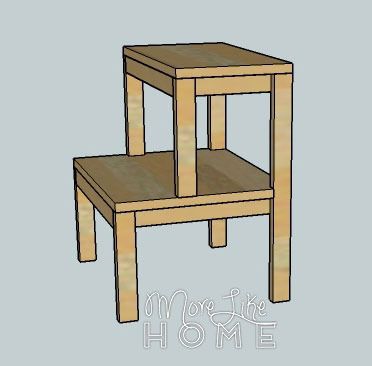
You can follow skip step one (so your legs will be straight instead of angled) and follow the plans as written to end up with a slightly different design:
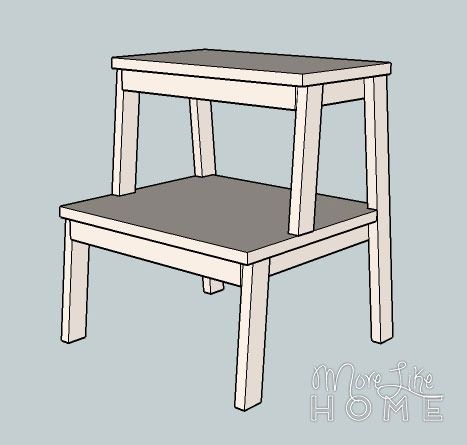
Once the building is done, you just have to finish it! Start by filling any holes with wood filler. Let it dry, then sand it smooth (repeat if necessary). Then sand the whole table smooth for a great finished product (a good sanding can be the difference between looking professional vs. crafty). Then finish with any paint or stain and polyurethane you like. You probably know by now that I favor the clean white of the Ikea catalog, but have fun and make it yours!
We only have 6 days left, but some of my favorite plans are still coming up! It's going to be fun!

No comments:
Post a Comment