
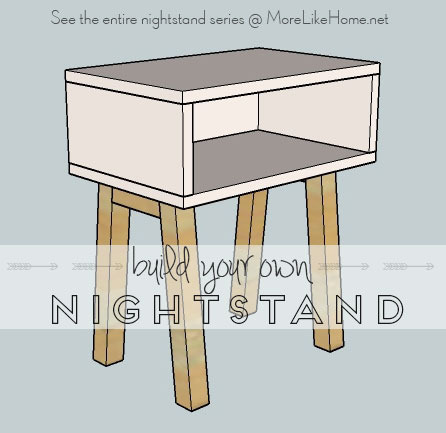
Welcome to day one of our nightstand series! You can see the entire series here. We're starting with something that is easy to build and has a simple, modern style. And you can totally change the style just by switching up the legs!
P.S. Now you can build a matching coffee table, too!

You can choose a tapered leg for a mid-century modern look (check etsy or ebay).
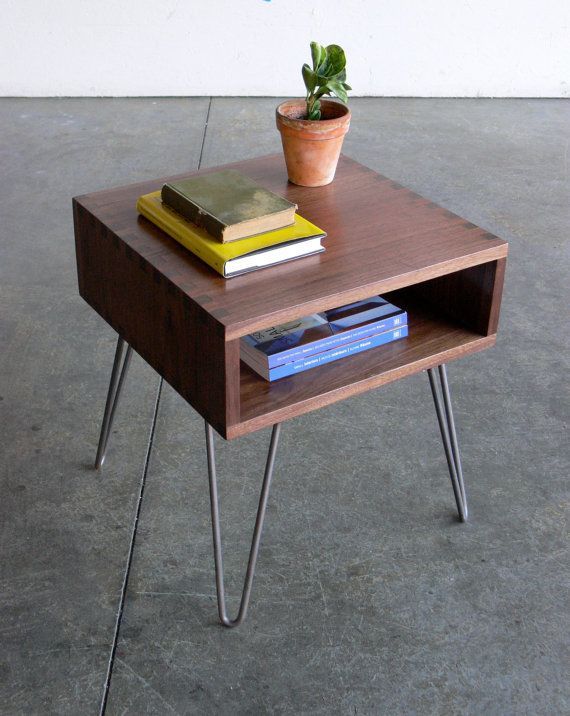
via pinterest
Our base plan will use simple 2x2 legs because they are much more affordable, and you can get them anywhere. But feel free to have fun and mix it up!
Shopping List:
1 - 1x6 @ 4'
1 - 1x12 @ 4'
1 - 2x2 @ 6' OR a set of legs about 14" tall
wood filler
wood glue
1 1/4" screws
2" screws
Kreg Jig with 1 1/4" and 2 1/2" pocket screws (optional)
finishing nails (optional)
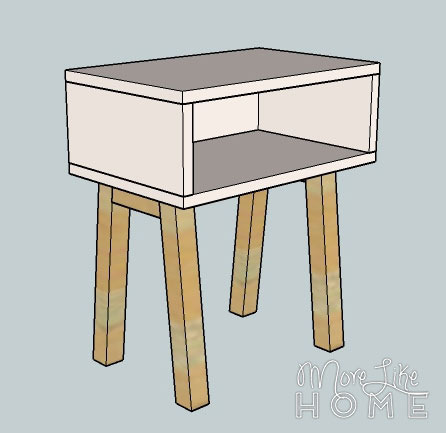
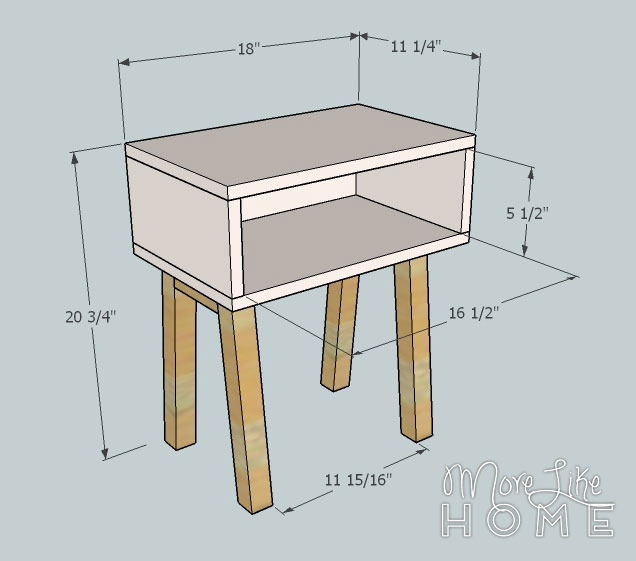
Overall dimensions for this table are 18" wide x 20 3/4" tall x 11 1/4" deep. If you need a different height you can adjust the length of the legs to get a good fit for your bed.
Remember to always double check your measurements before you cut. Use 1 1/4" screws unless otherwise indicated. Pre-drill your holes and countersink your screws. Always use glue before you screw the boards together (you don't have to let it dry first), I'm not going to list it in every step, but it's a good idea to glue everything! Be safe, and have fun!
Cut List:
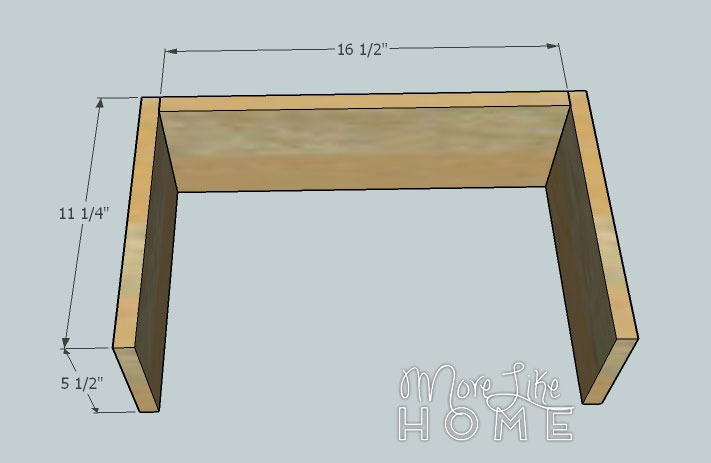
(A) 1 - 1x6 @ 16 1/2" (back)
(B) 2 - 1x6 @ 11 1/4" (sides)
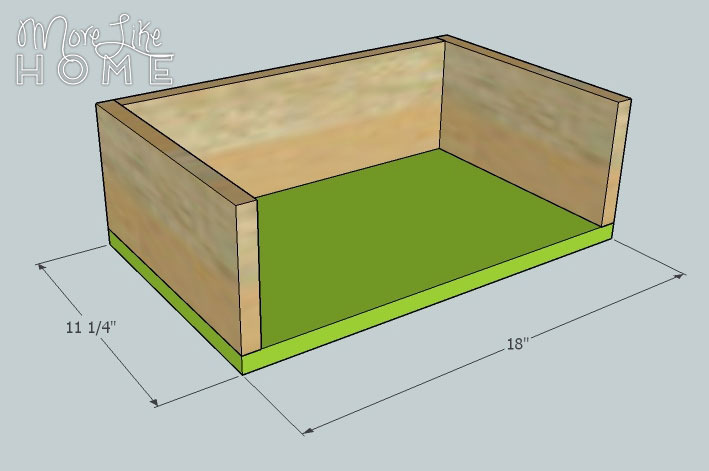
(C) 2 - 1x12 @ 18" (bottom & top)
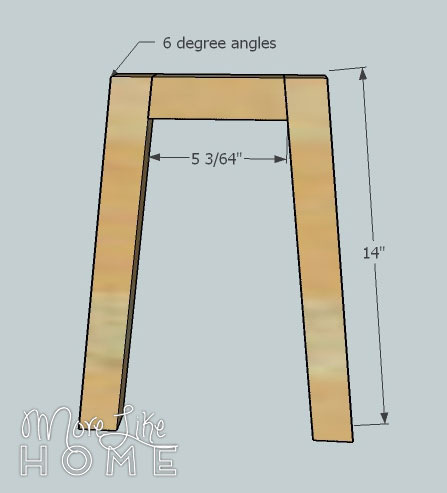
(D) 4 - 2x2 @ 14" (legs)
(E) 2 - 2x2 @ 5 1/8" (trim)
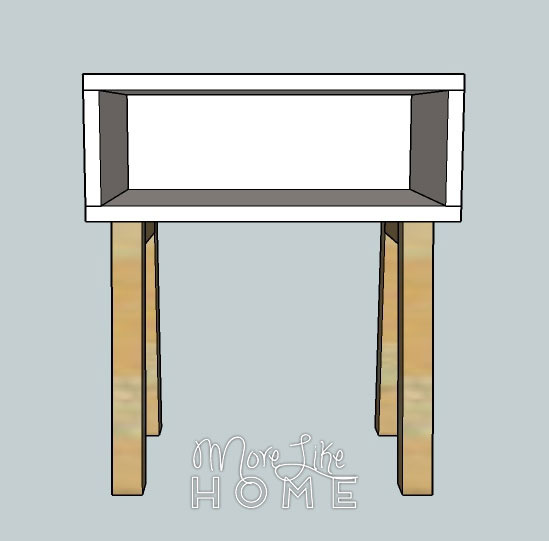
Start by attaching a side board (B) to each end of the back board (A) like this. You can use a Kreg Jig, or drill through the side boards into the ends of the back board.
Next attach the bottom board (C). It should be flush with the sides and back. Attach it using a Kreg Jig or by drilling up through the bottom into the sides and back.
Next prepare the legs. Start by cutting the end of each leg (D) off at a 6 degree angle (I know, it's a funny amount). Make sure the ends are cut parallel, like this /=/, not this /=\.
Now cut the ends of each trim piece at a 6 degree angle. This time you do NOT want them parallel, so it should be like this /=\.

Now you can assemble each leg unit. Attach one leg on each side of the trim piece like in the picture below. Make sure it is totally flush across the top. You can use a Kreg Jig with 2 1/2" screws, or drill through each leg into the trim piece using 2" screws (don't forget the glue!!).
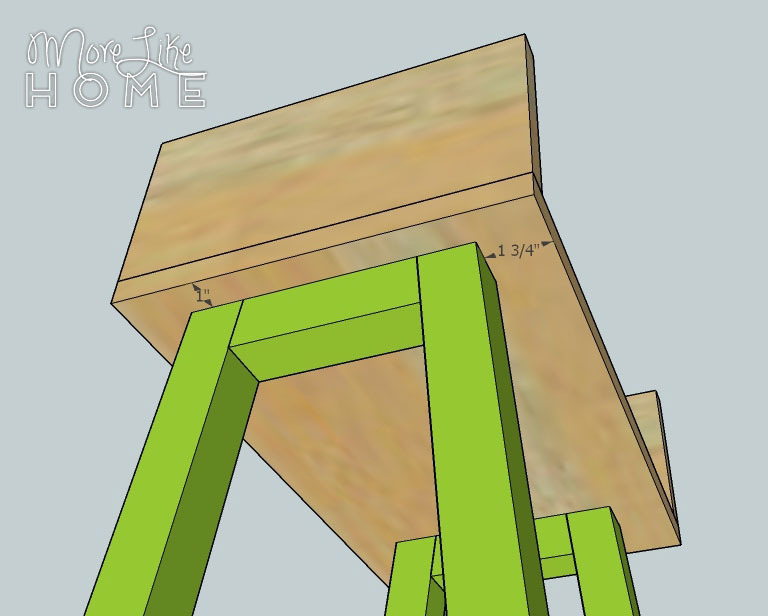
Attach each leg unit to the bottom of the nightstand. Each unit should be set in 1" from the side and 1.75" from the front edge. Drill down through the bottom board into the legs and trim pieces (be careful not to hit the screws holding the leg units together).
Finally attach the top (C) by drilling down through the top into the sides and back. It should be flush all around the outside. You can use finishing nails instead if you want a cleaner finished looks because it won't leave any big holes to fill.
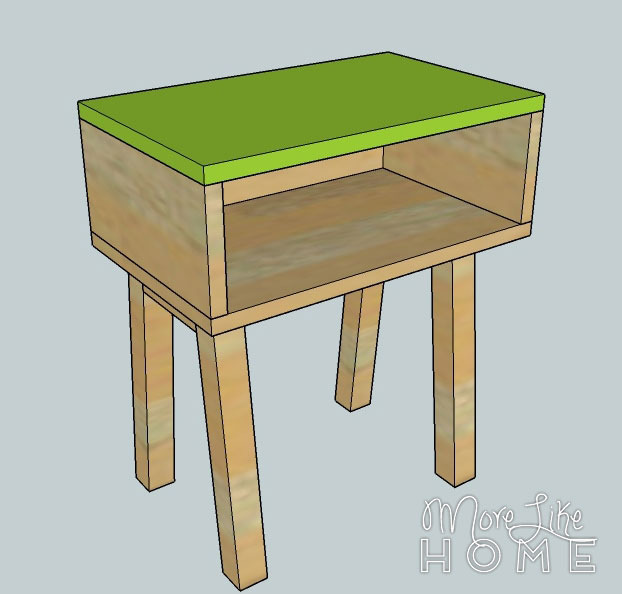
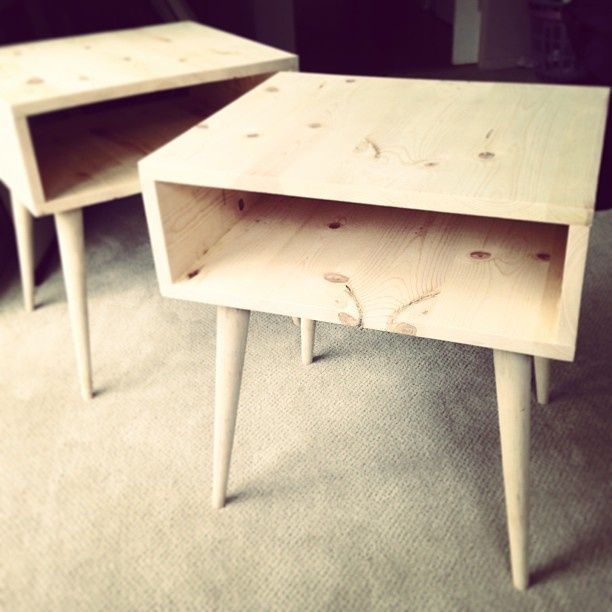
The building is done, now you just have to finish it! Start by filling any holes with wood filler. Let it dry, then sand it smooth (repeat if necessary). Then sand the whole table smooth for a great finished product (a good sanding can be the difference between looking professional vs. crafty). Then finish with any paint or stain and polyurethane you like. I'm digging the two-tone look with a white painted top and clear poly on natural wood legs. How about you?
Stay tuned - we have 17 more days of DIY nightstands coming up!

Any tips or workaround if I don't want to see screws at the top or kreg jig holes inside the side panels?
ReplyDeleteThanks!
Sure! One option would be using small finishing nails instead of screws because they pretty much hide themselves. You're other option would be using wood filler to either fill the Kreg holes, or to countersink screws from the top and use wood filler to fill in those holes. Make sure you get a stainable kind if you will be staining instead of painting!
Deleteim going to make this for my final project for woods class
ReplyDeleteSounds great! I'd love to see how it turns out! :)
DeleteMe too!!
DeleteI read this article from Anna-white, and just bought 18mm blockboard and some woods for the legs.. Looking forward to make this nightstand desk..
ReplyDeleteI'd love to see how it turns out! Good luck! :)
DeleteI made it.. Sorry for the late reply.. Check this out.. https://www.instagram.com/p/Bak-7J-hsTN/
DeleteI also plan to use this to teach basic sketchup for my woodworking community.. Thanks, I love this very much
It looks great! Thanks for sharing. :) I'm glad you like it!
DeleteIs the materials list for one or two night stands?
ReplyDeleteHi! The list is for one night stand, but you may have some scraps leftover that could contribute to a second. :)
DeleteAwesome direction, seems easy enough for even someone like me with minimum carpentry skills. One question though, the bed i'm making this for is a tall bed. Therefore I will be adding another 4-6inches on the legs, will that change the 6 degree angle cut or would it stay the same.
ReplyDeleteYou can definitely keep it at the same angle. The bottom of the legs will reach a smidgen farther toward the front and back. It should still work out just fine! Good luck!
DeleteI would strongly recommend to use dowels and glue to put this nightstand together. I remade the whole thing because the counter-sunk screws were too egregious.
ReplyDeleteThat would definitely look better! Just trying to keep the plans simple for people who don't have the experience or tools for dowels yet. :)
Deleteis there a way to add a drawer to this? what would be dimensions?
ReplyDeleteDefinitely! For this guy I would just build a super simple box drawer and skip the drawer slides since it's so small. Dimensions for that would be:
Delete16 1/4 x 5 3/8" (cut two for the front & back)
9 x 5 3/8" (cut two for the sides)
14 3/4 x 9" (cut one for the bottom)
Attach the sides to the bottom, then attach the front and back.
Have fun! :)
Can I use 1x2 for legs, will it still hold the weight ?
ReplyDeleteyou might consider a lower apron rail to keep legs from "wobbling or jumping when its used. It will hold the weight. another option is hardwood that is more structurally stronger.
DeleteYou could also glue two pieces of 1x2 if you have enough laying around.
Deletesimple and excelent. I will make it for my young daughter
ReplyDeleteHave fun!
Deletewhat is the measurement unit on this woodwork?
ReplyDeleteHi, it's all in inches. :)
DeleteWhat type of wood did you use?
ReplyDeletehow much did this cost
ReplyDelete