

It's day thirteen of our nightstand series - welcome back! You can see the entire series here. Today's plan is much deeper than any of our plans thus far, so it's a great option if you need more storage and have limited wall space beside the bed. Plus it has a secret - a hidden shelf inside the drawer! It's a great place to stash your books out of sight, or you can even run a power cord in through the back for a hidden charging station.

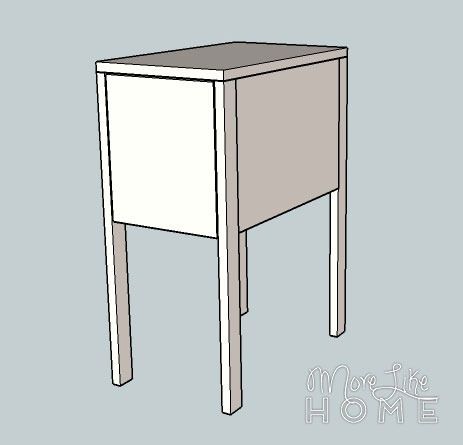
This nightstand was inspired by another Ikea find. We'll be sharing two design options in our plans - individual legs or solid sides. It's on the taller end of our nightstand designs, but you can easily adjust the height by shortening the legs if needed.

Shopping List:
1 - 1x12 @ 8'
1 - 1x2 @ 10' OR 3/4" plywood for solid sides
1 - 1x8 @ 4'
1 - 1x6 @ 4'
1 set 16" side-mount drawer slides
wood filler
wood glue
1 1/4" screws
2" screws
Kreg Jig with 1 1/4" pocket screws (optional)
finishing nails
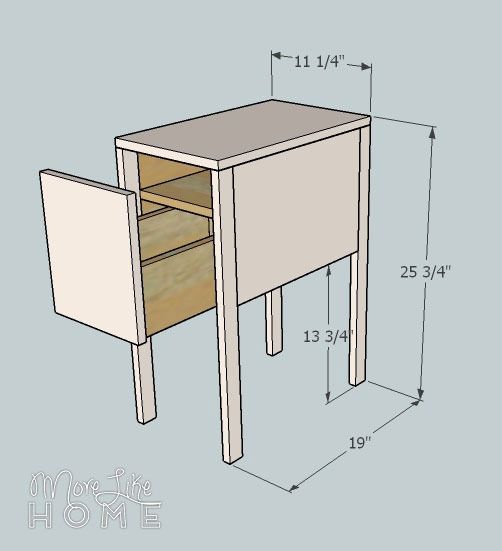
Finished Dimensions: 11 1/4" wide x 25 3/4" tall x 19" deep
Remember to always double check your measurements before you cut. Use 1 1/4" screws unless otherwise indicated. Pre-drill your holes and countersink your screws. Always use glue before you screw the boards together (you don't have to let it dry first), I'm not going to list it in every step, but it's a good idea to glue everything! Be safe, and have fun!
Cut List:
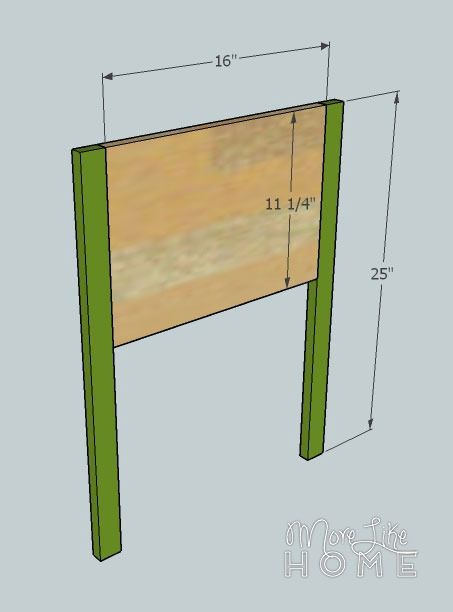
(A) 2 - 1x12 @ 16" (sides)
(B) 4 - 1x2 @ 25" (legs)
OR two pieces of plywood @ 19 x 25 3/4" in place of the sides and legs
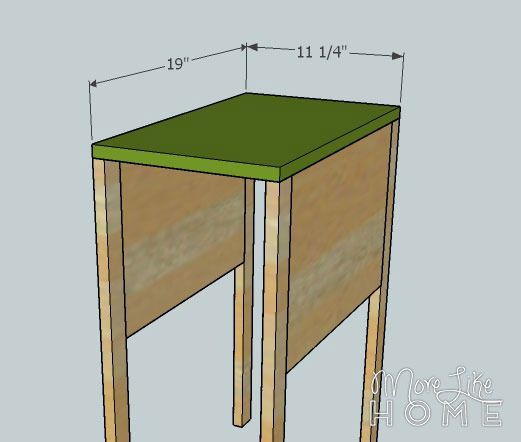
(C) 1 - 1x12 @ 19" (top)
(D) 1 - 1x12 @ 9 3/4 x 16" (shelf)
(E) 1 - 1x8 @ 9 3/4" (back)
(F) 1 - 1x8 @ 15 1/4" (drawer bottom)
(G) 1 - 1x6 @ 7 1/4" (drawer back)
(H) 2 - 1x6 @ 16" (drawer sides)
(I) 1 - 1x12 @ 9 1/2" (drawer front)
Start by attaching one leg (B) on each end of the side boards (A). Keep the top and sides flush. Attach with a Kreg Jig or by drilling through the legs into the sides with 2" screws. You'll end up with two side units like the one pictured below. If you're doing solid sides, you will use one plywood side in place of each of these units.
Attach the top board (C) across the top of the side units. All the outside edges should be flush. Use a Kreg Jig or drill down through the top into the sides and legs.
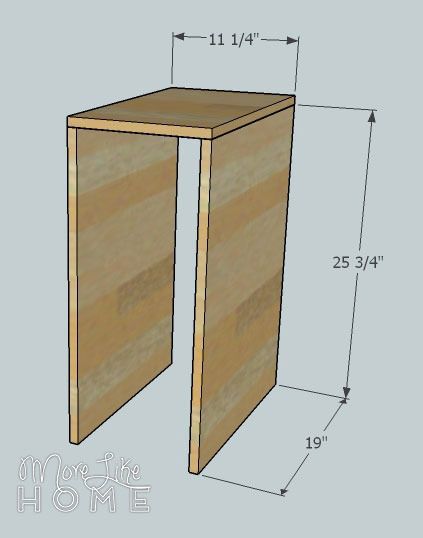
If you're using solid sides it will look like the picture below. The rest of the diagrams will use the side units shown above, but you can follow the same steps using the solid-side design.
The shelf (D) will slip between the two sides of the nightstand. Cut a piece of 1x12 down to 16 x 9 3/4" (or if you're using plywood sides you could cut some extra plywood down to size instead). This will make a shelf that stops just inside the legs in the front and back. Set the shelf down 3 3/4" from the top board and attach it using a Kreg Jig or by drilling through the sides of the nightstand into the sides of the shelf.
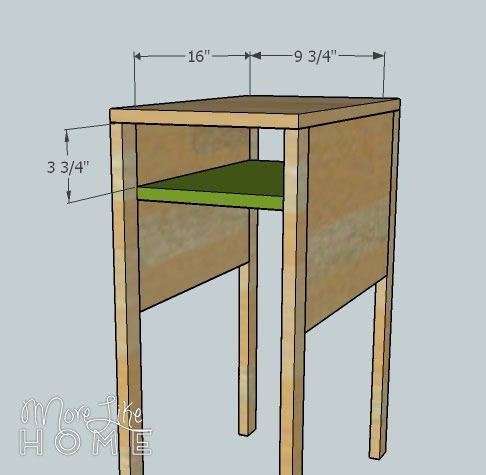
Install the back board (E) on the back side of the nightstand, flush with the top edge of the shelf. It will be set in 3/4" from the back of the nightstand. Attach it with a Kreg Jig or by drilling through the legs into the back board, and through the back board into the shelf. The drawing shows the back board height at 7 1/2" but it's actually 7 1/4." Sorry!
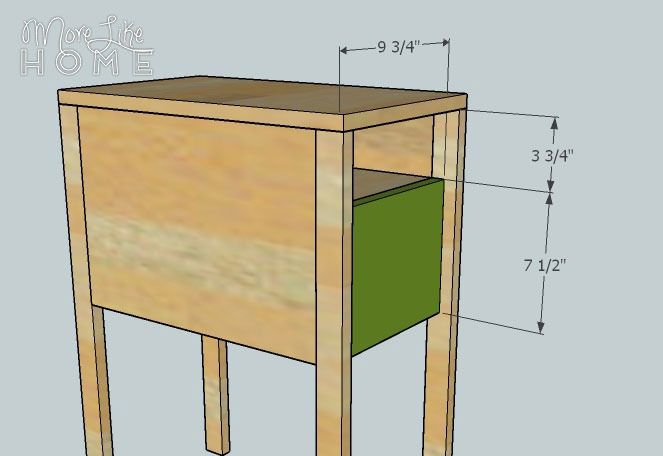
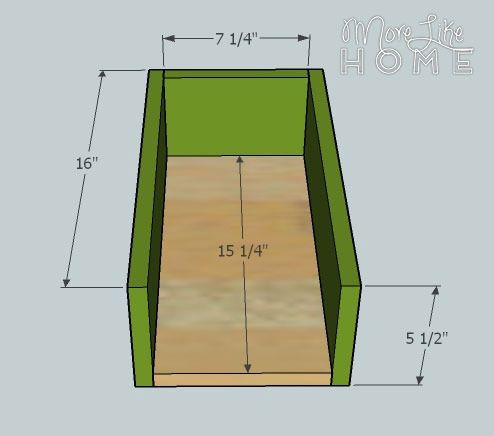
To build the drawer box, start by cutting a piece of 1x12 or plywood down to 7 1/4 x 15 1/4" to make the drawer bottom (F). Then attach the drawer back (G) to the back edge of the drawer bottom using a Kreg Jig or by drilling through the drawer back into the drawer bottom. Then attach the drawer sides, keeping all the edges flush, using a Kreg Jig or by drilling through the sides into the drawer back and bottom. Double check the opening of your nightstand first. Most drawer slides require the drawer box to be 1" narrower than the opening.
Follow the instructions on your drawer slides to install the drawer box. The box should end up recessed 3/4" from the face of the nightstand to ensure your drawer front ends up flush in the next step.

Set the drawer front (I) in place over the drawer box. Center it with 1/8" gap above and on each side (it should be flush with the face of the cabinet if you recessed your drawer box in the previous step). Use finishing nails and glue to attach the drawer front to the drawer box. It may help to trace the drawer box on the face of the drawer front first so you have an idea of where to nail. You can reinforce the drawer front with a Kreg Jig.

If you prefer you can add a drawer pull to the front (remove it before painting), or for a more streamlined look you can omit the drawer pull and use the lip at the bottom of the drawer front to open the drawer.
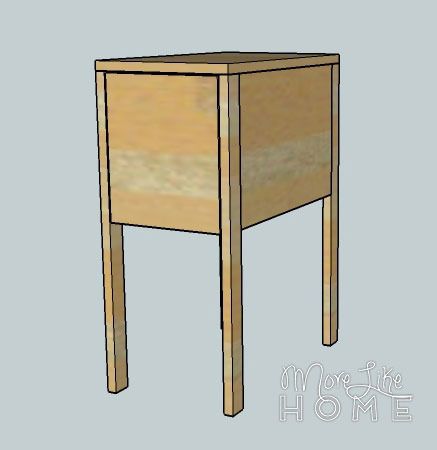
Once the building is done, all you just have to finish it! Start by filling any holes with wood filler. Let it dry, then sand it smooth (repeat if necessary). Then sand the whole table smooth for a great finished product (a good sanding can be the difference between looking professional vs. crafty). Then finish with any paint or stain and polyurethane you like.
I like leaving the drawer box and interior of the nightstand natural wood finished with a clear poly. It gives it nice contrast when you open the drawer.

We have five more days of DIY nightstands coming up! What's your favorite so far?

Is there a picture of the actual finished product? This looks good, I just want to get an idea of how it looks in a space.
ReplyDelete