
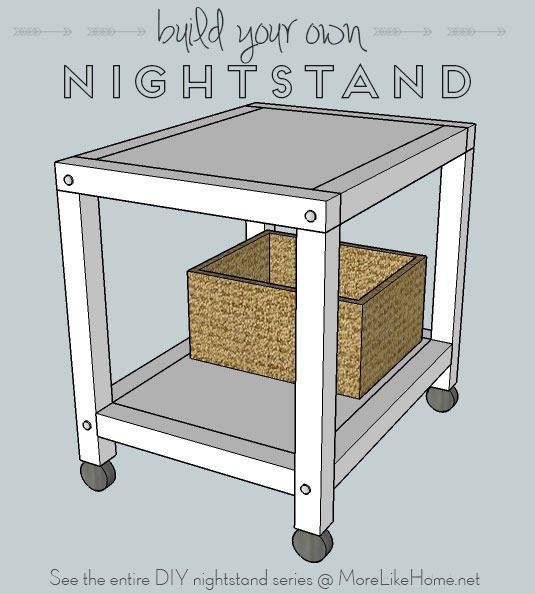
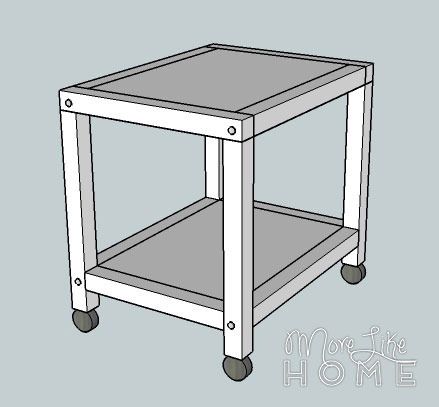
We're already on day six of our nightstand series! You can see the entire series here. Today's plan is for an open cart on wheels. It's great as a nightstand, but would also work for an end table or even a printer cart in your home office! Add a big basket underneath for more storage.

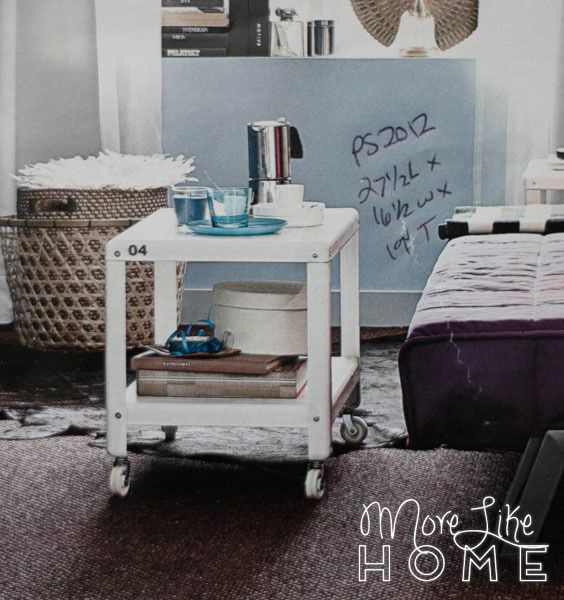
This plan is a based on a coffee table from the 2015 Ikea catalog (I like their catalog, okay?!) adjusted to nightstand dimensions. You can easily size-up these plans to make a coffee table instead.
Shopping List:
2 - 2x2 @ 8'
3/4" plywood
4 casters
wood filler
wood glue
1 1/4" screws
2" screws
Kreg Jig with 1 1/4" and 2 1/2" pocket screws (optional)
finishing nails (optional)
Remember to always double check your measurements before you cut. Use 1 1/4" screws unless otherwise indicated. Pre-drill your holes and countersink your screws. Always use glue before you screw the boards together (you don't have to let it dry first), I'm not going to list it in every step, but it's a good idea to glue everything! Be safe, and have fun!
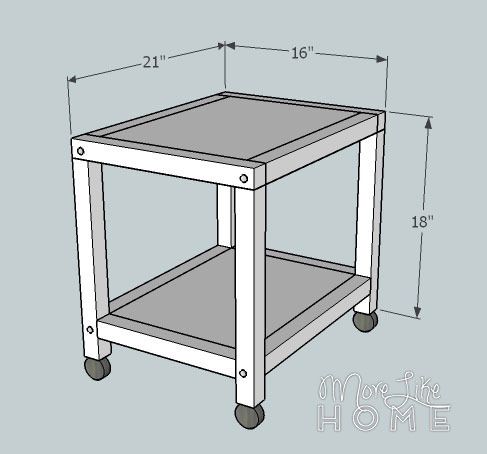
Cut List:
(A) 4 - 2x2 @ 16 1/2" (legs)
(B) 2 - 2x2 @ 16" (top trim)
(C) 2 - 2x2 @ 13" (bottom trim)
(D) 4 - 2x2 @ 18" (sides)
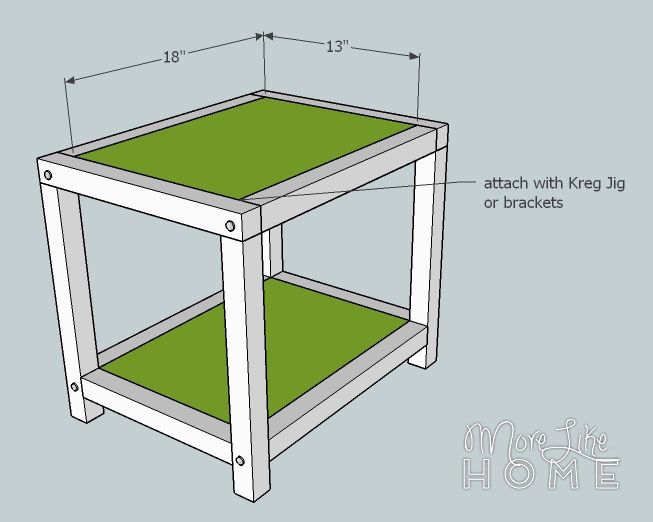
(E) plywood @ 18 x 13" (shelves)
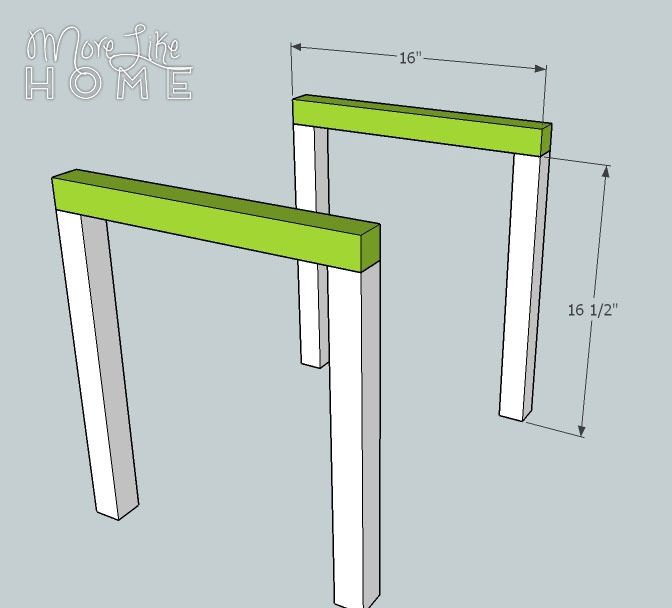
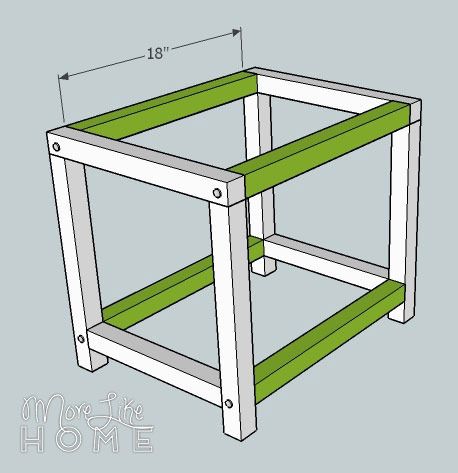
Start by attaching the top trim (B) across two of the legs (A) to create two leg sections. Keep the outside edges flush. Use a Kreg Jig or drill through the trim into the tops of the legs.
Add a piece of bottom trim (C) between the legs of each section. It should be flush with the front and back edges and set up 2" from the bottom of the legs. Use a Kreg Jig or drill through the legs into the ends of the trim pieces.
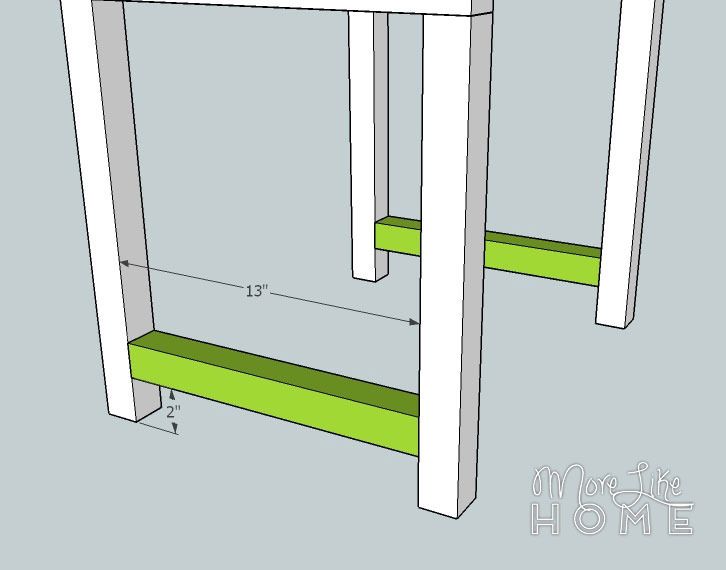
Use the side pieces (D) to connect the two leg sections. On each side, one board should be flush with the top edge and another should be set up 2" from the bottom of the legs (level with the bottom trim). Use a Kreg Jig or drill through the top trim and legs into the side boards.
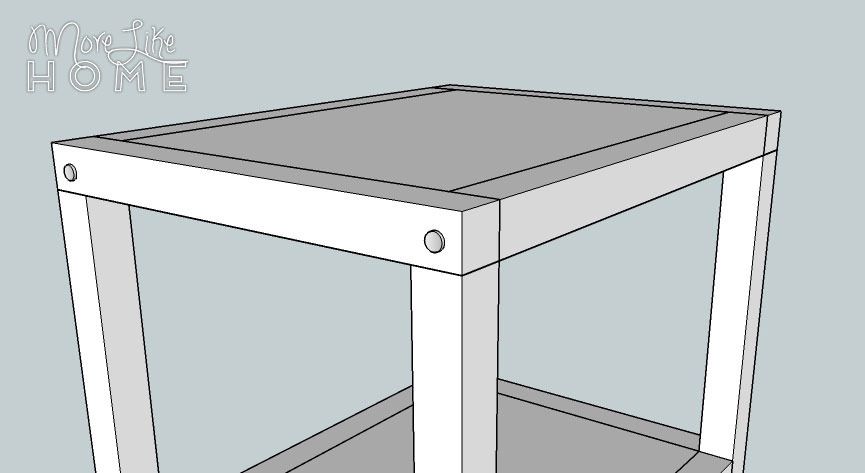
To get the more industrial style of the inspiration table you can use something with a large bolt head for these joints (or if you use a Kreg Jig just add a really short bolt for looks).
Once the frame is done you can install the shelves. The top shelf should be flush with the top of the table, and the bottom shelf should be flush with the top edges of the side and trim boards. The easiest way to attach the shelves is with a Kreg Jig, but you could also use small brackets or a piece of 3/4" trim to create a lip for the shelves to sit on (we did this with our coffee table before we owned a Kreg Jig)
The building is done, now you just have to finish it! Start by filling any holes with wood filler. Let it dry, then sand it smooth (repeat if necessary). Then sand the whole table smooth for a great finished product (a good sanding can be the difference between looking professional vs. crafty). Then finish with any paint or stain and polyurethane you like.
Follow the directions with your casters to attach them to the legs of your nightstand.
We still have 12 more days of DIY nightstands coming up, and tomorrow's plans feature casters again!

No comments:
Post a Comment