
P.S. Check out the rest of our free DIY Desk Plan Series here!
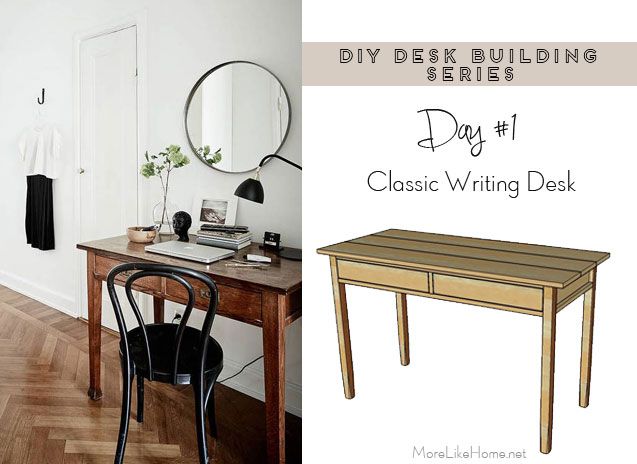
These plans are based on this sweet desk-space I spotted on pinterest. Clean, charming, and full of character. I love a little black and white with my wood, so this won me over in an instant.

Shopping List:
1 - 2x2 @ 10'
2 - 1x2 @ 8'
1 - 1x2 @ 4'
1 - 1x4 @ 6'
1 - 1x8 @ 8'
1 - 1x8 @ 6'
1 - 1x3 @ 10'
1/2 sheet of plywood, or plywood scraps for drawer bottoms - 1/4 - 1/2" thick
2 sets of 16" side-mount drawer slides (full-extensions slides are worth the splurge, and usually include a quiet-close feature!)
2 drawer pulls
wood glue
1 1/4" screws
2" screws
finishing nails
Kreg Jig with 1 1/4" pocket hole screws
wood filler & finishing supplies
Cut List:
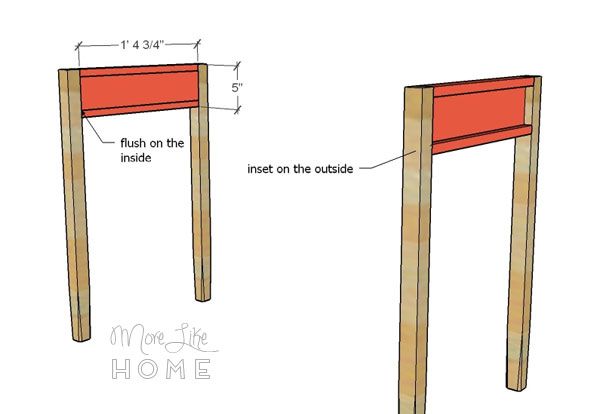
(A) 4 - 2x2 @ 29 1/4" (legs)
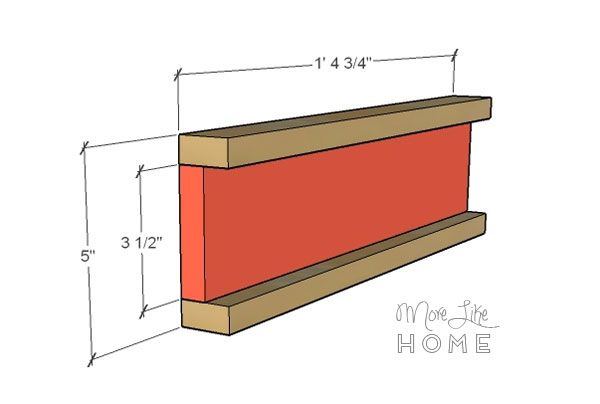
(B) 4 - 1x2 @ 16 3/4" (side trim)
(C) 2 - 1x4 @ 16 3/4" (side)
(D) 2 - 1x2 @ 41" (back trim)
(E) 1 - 1x4 @ 41" (back)
(F) 2 - 1x2 @ 41" (front trim)
(G) 1 - 1x2 @ 3 3/4" (divider trim)
(H) 1 - 1x8 cut down to 16 3/4 x 5" (drawer divider)
(I) 3 - 1x8 @ 48" (top)
(J) 4 - 1x3 @ 16" (drawer sides)
(K) 2 - 1x3 @ 19 1/8" (drawer back)
(L) 2 - plywood @ 19 1/8 x 16 3/4" (drawer bottom)
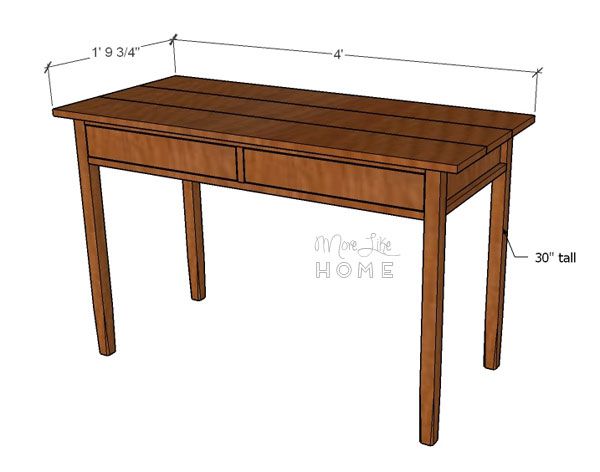
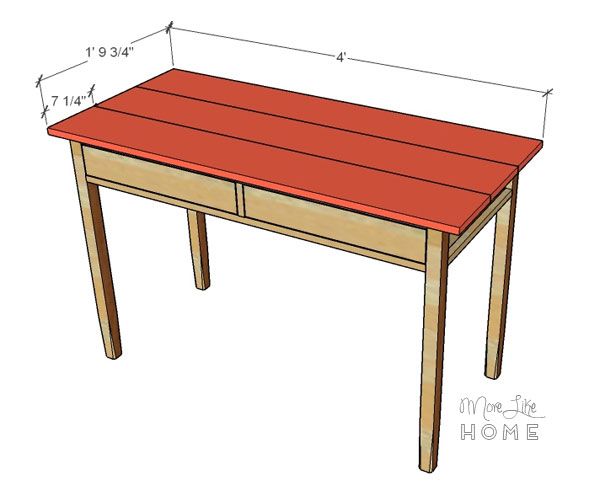
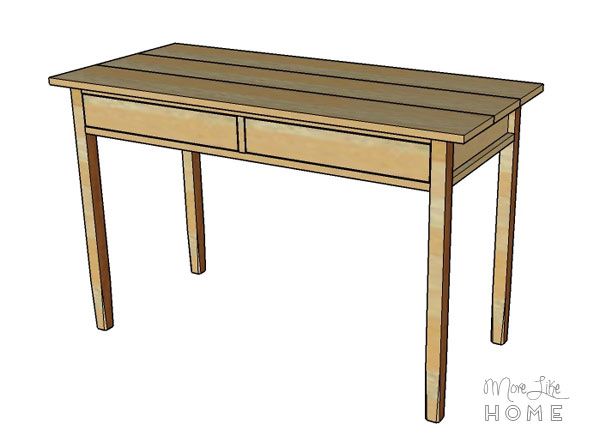
Finished dimensions are 48" wide x 21 3/4" deep x 30" tall
Measure twice, cut once (seriously, though). Use glue in every step. Read through all the
instructions before you begin. Use 1 1/4" screws unless otherwise indicated. Pre-drill and countersink all your screws. Be safe, have fun, and let me know if
you have any questions!
Optional: You can start by giving the legs a slight taper if you'd like. Use a circular saw to shave a little off the bottom corners of each leg

Attach two trim pieces (B) to each side piece (C). The outside edges should be flush as shown below. Drill through the trim pieces into the edges of the side piece, or use the Kreg Jig.
Attach two legs to each of the side pieces you just built. You can drill through the legs into the ends of the side pieces with 2" screws, or use the Kreg Jig (with the Kreg you won't have any visible holes in the legs when you are done!)
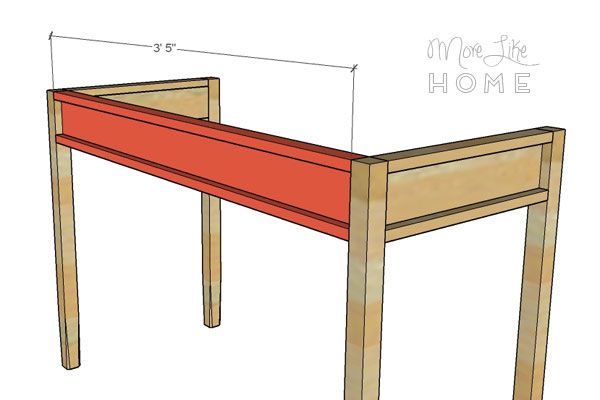
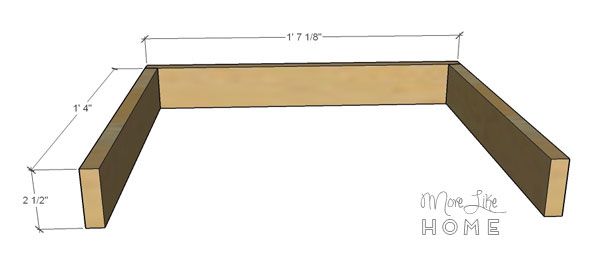
Build the back section by attach the back trim pieces (D) to the back piece (E) the same way you built the side sections.

Use the back section to connect the two leg sections you built. Make sure the leg sections and back section are all turned so the flush sides are facing in toward the center of the desk, and the inset faces are facing out. Attach this section the same way you attached the side sections.
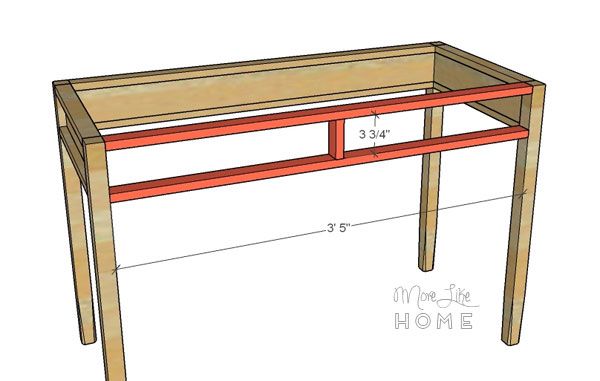
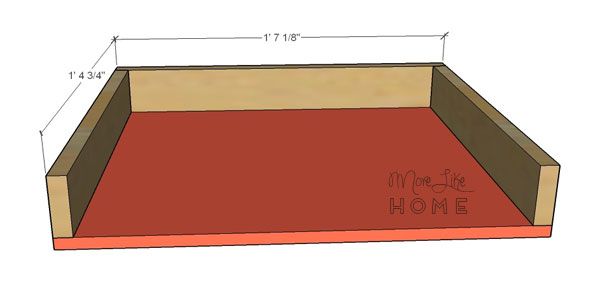
Install the front trim pieces (F). Again, you can drill through the legs into the ends of the trim pieces with 2" screws, or use the Kreg Jig to attach them. The top piece should be flush with the top of the legs, and the bottom piece should be set down with 3 3/4" gap from the top trim piece.
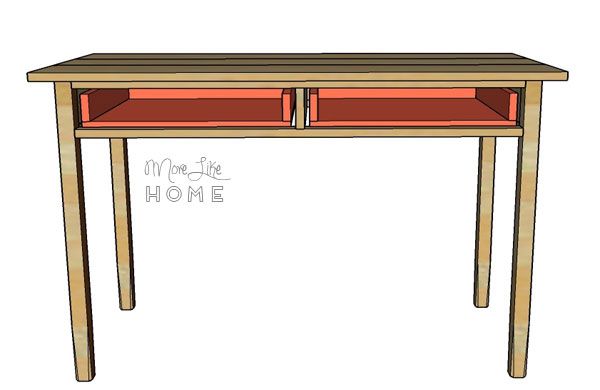
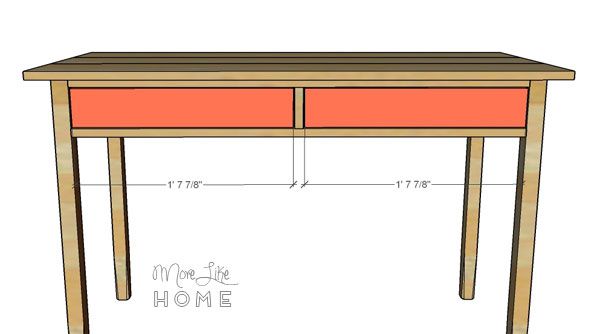
Next install the divider trim (G). This needs to be centered on the opening with 20 1/8" gap on either side. Mark the distances on both the top and bottom trim pieces to make sure the divider trim is standing straight. Attach it by drilling through the top and bottom trim pieces into the ends of the divider trim (you won't be able to get in this narrow space with a Kreg).
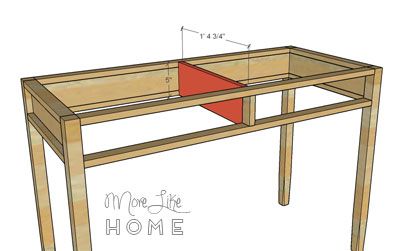
Install the drawer divider (H) connecting the front trim divider to the back section. Use a circular saw to cut the 1x8 down to 5" wide, then attach it to the front trim by drilling through the trim into the end of the divider, and to the back by drilling through the back board into the end of the divider (or use a Kreg Jig to connect it at both ends. Again, no holes!). This board will hold the drawer slides and help support the desktop. It is super important that this sits perfectly straight so your drawer slides will work perfectly! So first double-check that your front trim is centered, then measure on the back and mark 20 1/8" in from each edge to see where to attach the back end of the divider.
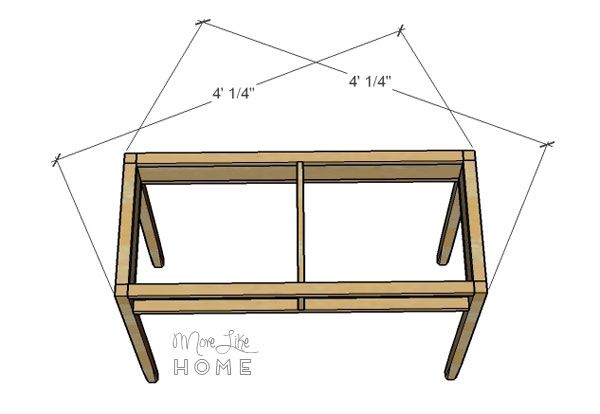
Check for square! Measure corner-to-corner both ways across the top of the desk. If these measurements are the same, the frame is square. If not, gently shift the sides until you get it evened out. Why did I never think to illustrate this before? Could have saved myself a thousand words with this:
Once the frame is square, go ahead and attach the top (I). If you have a Kreg Jig, you can attach the boards side-to-side first. If not, just line them up side-by-side on the top. Center them with a 1" overhang front and back, and a 2" overhang on the sides. You can flip the table upside down and drill up through the trim pieces into tabletop boards (that way you won't have any holes to fill in the top). Just be sure you don't pre-drill too far and poke all the way through the top, plus don't countersink the screws this time or they could poke through, too.
Next build the drawer boxes. These are shallow drawer that are perfect for things like pens, notepads, and a few envelopes. Start by attaching two drawer sides (J) to each drawer back (K) using a Kreg Jig, or by drilling through the back into the ends of the drawer sides. The drawer box should be 1" narrower than the drawer opening
Attach the drawer bottom to the drawer frame. Drill up through the drawer bottom into the sides and back.
Follow the instructions on the drawer slides to install the drawer boxes. Keep them level, and make sure the front of the boxes is inset 3/4" from the face of the desk frame (so the drawer fronts will be flush when you add them)
With the drawer boxes installed, center a drawer front over each box with a 1/8" gap all around it. Use screws or finishing nails and glue to attach the drawer fronts to the drawer boxes (you can also reinforce this with a Kreg Jig). Finishing nails make a prettier finish, but screws will hold up better.
Fill any holes in the table, sand it down (don't skimp! This is the most important step for a great finish!), then finish with and paint or stain and sealer you like.
That's it! Come back tomorrow for another DIY desk plan, and check out the full series here!
)
No comments:
Post a Comment