
P.S. Check out the rest of our free DIY Desk Plan Series here!
And the rest of the standing-height desk plans here!

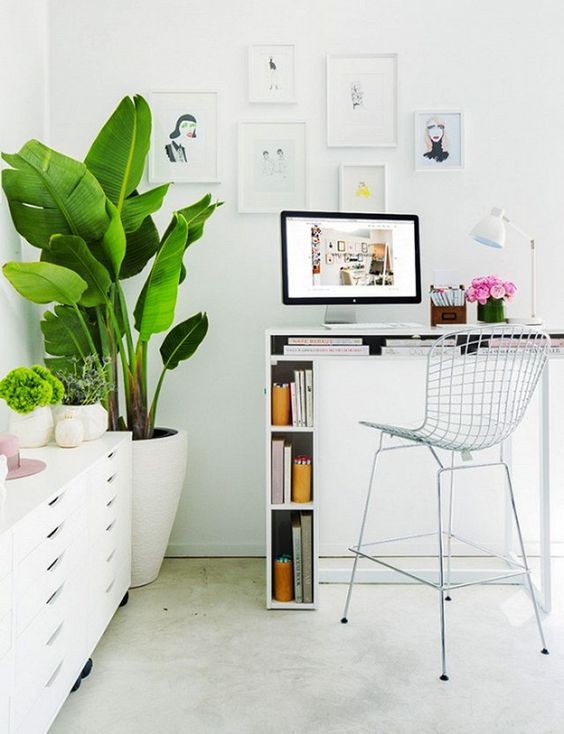
inspiration photo source
It's a great way to add simple, clean lines to you workspace without sacrificing storage.
inspiration photo source
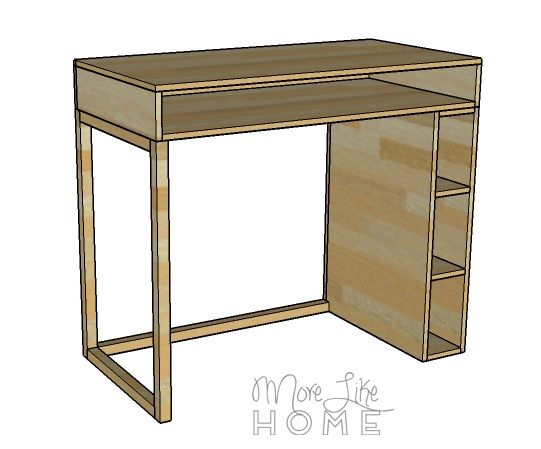
The shelves run down the front and side of the leg, and we'll have an
option to do a shelf for both legs OR keep the shelf on one side with a
simple leg on the other to make the desk feel much lighter.

Shopping List:
1.5 sheets 3/4" plywood (2.5 sheets if you're doing shelves on both sides)
1 - 2x2 @ 6' (only if you are doing legs)
1 - 2x2 @ 8' (only if you are doing legs)
Kreg Jig
1 1/4" pocket hole screws
2 1/2" pocket hole screws
1 1/4" wood screws
2" wood screws
finishing nails (optional)
wood glue
wood filler
sandpaper and finishing supplies
Dimensions: 48" wide x 41 3/4" high x 24 3/4" deep

Measure twice, cut once (seriously, though). Use glue in every step (be careful to clean up any drip, because they will mess up your finish at the end!). Read through all the instructions before you begin. Use 1 1/4" screws unless otherwise indicated. Pre-drill and countersink all your screws. Be safe, have fun, and let me know if you have any questions! Please note I have not built from these plans myself (you might be the first!), so double check everything as you go.
Cut List Top:
(A) 2 - plywood @ 5 3/4 x 24" (sides)
(B) 1 - plywood @ 48 x 5 3/4" (back)
(C) 1 - plywood @ 48 x 24 3/4" (top)
(D) 1 - plywood @ 46 1/2" x 24" (bottom)
Cut List Shelves (to make one shelf unit. double the cut list to make two units.):
(E) 1 - plywood @ 24 x 35 1/4" (side)
(F) 2 - plywood @ 24 x 6" (top/bottom)
(G) 1 - plywood @ 6 x 33 3/4" (divider)
(H) 2 - plywood @ 11 1/4" x 6" (side shelves)
(I) 2 - plywood @ 12 x 6" (front shelves)
(J) 1 - plywood @ 7 1/2" x 35 1/4" (back)
(K) 1 - plywood @ 12 3/4" x 35 1/4" (inside)
Cut List Legs:
(L) 2 - 2x2 @ 35 1/4" (legs)
(M) 2 - 2x2 @ 21 3/4" (stretchers)
(N) 1 - 2x2 @ 39" (back stretcher)
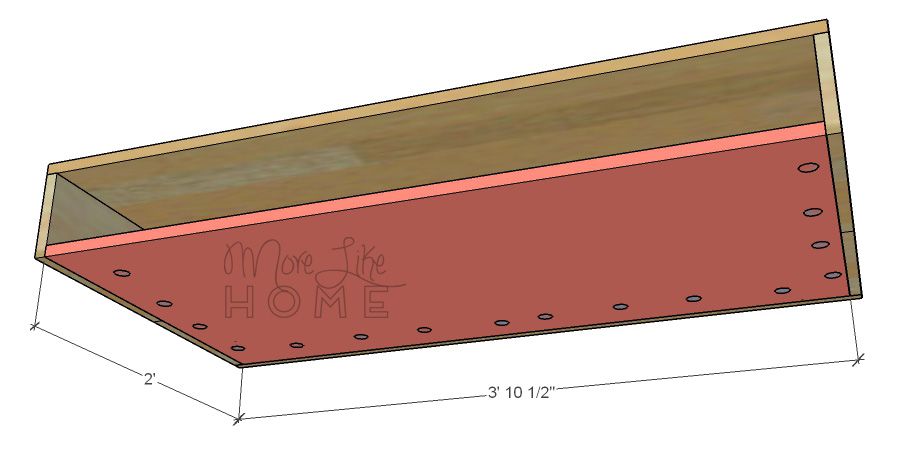
Let's build the top first. Start by using the Kreg Jig to drill pocket holes along the top and back of the side boards (A) and the top of the back board (B). Use the 1 1/4" pocket screws to attach the sides to the back. Then use the holes along the top of those three boards to attach the top (C). You can also drill a large hole through the back board for running in a charger or power strip.

Drill pocket holes around the sides and back of the bottom (D) and attach it into the frame you just built. The top is done!
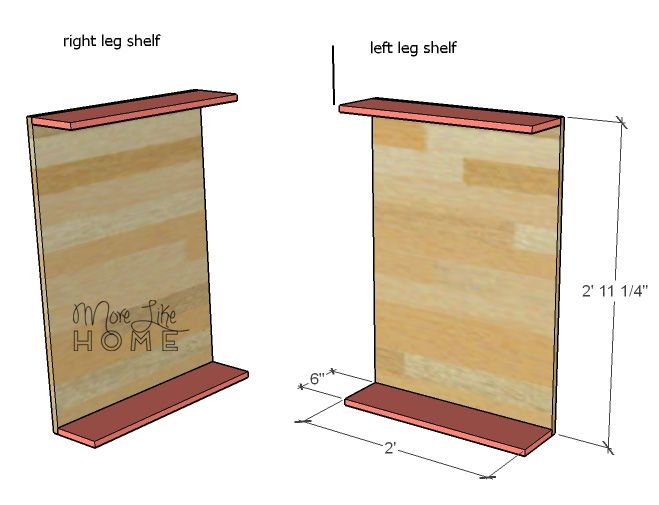
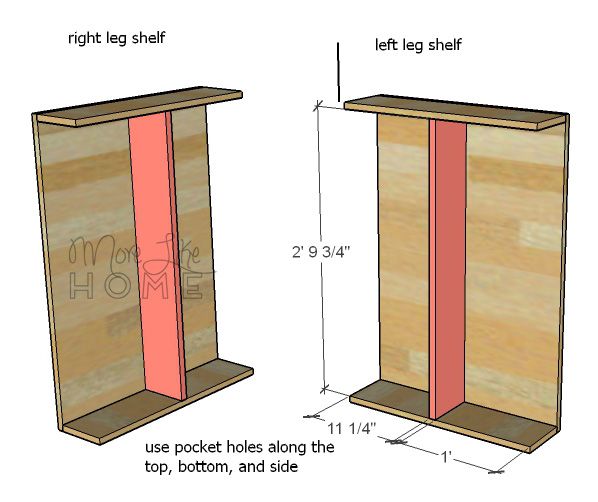
Next we'll build the leg sections. You need to make sure you assemble them the right way so your shelves face the right direction (they are mirror images of each other). You'll build both if you are using shelves on both sides, and just one if you are using the legs for one side. The right leg section is shown on the left, and the left leg section is shown on the right. My bad, guys. Here we go:
Attach the top/bottom boards (F) to the sides (E) by drilling pocket holes along one side of each top/bottom board.
Drill pocket holes along the top, bottom, and one side of the divider boards. Attach them so they are 12" from the front of the leg and 11 1/4" from the back of the leg.
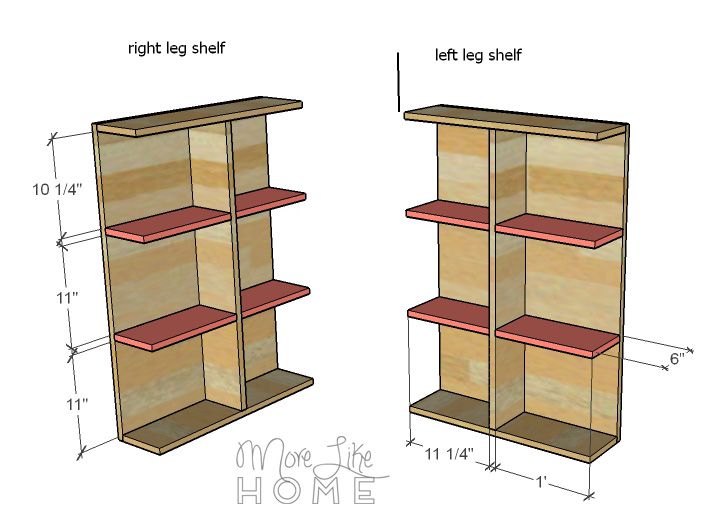
Use pocket holes along one side and edge of the side shelves (H) and front shelves (I) and install them on either side of the divider, making sure they are level (you can space these however you like).
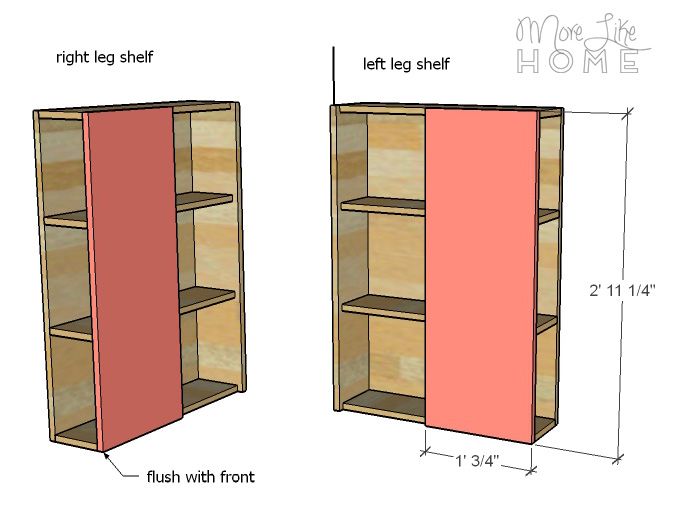
Attach the back board (J) by drilling through the back into the end of each shelf and the top/bottom boards. It should overhang the shelves by 3/4" and be flush on the other side.

Install the front side board (K) by drilling through this board into the sides of each shelf and the top/bottom boards. If you don't want nail holes to show on this side of the desk, you can use finishing nails for this step instead. Shelves are done!
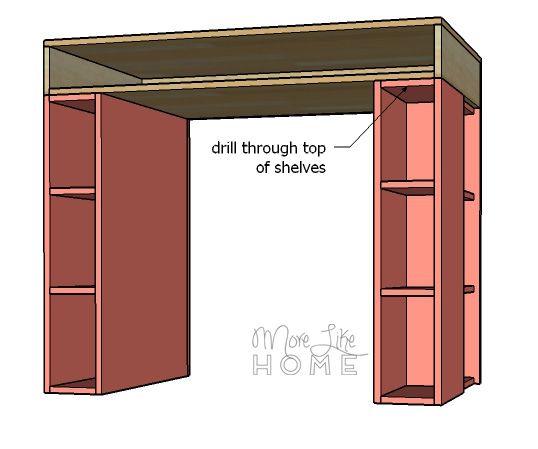
Set the top on the leg shelf sections (make sure the shelves are facing out!) and attach it by drilling up through the top of the shelves into the bottom of the top with 1 1/4" screws. Be careful not to drill all the way through.
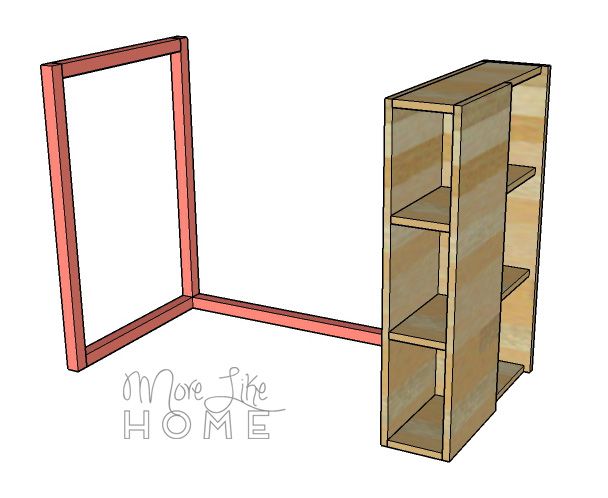
To build the leg section, drill pocket holes in both ends of the side stretchers (M) and attach them to the legs (L) with 2 1/2" pocket hole screws.
Drill pocket holes in both ends of the back stretcher (N) and attach it to the bottom of the back leg with 2 1/2" pocket hole screws.

Attach the legs to the shelf unit.with 1 1/4" pocket hole screws.
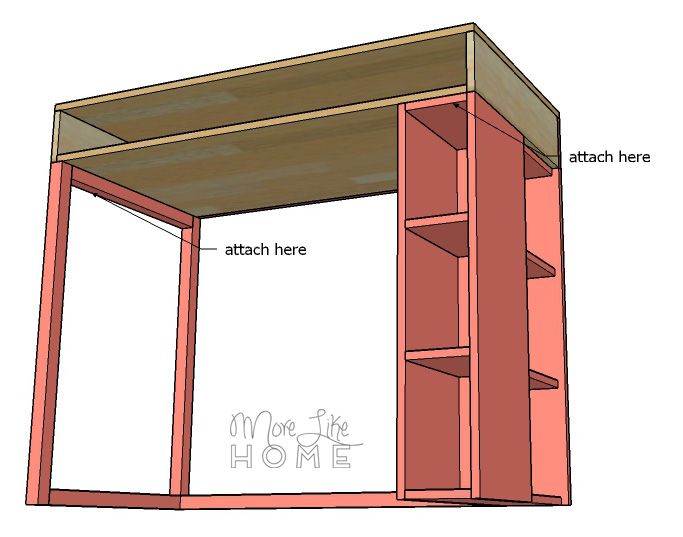
Attach the top by drilling up through the top of the shelf unit with 1 1/4" screws and through the top stretcher with 2" screws. Be careful not to drill all the way through.
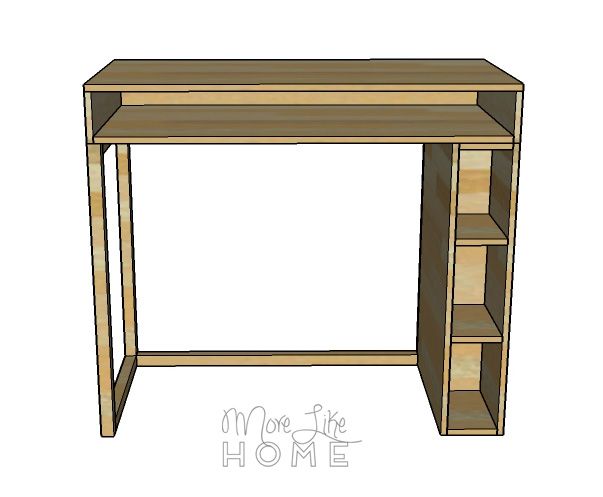
To finish, fill any holes with wood filler then sand everything down really well. This is the most important step for a professional finish! Start with a rough sand paper, then go over everything with a medium paper, then again with a fine paper. Once it's super smooth, finish it with whatever paint or stain and sealer you like. If you'd like a two-tone finish, you can finish each section separately before you attach them together.
)
No comments:
Post a Comment