
P.S. Check out the rest of our free DIY Desk Plan Series here!
And the rest of the floor desk plans here!
inspiration photo source
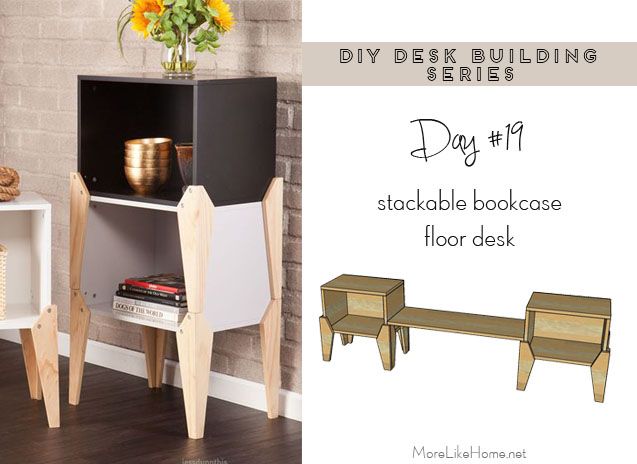
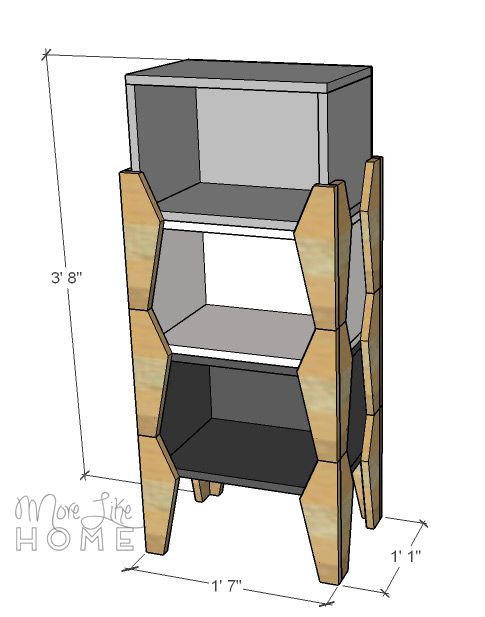
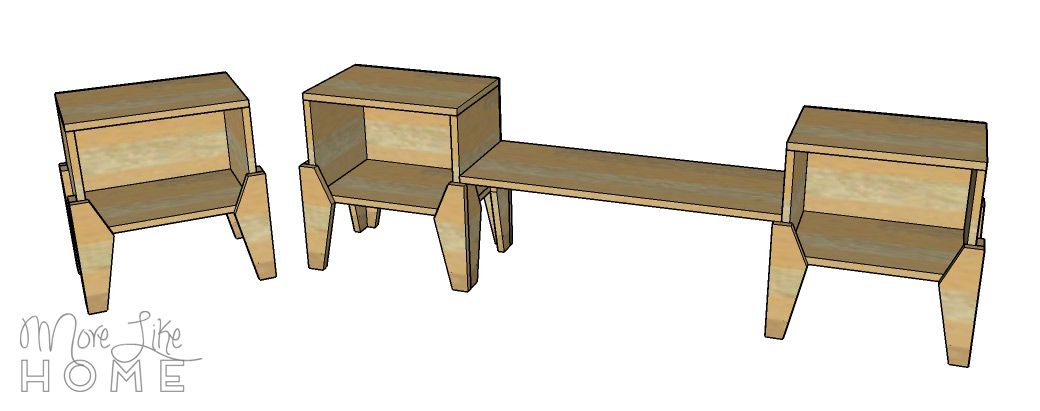
This one is perfect for someone who only needs an occasional floor desk. It also makes a great space for kids to draw or do homework that you can tuck away when you're done, and can serve as a coffee table or end tables if your guests need an extra place to set their snacks. It stacks up into a funky bookcase when you don't need a desk:
And un-stacks to a create a handy workspace desk when you do:
The desktop tucks away behind the bookcase until you need it.
Shopping List:
- 1 - 1x12 @ 10' (cut all the sides and three tops)
- 1 - 1x12 @ 8' (cut three bottoms and the desktop)
- 3 - 1/4" plywood @ 17 1/2 x 12" (some stores sell smaller "project panels" so you don't need to buy a whole sheet) (these don't have to be 1/4" thick, if you have plywood scraps use them!)
- 3 - 1x4 @ 8' (legs)
- 1 - 1x4 @ 6' (extra for the legs, you'll lose some length with each cut and may only get 7 legs per 8' board)
- Kreg Jig (optional)
- 1 1/4" pocket hole screws (optional)
- 1 1/4" wood screws
- 5' long leather or canvas strap
- wood glue
- wood filler
- sandpaper and finishing supplies
Bookcase Dimensions: 19" wide x 44" high x 13" deep
Desk Dimensions: 69 1/2" wide x 20" high x 13" deep

Measure twice, cut once (seriously, though). Use glue in every step (be careful to clean up any drip, because they will mess up your finish at the end!). Read through all the instructions before you begin. Use 1 1/4" screws unless otherwise indicated. Pre-drill and countersink all your screws. Be safe, have fun, and let me know if you have any questions! Please note I have not built from these plans myself (you might be the first!), so double check everything as you go.
Cut List:
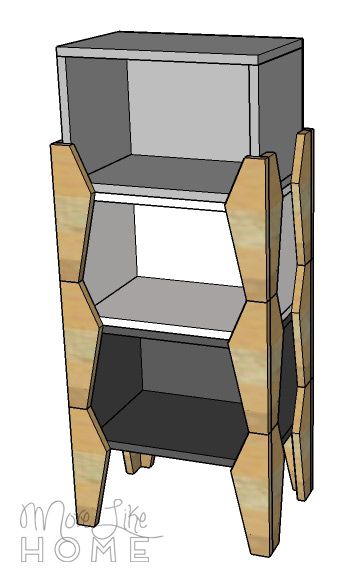
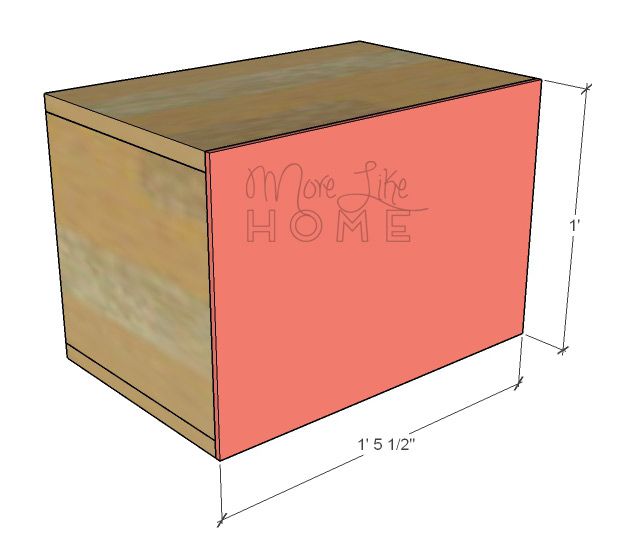
(A) 6 - 1x12 @ 10 1/2" (sides)
(B) 6 - 1x12 @ 17 1/2" (top/bottom)
(C) 3 - plywood @ 17 1/2 x 12" (back)
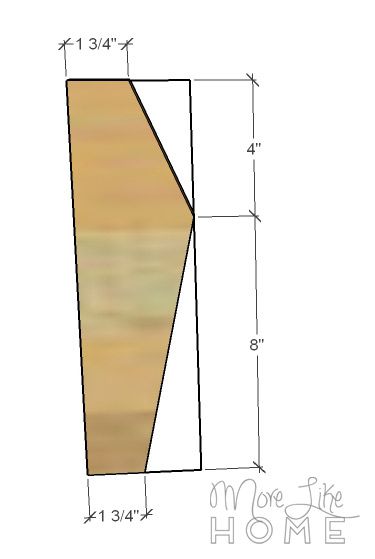
(D) 24 - 1x4 @ 12" (legs)
(E) 1 - 1x2 @ 12" (brace)
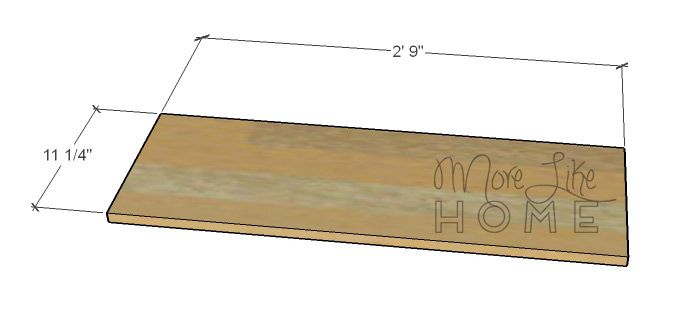
(F) 1 - 1x12 @ 33" (desktop)
Follow the steps to build three of these shelf boxes with legs:
Use a Kreg jig to drill pocket holes along the long edges of the side boards (A). Use the pocket hole screws to attach a top and bottom board (B) to the sides. If you don't have a kreg jig, just drill down through the top board into the ends of the side boards. Do the same with the bottom board.
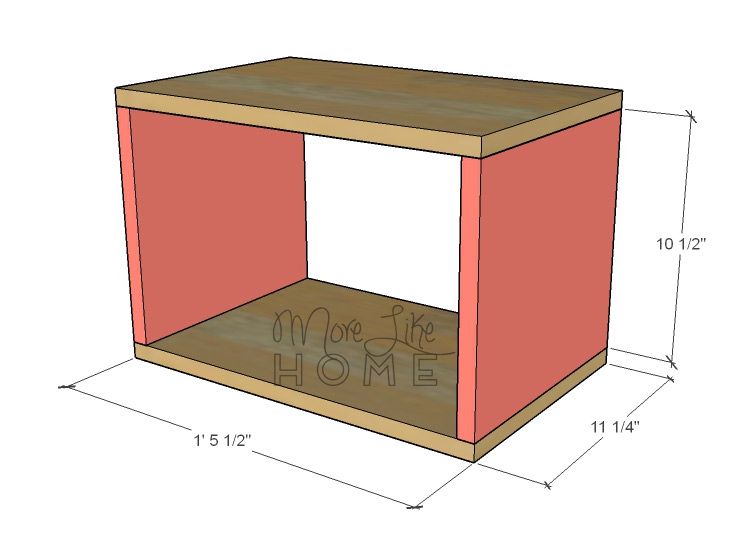
Line up the back on the box frame and drill through into the sides, top, and bottom boards. Attach it with 1 1/4" wood screws.
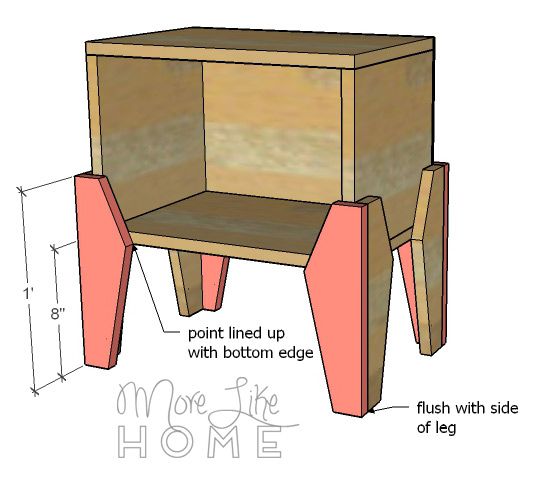
Now, get out a handy circular saw and get ready to make a lot of cuts. Like a lot. You'll need 24 of these legs (D). The good news is once you get one done, you can use it as a template and trace the shape onto the rest of the legs to save a little time.
Make a mark on the right side 4" down from the top (it should be 8" from the bottom). Also make a mark right in the center of the top and bottom edges (1 3/4" from either side). Draw a line connecting the mark at the top to the mark on the side, and another line connecting the mark at the bottom to the mark on the side. Cut along those two lines to get a leg like this:
Attach two legs on each side of the box as shown below. They should be flush with front and back of the box, and the point on the side should line up with the bottom edge of the box. Drill through the leg into both the side and bottom boards.

Attach two more legs to the front and back of the box. These legs should overlap the side legs and be flush with the outside edges. The tops and bottoms of the legs should line up, and the points should line up with the bottom edge of the box. Drill through the legs into the side boards, bottom boards, and side legs.
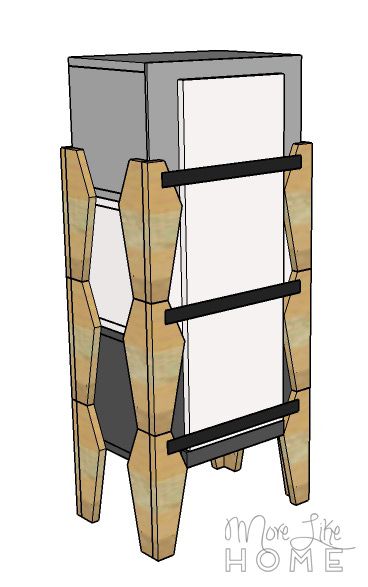
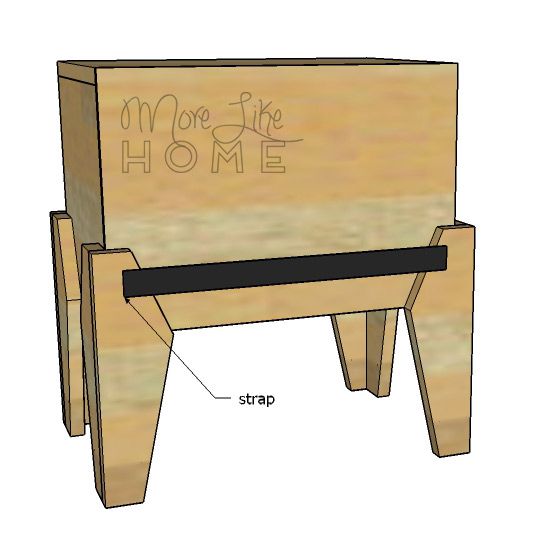
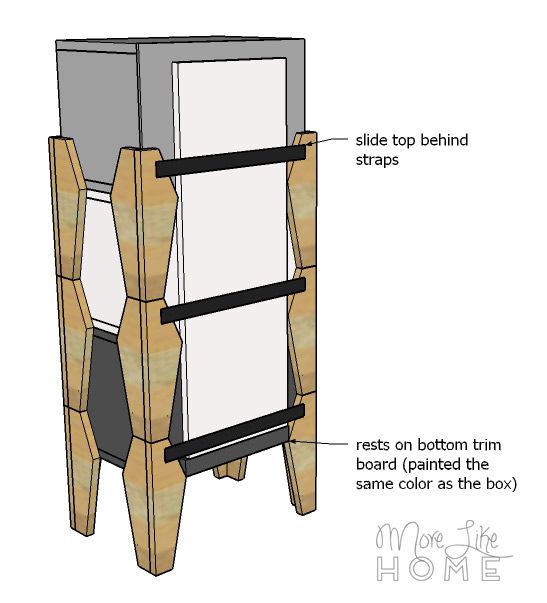
Attach a strap across the top of the back legs with staples or wood screws. You may want to apply your finish first and attach the strap once it is dry!
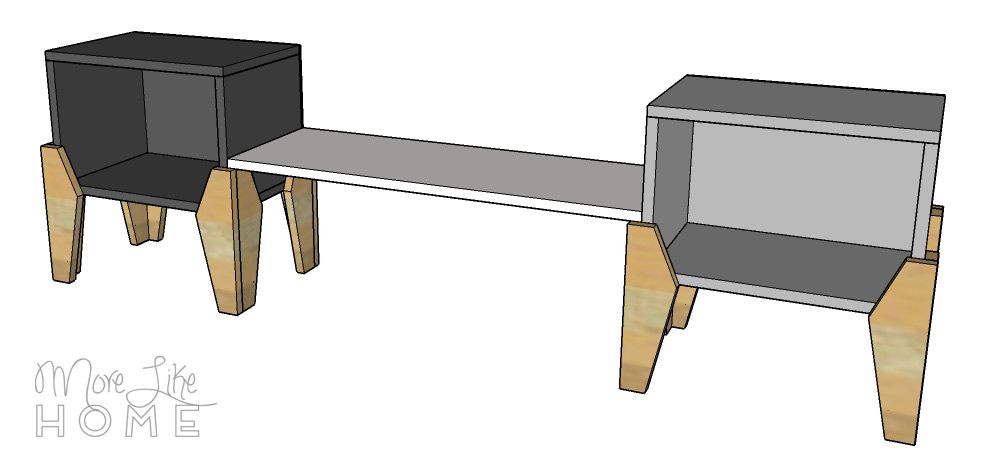
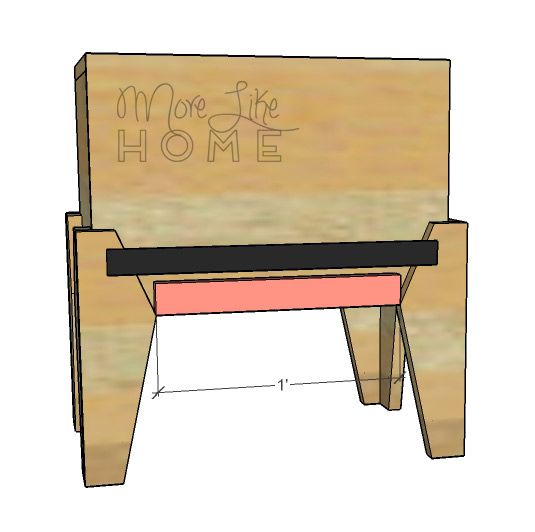
Make three boxes just like this. Then on only one of the boxes (this will be the bottom in the stack) attach the brace (E) at the bottom of the box .
Cut the top (F).
When you're not using it, it will slip under the straps on the back and rest on the brace to stay out of sight.
So when it's all said and done, you should have three stackable boxes and the desktop board. To use the desk, rest the desktop board across the top of the legs.
To finish, fill any holes with wood filler then sand everything down really well. This is the most important step for a professional finish! Start with a rough sand paper, then go over everything with a medium paper, then again with a fine paper. Once it's super smooth, finish it with whatever paint or stain and sealer you like. You can mix up the finishes like the inspiration photo, go for an ombre effect, or keep it clean and simple with solid white boxes. Have fun!
That's it! Come back tomorrow for another DIY desk plan, and check out the full series here!
)
Good golly. Now I want like 5 desks in my house. This one would be so perfect for the girls.
ReplyDeleteHa! I don't think you can have too many desks!
Delete