
P.S. Check out the rest of our free DIY Desk Plan Series here!

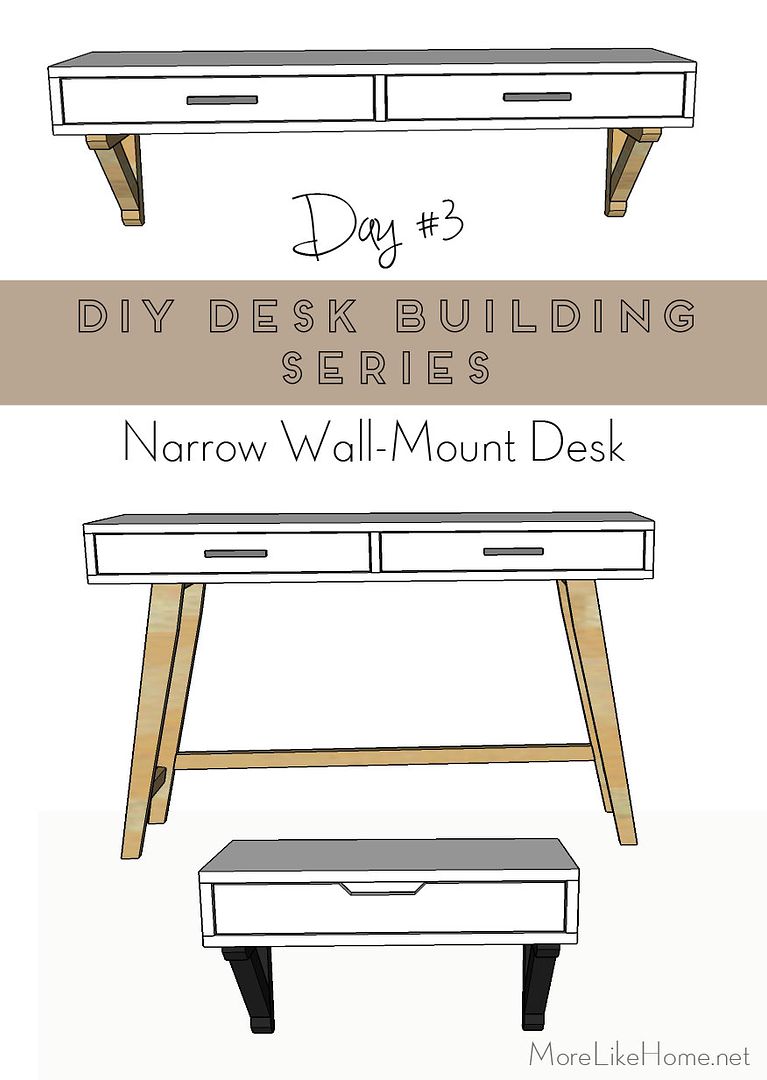
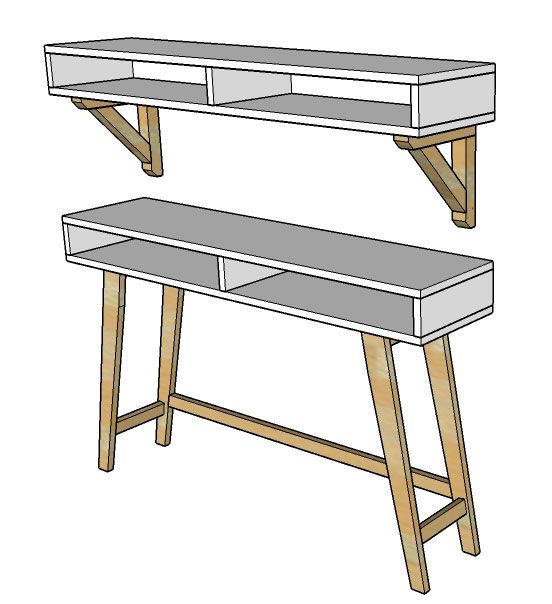
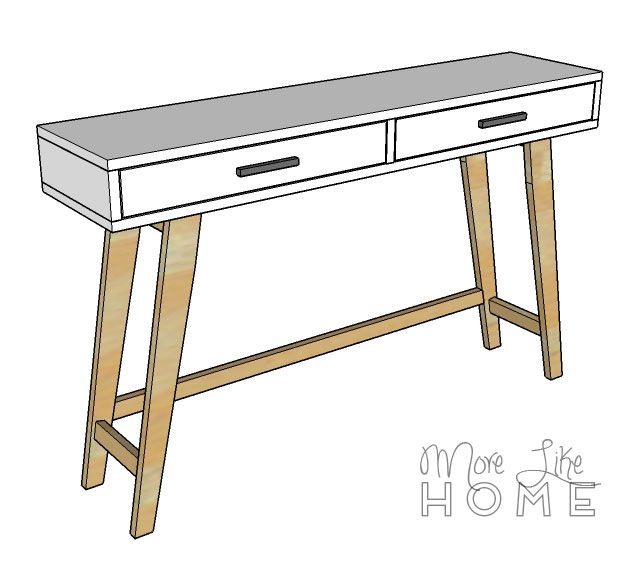
It's narrow frame makes it perfect for mounting on the wall, but we're including a plan for a set of legs to give you a free-standing desk option. You'll also have options for a one-drawer or a two-drawer version to give you double the space-fitting options!
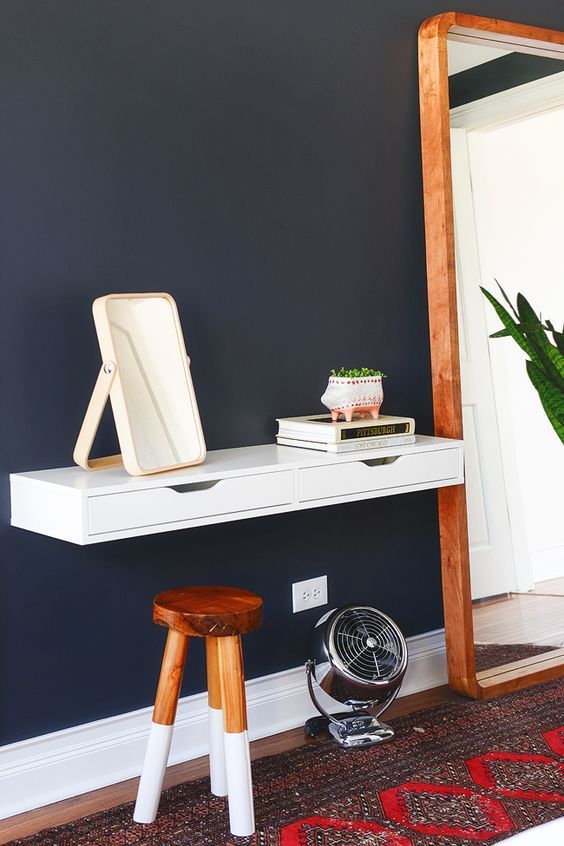
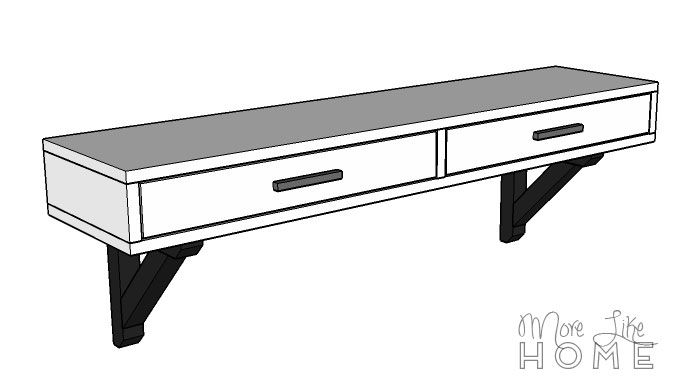
You can also attach the desk to the wall by drilling through the back (into studs!) and add a set of legs to support the front. Any legs 24-25" tall will work! You can find tapered mid-century modern legs like these on ebay, etsy, and at some hardware stores.
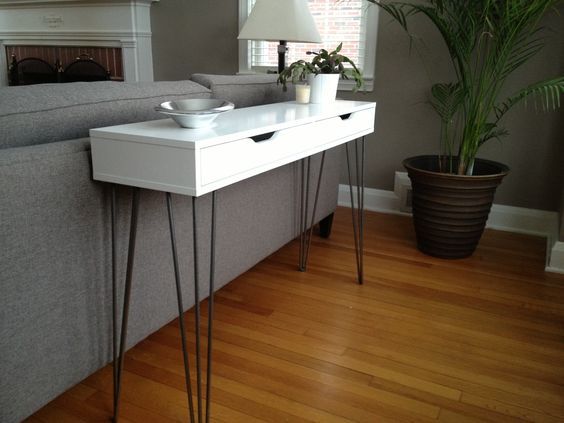
It's also great with a set of hairpin legs!
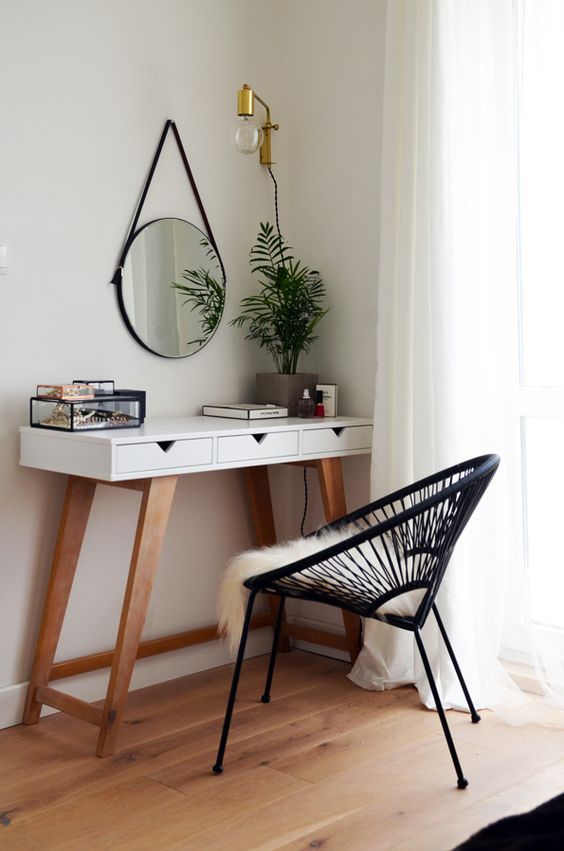
Okay, okay, last one and we'll get to the plans! I'm loving the two-tone white with wood (you'll probably see that theme throughout the series). Also, I based our leg design on this desk. 'K, let's get started.
Like yesterday's plan, this one has a few options to choose from! So again there will be a separate shopping list for each item. Take what you need and leave the rest.
Measure twice, cut once (seriously, though). Use glue in every step. Read through all the instructions before you begin. Use 1 1/4" screws unless otherwise indicated. Pre-drill and countersink all your screws. Be safe, have fun, and let me know if you have any questions!
Shopping List for a Two Drawer Desk:
- 1 - 1x12 @ 8'
- 2 - 1x4 @ 6'
- 1 - 1x3 @ 8'
- 2 - 21 7/8" x 9 3/4" pieces of 1/4" plywood (if you have scrap plywood to use, anything up to 1/2" thick will work)
- 2 sets of 9" drawer slides (we love full extension slides, especially for small drawers like these)
Shopping List for a One Drawer Desk:
- 1 - 1x12 @ 6'
- 1 - 1x4 @ 6'
- 1 - 1x3 @ 4'
- 1 - 21 7/8" x 9 3/4" piece of 1/4" plywood (if you have scrap plywood to use, anything up to 1/2" thick will work)
- 1 set of of 9" drawer slides (we love full extension slides, especially for small drawers like these)
Shopping List Two Brackets:
- 1 - 2x2 @ 6'
- 2 1/4" wood screws
- 2 1/2" pocket hole screws
- optional: you can also order sturdy metal brackets like these instead if you don't feel like building your own or want a different look.
Shopping List for Legs:
- 1 - 1x3 @ 8'
- 1 - 1x2 @ 8'
General Supplies:
- 1 1/4" wood screws
- Kreg Jig and 1 1/4" pocket hole screws
- finishing nails
- wood glue
- wood filler & finishing supplies
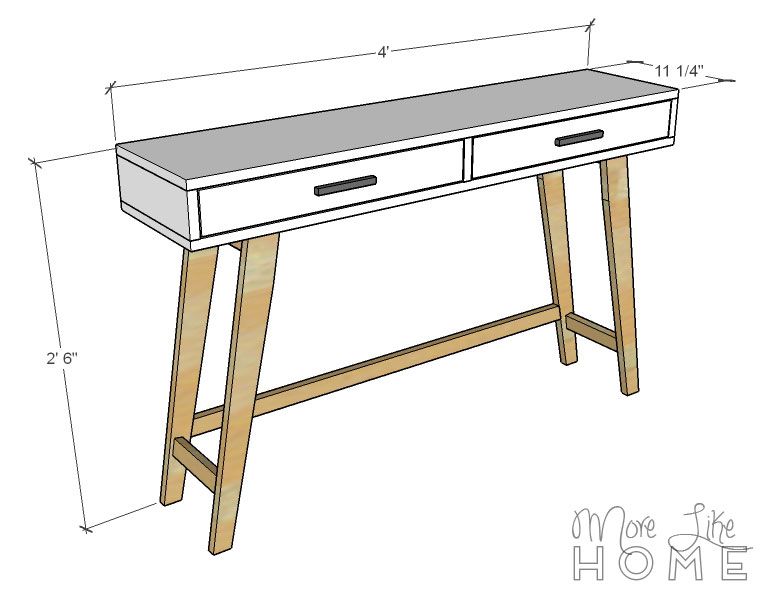
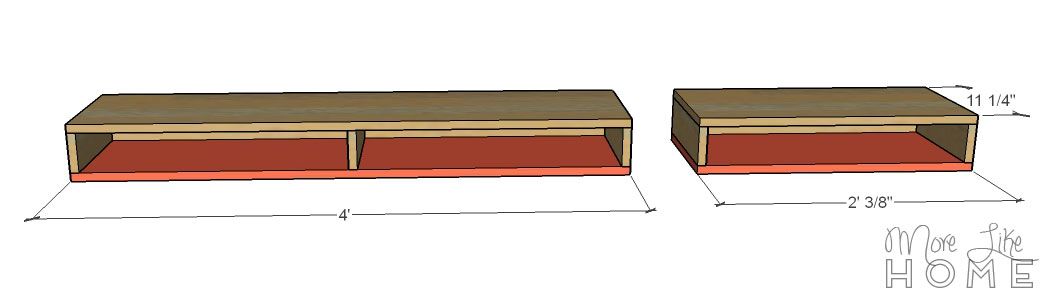
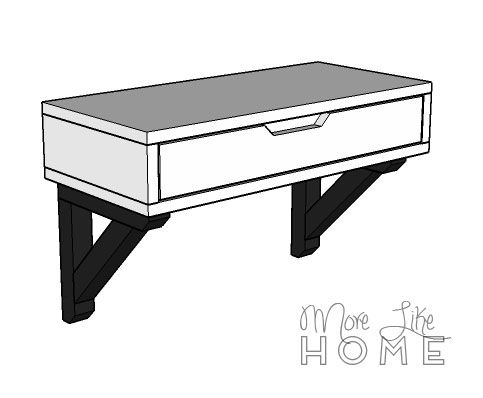
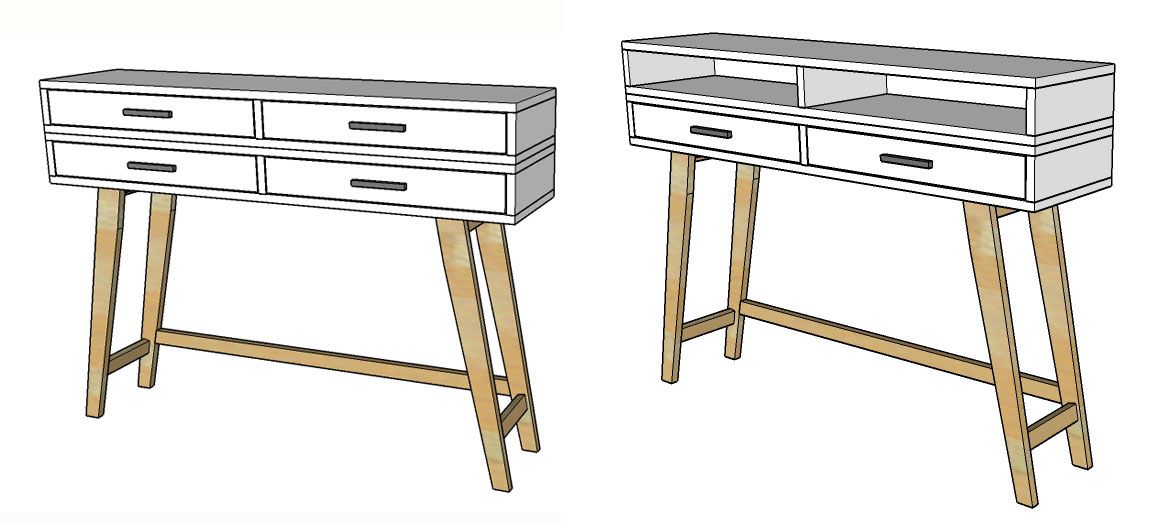
Finished dimensions with the legs are 48" wide x 11 1/4" deep x 30" high
Desk and Drawers
Two Drawer Desk:
(A) 2 - 1x12 @ 48" (top/bottom)
(B) 2 - 1x4 @ 11 1/4" (sides)
(C) 1 - 1x4 @ 46 1/2" (back)
(D) 1 - 1x4 @ 10 1/2" (divider)
(E) 2 - 1x3 @ 21 7/8" (drawer back)
(F) 4 - 1x3 @ 9" (drawer sides)
(G) 2 - 1/4" plywood @ 21 7/8" x 9 3/4"
(H) 2 - 1x4 @ 22 5/8" (drawer fronts)
One Drawer Desk:
(A) 2 - 1x12 @ 24 3/8" (top/bottom)
(B) 2 - 1x4 @ 11 1/4" (sides)
(C) 1 - 1x4 @ 22 7/8" (back)
(E) 1 - 1x3 @ 21 7/8" (drawer back)
(F) 2 - 1x3 @ 9" (drawer sides)
(G) 1 - 1/4" plywood @ 21 7/8" x 9 3/4"
(H) 1 - 1x4 @ 22 5/8" (drawer fronts)
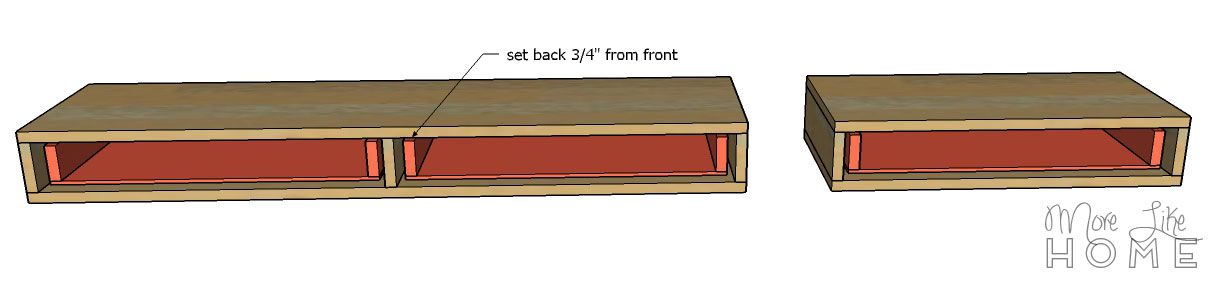
Use a Kreg Jig to attach the sides (B), back (C), and divider (D), to the the top (A). I like the Kreg Jig for this because you won't have any holes to fill in the top, but if you don't have one you can drill down through the top into the pieces to attach them. The sides and back should be flush with the sides and back of the top, and the divider should be centered with 22 7/8" on either side.
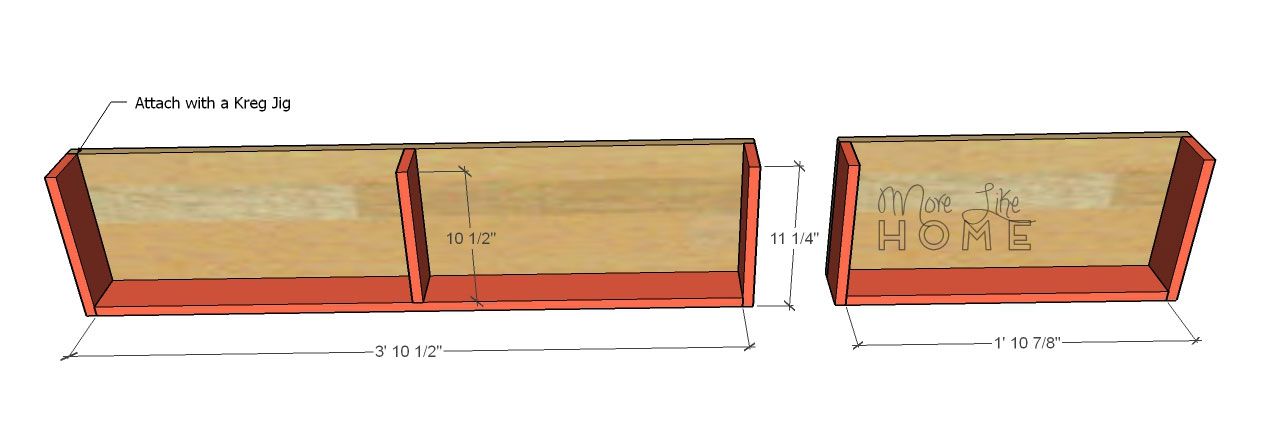
Then attach the bottom (A). For this one you can drill up through the bottom into the sides, divider, and back (no sweat since any holes will be on the bottom).
For a super-simple build, you can stop right here and leave the spaces open as a shelf. It's perfect for stashing papers or a laptop off the desk top. You could even use one as shelf with brackets mounted about your desk for double storage!
To build the drawer boxes, start by attaching the drawer sides (F) to the drawer back (E). Use a Kreg Jig, or drill through the back into the ends of the side boards.
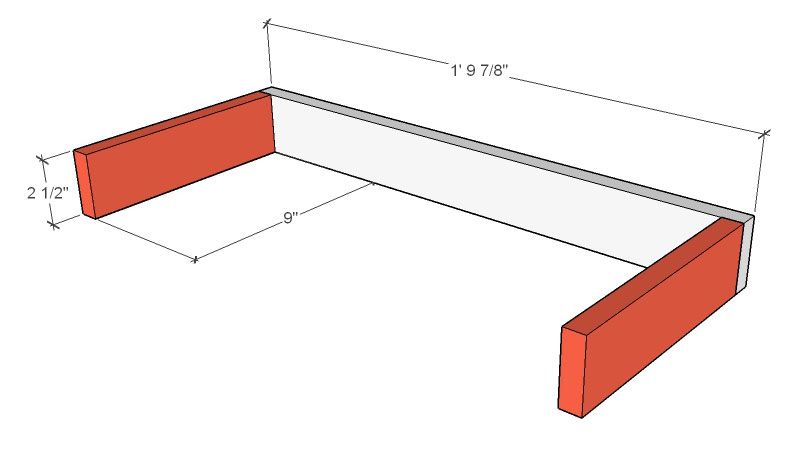
Attach the drawer bottom (G) to the bottom of the drawer frame with 1 1/4" screws.

Follow the instructions on your drawer slides to install the drawer boxes into your desk.
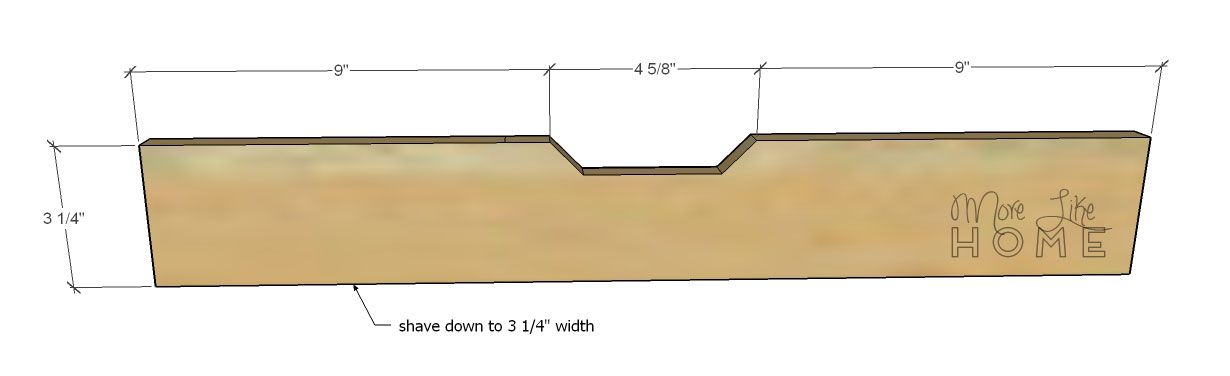
On each drawer front (H), shave the 1x4 down 1/4" so it's only 3 1/4" wide. You can do this with a table saw, or a regular old circular saw and a steady hand. :)
Optional: for a modern look you can cut a notch handle into the drawer fronts. Measure in 9" from each side, and cut out a notch 3/4" deep between those marks.
Center a drawer front on each drawer box, with a 1/8" gap around the drawer front. Attach it to the drawer box with finishing nails (you can reinforce this with the Kreg Jig for a stronger hold).

Brackets
Two Brackets:
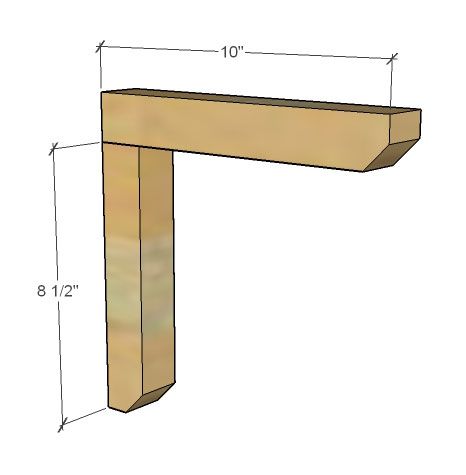
(I) 2 - 2x2 @ 10" (bracket top)
(J) 2 - 2x2 @ 8 1/2" (bracket back)
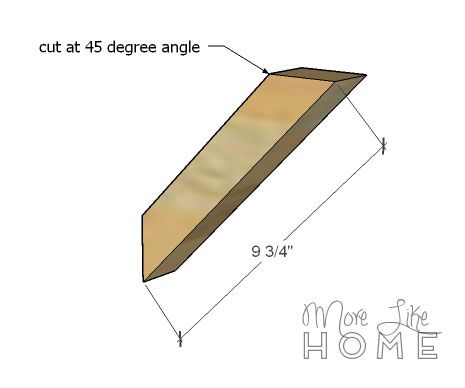
(K) 2 - 2x2 @ 9 3/4" (bracket support)
Attach the bracket top (I) to the bracket back (J). You can use a Kreg Jig with 2 1/2" pocket hole screws, or drill down through the top into the back with 2 1/4" screws. You can cut off the front corners of the boards for a neater look.
Cut the ends of the support (K) at a 45 degree angle.
Attach it to the bracket with the Kreg Jig or by drilling through the support into the top and back boards. Repeat to make the second bracket.
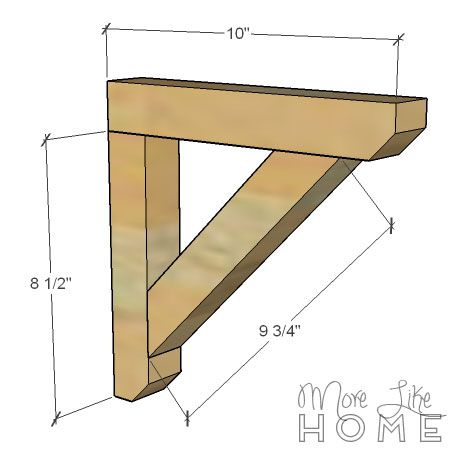
You will need two brackets for each desk. Make sure you anchor the brackets into studs, or use really good anchors to hold the weight. It may be easier to assemble the top and back, then attach the bracket to the wall before you install the support board. Be sure you screw it to the desk, too.

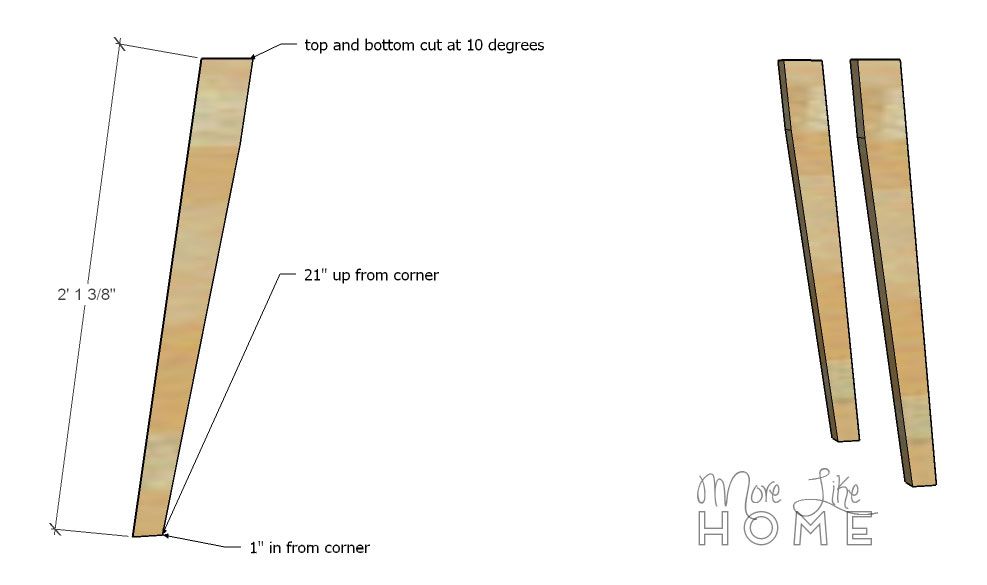
(L) 4 - 1x3 @ 22ish" (legs)
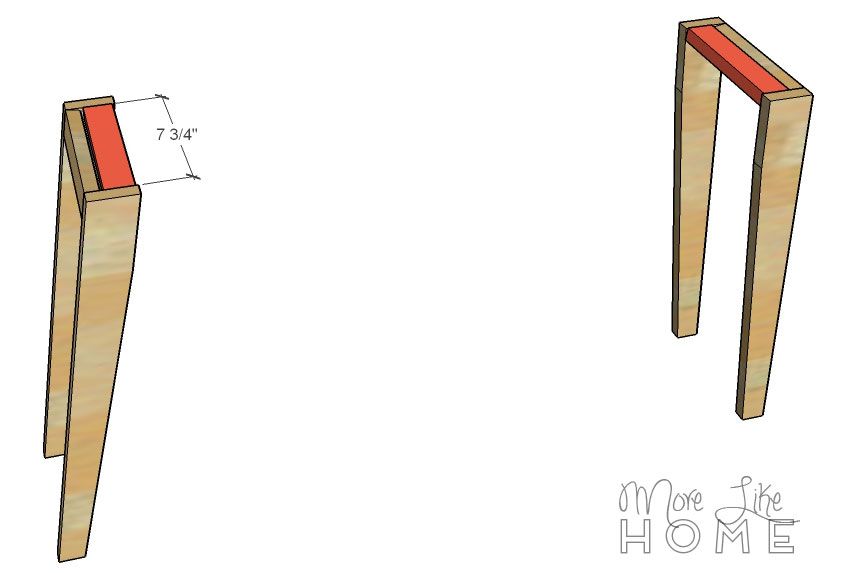
(M) 6 - 1x2 @ 7 3/4" (trim)
(N) 1 - 1x2 @ 41 1/4" (stretcher)
Start by cutting the top of the leg (L) at a 10 degree angle. Measure down 25 3/8" from the short side and make a mark. Cut on the mark at a 10 degree angle, making sure the cut ends are parallel.
Optional: You can taper the legs with a circular saw to give your desk a lighter feel. Measure in 1" from the bottom inside corner of the leg, then measure up 21" from that corner. Drawer a line connecting those two marks and cut along the line.
Install the first two trim pieces (M) between a pair of the legs. It should be flush with the top and outside edges of the legs. Use a Kreg Jig, or drill through the legs into the ends of the trim.

Install another trim piece next to that piece, lying flat and flush with the top edge of the legs. You'll use these pieces to attach the legs to the top.
The last pieces connect the bottom ends of the legs. They are set up 5" from the floor, and inset slightly from the outside face of the legs.

Use the stretcher to connect the two leg pieces. It should be set up 5 5/8" from the bottom of the legs. Use the Kreg Jig, or drill through the legs into the ends of the stretcher with 2 1/4" screws.

Attach the desk to the legs by drilling up through the flat trim pieces into the bottom of the desk. Don't countersink these screws, you don't want them poking all the way through the bottom of the desk! You can make a set of legs for the single drawer desk by shortening the stretcher, but you won't be able to get a chair under it. It would still work great as an end table or nightstand, though!
Finishing
If you're doing a two-tone finish, it may be easier to paint and stain the desk and legs separately, then assemble them once they are dry.To finish, fill any holes with wood filler then sand everything down really well. This is the most important step for a professional finish! Start with a rough sand paper, then go over everything with a medium paper, then again with a fine paper. Once it's super smooth, finish it with whatever paint or stain and polyurethane you like
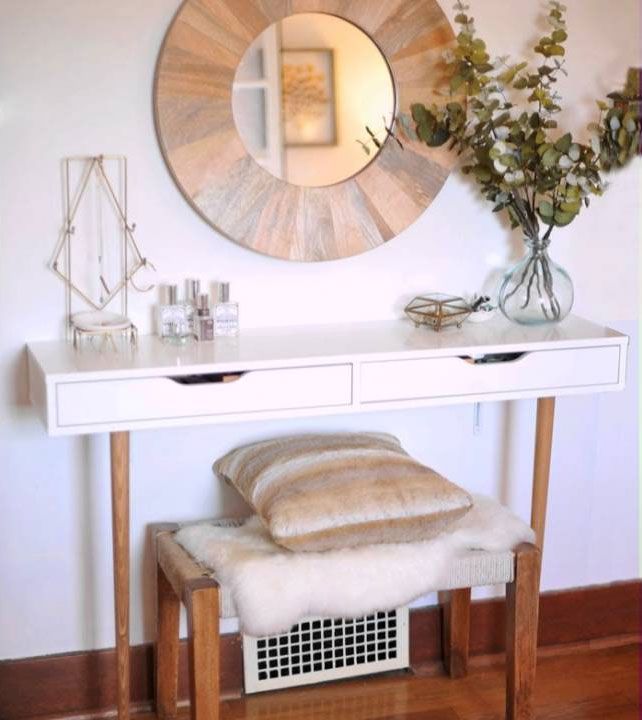
This would also make a great console table for a living room or entryway! You can even double-stack a pair of drawers and/or shelves for more storage and a different look. (this would make the top too high to use as a desk, though)
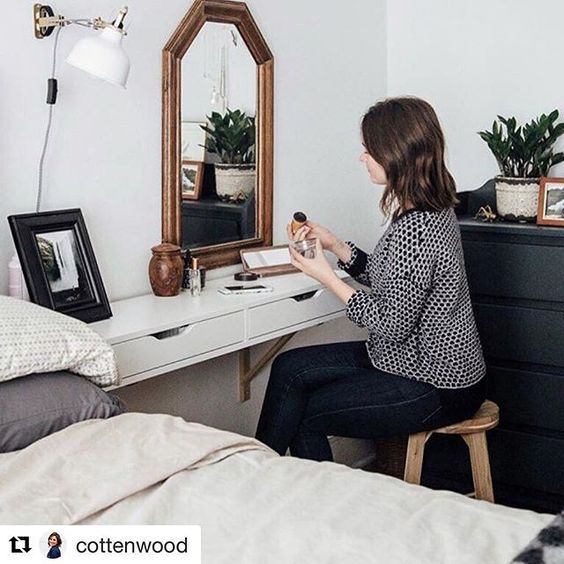
And here's a last inspiration photo for a nightstand/desk combo!
That's it! Come back tomorrow for another DIY desk plan, and check out the full series here!
)
This is what I need in our family room! And I looooove that one in the bedroom!
ReplyDeleteMe too! That's what I want my house to look like.
Delete