
P.S. Check out the rest of our free DIY Desk Plan Series here!
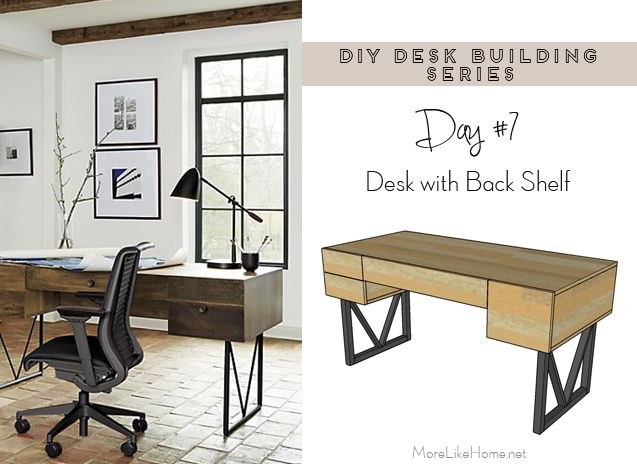
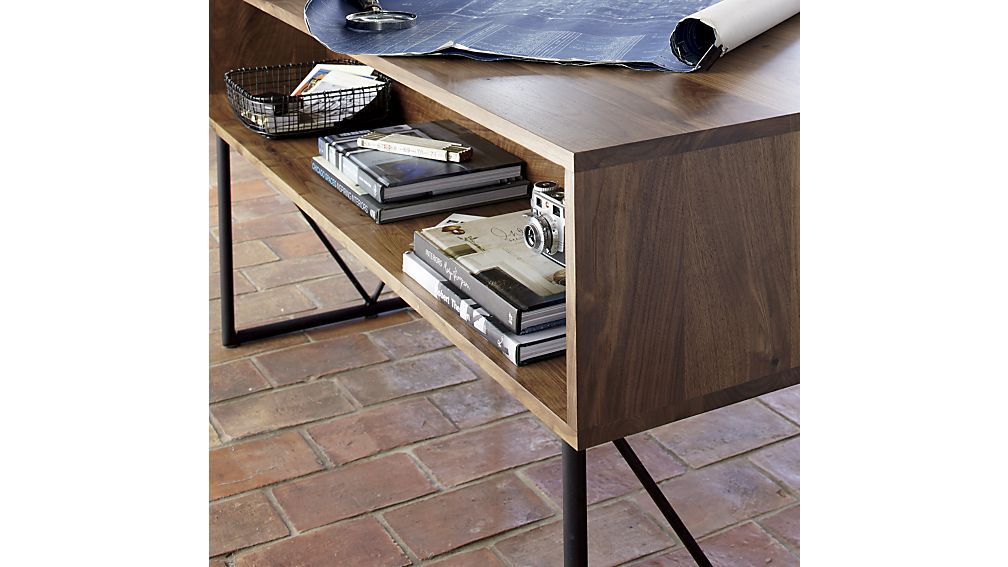
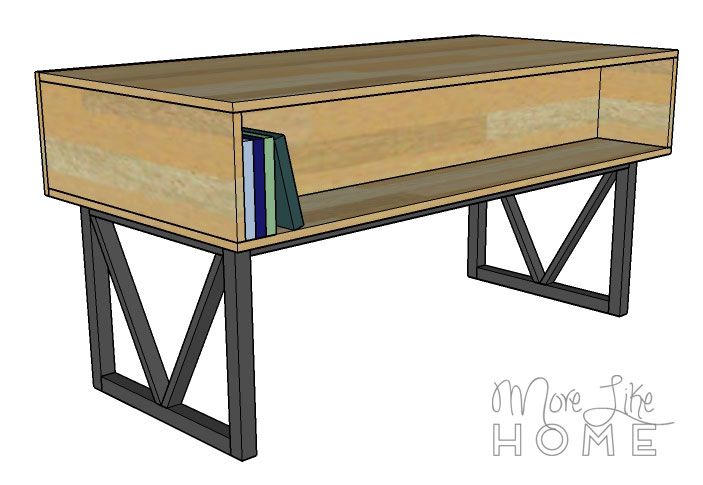
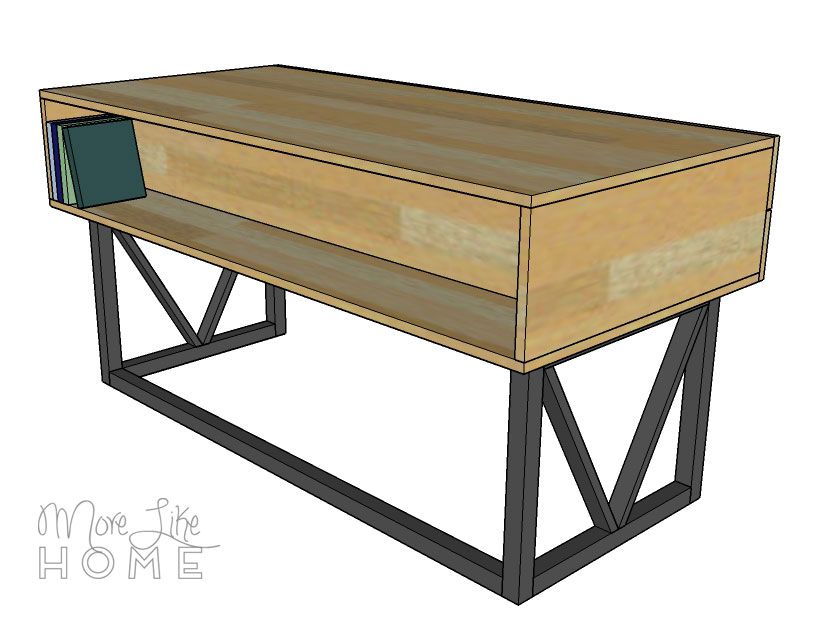
The back of the desk has an open display shelf! It's perfect for displaying favorite books or photographs. The inspiration photo is from a CB catalog, and sells for almost $1600, but you can DIY your own for a fraction of the cost!
Shopping List:
2 sheets 3/4" plywood
1 - 1x4 @ 8'
1 - 1x4 @ 6'
1 - 1x12 @ 8'
1 - 1x8 @ 6'
1 - 1x6 @ 4'
Kreg Jig with 1 1/4" pocket hole screws
1 1/4" wood screws
1 1/4" finishing nails
wood glue
sandpaper and finishing supplies
Legs:
3 - 2x2 @ 10'
1 - 1x2 @ 8'
Kreg Jig with 2 1/2" pocket hole screws
2" wood screws
2 1/2" wood screws
--OR--
Optional (but highly recommended because it would look fantastic!): 18 " hairping legs
Dimensions: 60" wide x 28" deep x 30" high
Cut List:
(A) 2 - plywood @ 60 x 28" (top/bottom)
(B) 2 - plywood @ 28 x 9 3/4" (outer sides)
(C) 2 - plywood @ 18 x 9 3/4" (inner sides)
(D) 1 - plywood @ 58 1/2 x 9 3/4" (shelf back)
(E) 6 - 1x4 @ 16" (short drawer sides)
(F) 2 - 1x4 @ 10 3/4" (narrow drawer back)
(G) 3 - 1x12 @ 16" (narrow drawer bottom)
(H) 1 - 1x4 @ 32 1/2" (wide drawer back)
(I) 1 - plywood @ 31 x 16" (wide drawer bottom)
(J) 2 - 1x8 @ 16" (tall drawer sides)
(K) 1 - 1x8 @ 19 3/4" (tall drawer back)
(L) 1 - 1x6 @ 33 1/4 (long drawer front)
(M) 2 - 1x12 @ 13 1/4" (tall drawer fronts)
Legs (OR use some sweet hairpin legs instead!):
(N) 4 - 2x2 @ 18 3/4" (legs)
(O) 4 - 2x2 @ 20" (stretchers)
(P) 4 - 1x2 @ ~19" (diagonal trim)
(Q) 2 - 2x2 @ 53" (back stretchers)
Measure twice, cut once (seriously, though). Use glue in every step. Read through all the instructions before you begin. Use 1 1/4" screws unless otherwise indicated. Pre-drill and countersink all your screws. Be safe, have fun, and let me know if you have any questions!
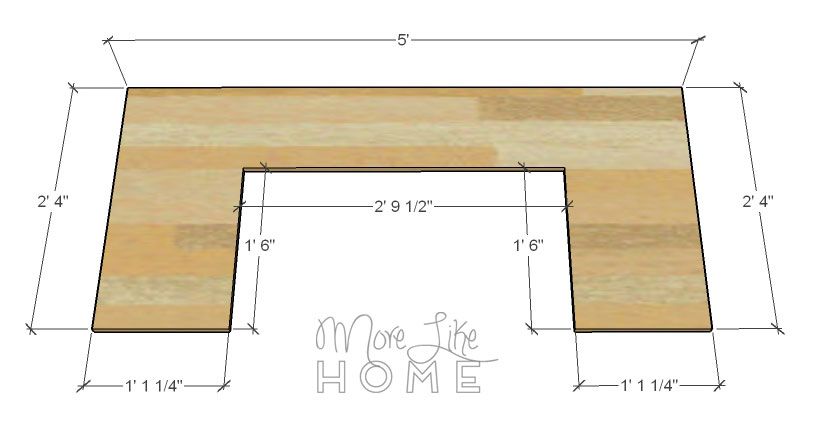
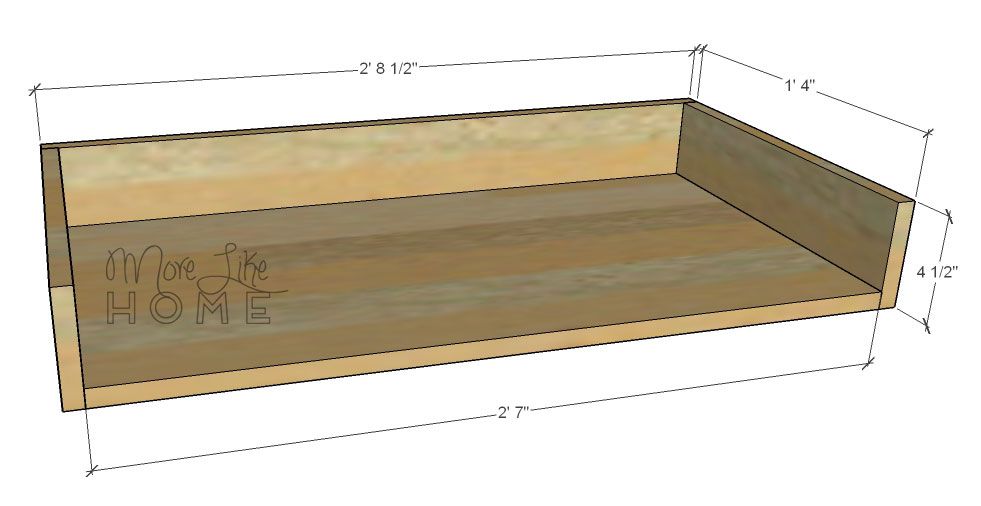
Start by cutting a notch out of the bottom board (A) like this:
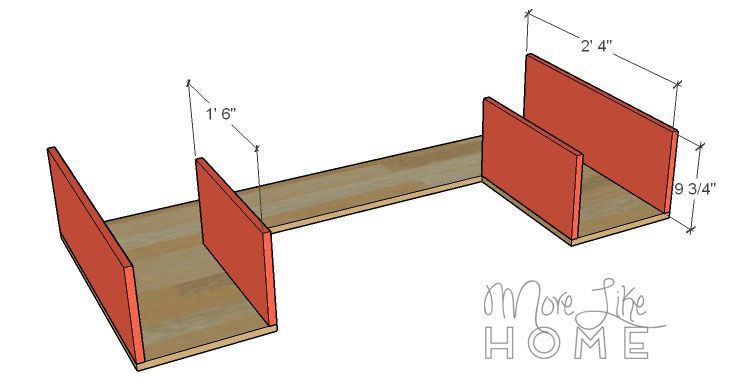
Use a Kreg Jig to make pocket holes along the bottom edge of the outer sides (B) and along the bottom and back edges of the inner sides (C). Then attach them to the bottom board as shown below. If you don't have a Kreg Jig, you can drill through the bottom board into the edge of each side board instead
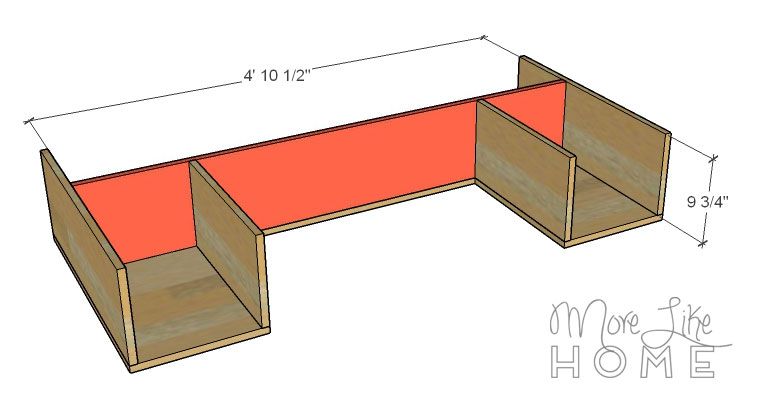
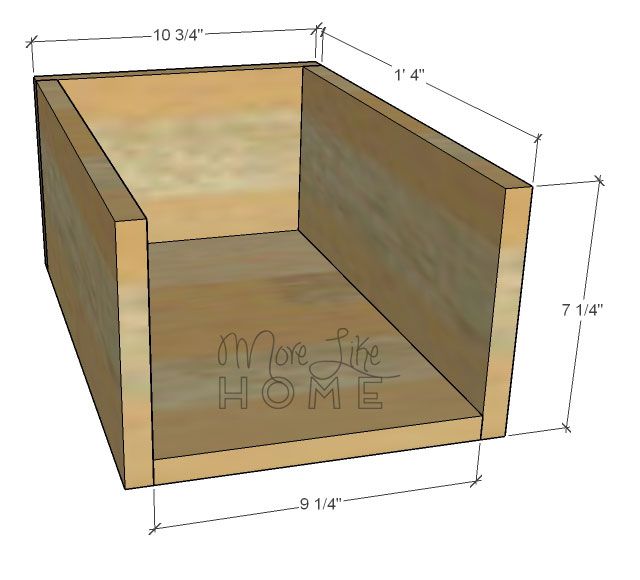
Use the Kreg Jig to make pocket holes along the sides and bottom edge of the shelf back (D) and install it as shown in the next picture. Use the pocket holes along the back edge of the inner side boards to attach them to the shelf back. (If you don't have a Kreg Jig, you can attach the shelf back by drilling in through the bottom and sides, and drill through the shelf back into the inner sides.)
Attach the top board (A). You can use pocket holes around the top of the sides and shelf back to avoid holes in the top (but you'll have to fill holes on the sides), or use finishing nails and glue to attach the top. Screws will be sturdier, but finishing nails won't leave holes to fill (make sure you don't lift the desk by the top when you move it if you do nails!)

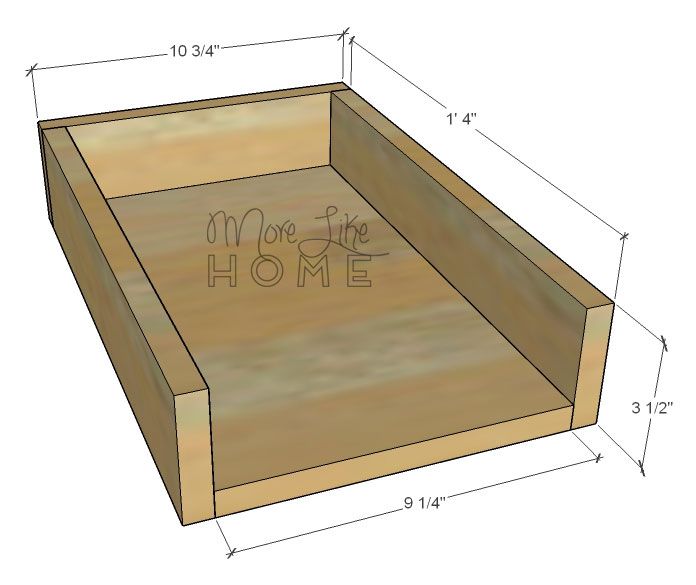
Assemble the drawer boxes. You'll build each drawer box the same way, by attaching two drawer sides to the drawer back (use a Kreg Jig to make pocket holes along the front back edge of the drawer sides or drill through the back into the ends of the side boards), then slip the drawer bottom into place and attach it to the sides and back (use pocket holes around all four edges of the drawer bottom, or drill through the sides and back into the edges of the drawer bottom).
You'll make two small drawer for the left side using two short drawer sides (E), one short back (F), and one narrow bottom (G) for each drawer.
Make one center drawer using two short drawer sides (E), one long drawer back (H), and one wide drawer bottom (I).
Make one tall drawer for the right side using two tall drawer sides (J), one tall drawer back (K), and one narrow drawer bottom (G).
Follow the instructions on your drawer slides to install each drawer box.
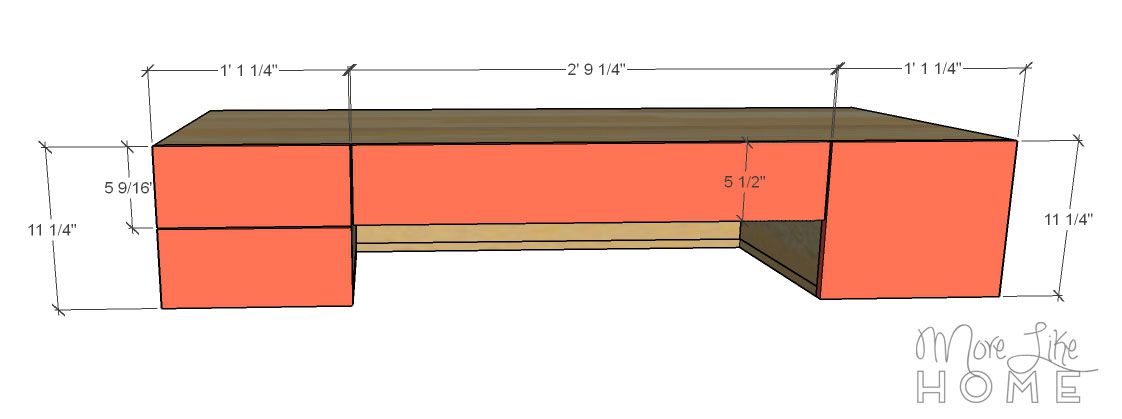
Center a drawer front over each drawer box (they should be flush with the top and sides of the desk, with a 1/8" gap between each drawer front) and attach the fronts with finishing nails. (if you put pocket holes along the front edge of the drawer bottoms and sides, they are a perfect way to reinforce your drawer fronts!)
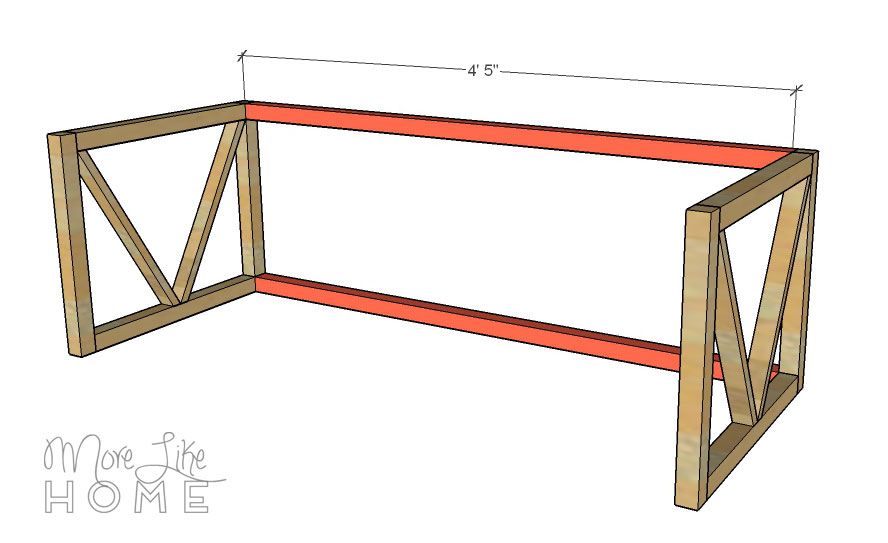
Now you can build the legs (unless you purchased a set of hairpin legs, then install them and skip ahead!). Take two legs (N) and attach two stretchers (O) between them. Use a Kreg Jig with 2 1/2" pocket screws, or drill through the legs into the ends of the stretchers with 2 1/2" wood screws.
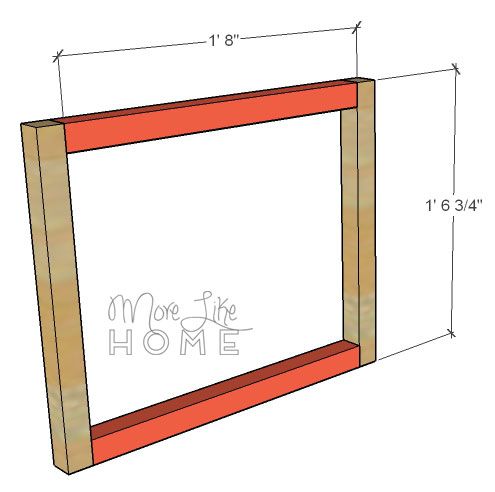
Cut the ends of the trim boards (P) at a 30 degree angle (parallel). The length along one side should be 18 3/16". Attach with finishing nails.

Build a second leg section the same way, then connect them with the back stretchers (Q). Use a Kreg Jig with 2 1/2" pocket screws, or drill through the legs into the ends of the stretchers with 2 1/2" wood screws.
Optional: you could try omitting the bottom stretcher and see if the desk seems sturdy without it, but I'm afraid it might not be.
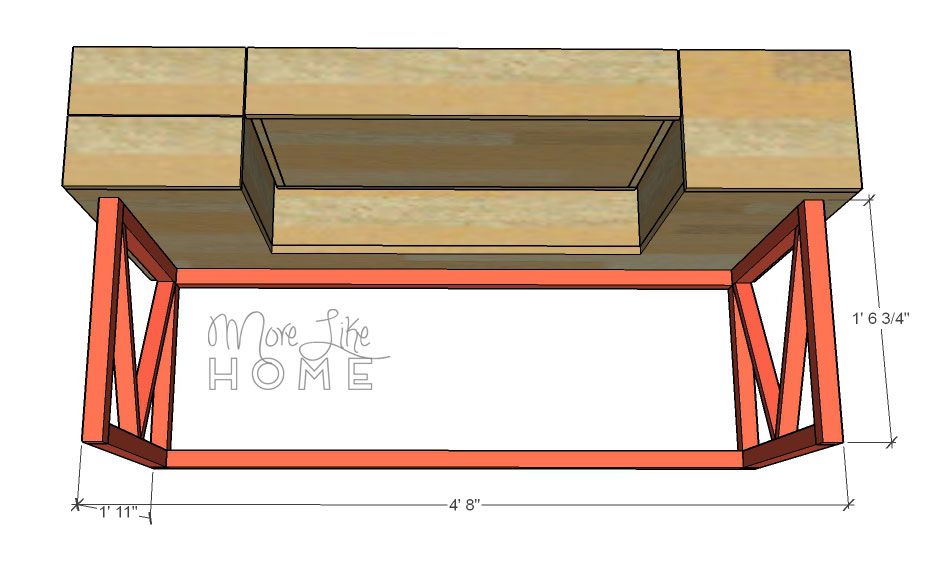
Attach the legs to the bottom of the desk by drilling up through the stretchers into the the bottom of the desk with 2" screws.
To finish, fill any holes with wood filler then sand everything down really well. This is the most important step for a professional finish! Start with a rough sand paper, then go over everything with a medium paper, then again with a fine paper. Once it's super smooth, finish it with whatever paint or stain and sealer you like. I'm loving the two-tone look of a wood top with satin black legs!
That's it! Come back tomorrow for another DIY desk plan, and check out the full series here!
)
I love this middle-of-the-room idea!
ReplyDelete