
P.S. Check out the rest of our free DIY Desk Plan Series here!
And the rest of the standing-height desk plans here!
inspiration photo source

inspiration photo source
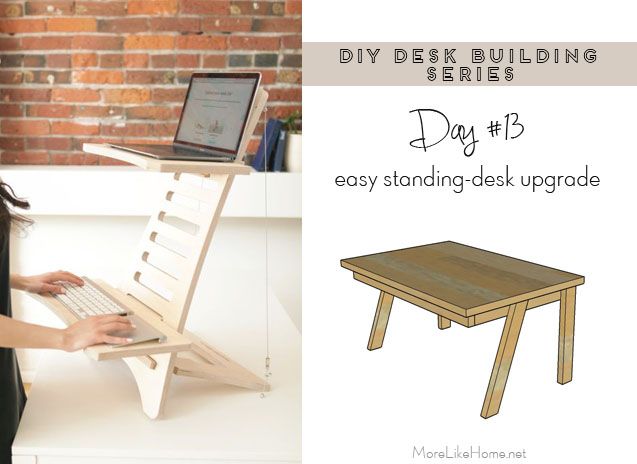
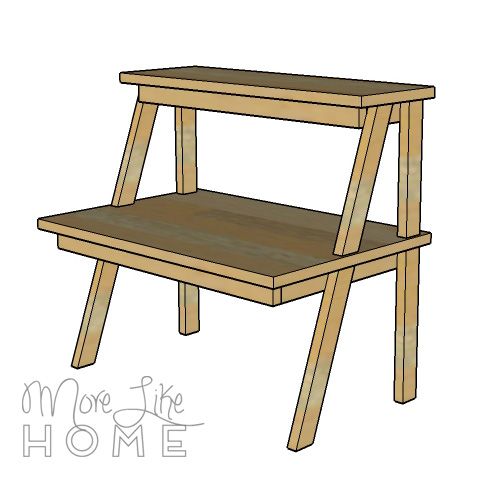
Have a desktop computer? We'll add a second platform on top to hold the monitor closer to eye level, while keeping your keyboard close to elbow-height.
Shopping List:
2 - 1x2 @ 8'
1 - 1x2 @ 4'
1 - 3/4" plywood @ 24 x 24" (some stores sell "project panels" in smaller sizes like this)
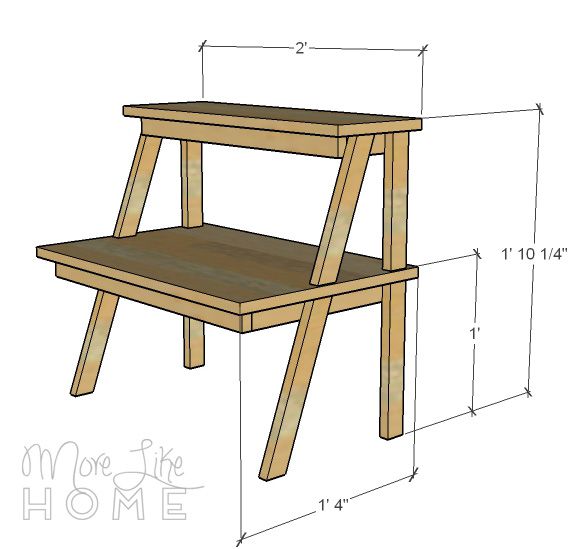
Dimensions: 24" wide x 16" deep x 22 1/4" high (only 12" high without the second platform)
Measure twice, cut once (seriously, though). Use glue in every step (be careful to clean up any drips, because they will mess up your finish at the end!). Read through all the instructions before you begin. Use 1 1/4" screws unless otherwise indicated. Pre-drill and countersink all your screws. Be safe, have fun, and let me know if you have any questions! Please note I have not built from these plans myself (you might be the first!), so double check everything as you go.
Cut List Main Desk:
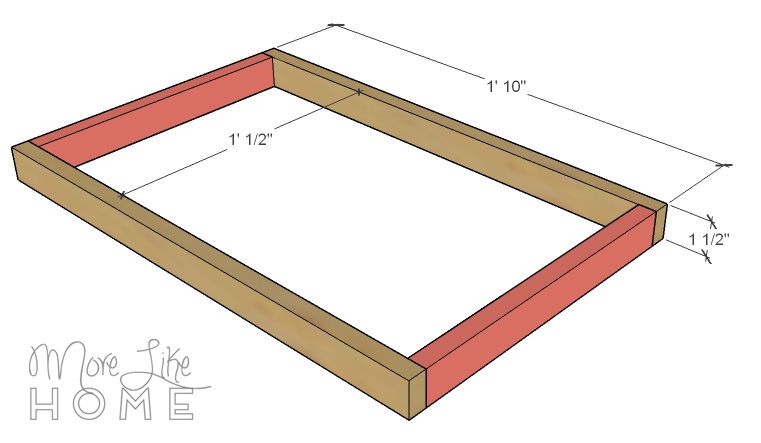
(A) 2 - 1x2 @ 22" (back/front)
(B) 2 - 1x2 @ 12 1/2" (sides)
(C) 2 - 1x2 @ 11 1/4" (back legs)
(D) 2 - 1x2 @ 14" (front legs)
(E) 1 - plywood @ 24 x 16" (top
Cut List Second Platform:
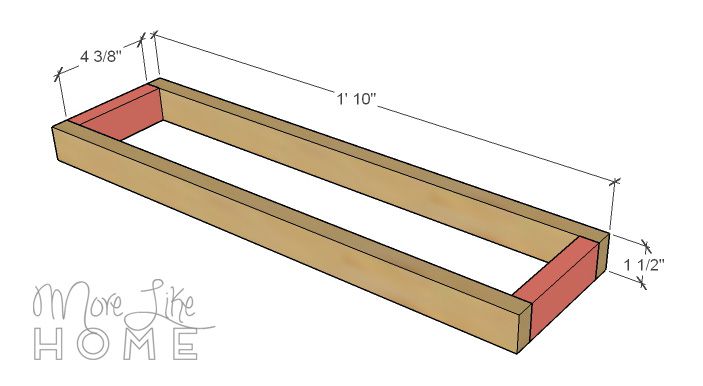
(F) 2 - 1x2 @ 22" (back/front)
(G) 2 - 1x2 @ 4 3/8" (sides)
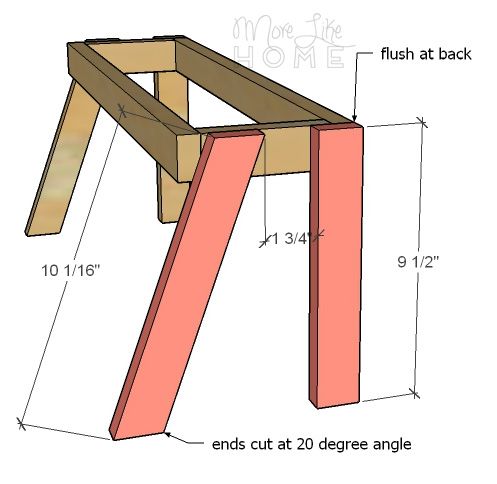
(H) 2 - 1x2 @ 9 1/2" (back legs)
(I) 2 - 1x2 @ 12" (front legs)
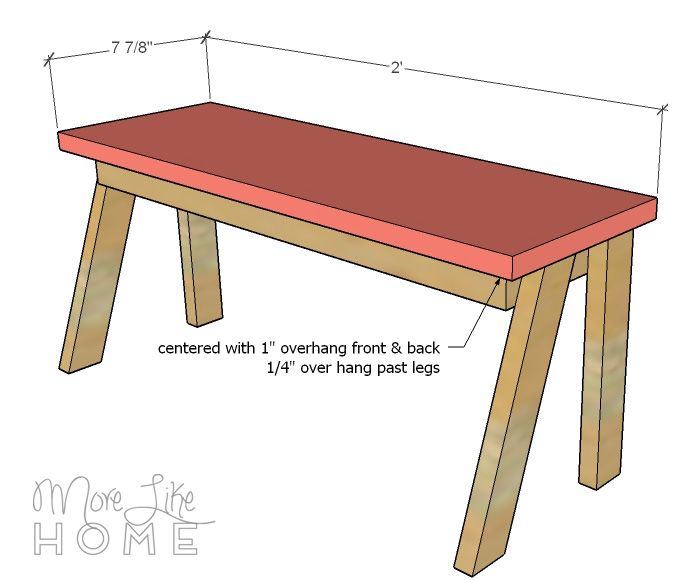
(J) 1 - plywood @ 24 x 7 7/8" (top)
I'll be giving instructions for the Kreg Jig, followed by instructions without a Kreg Jig in italics when applicable. It's always a handy tool to have around, but you *can* do this project without one.
Build the frame by drilling pocket holes in both ends of the side boards (B). Attach them to the front/back boards (A) using 1 1/4" pocket hole screws. OR drill through the front/back boards into the ends of the side boards with 1 1/4" wood screws.
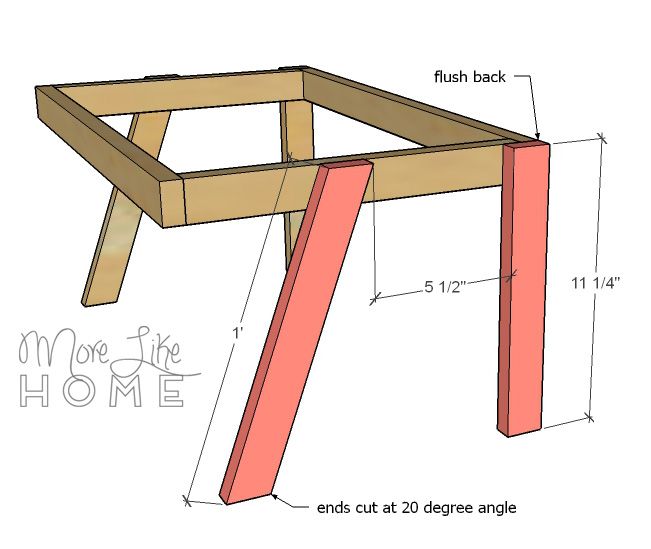
Attach the back legs (C) flush with the back of the frame, by drilling out through the inside of the frame into the leg (this way your screw heads will be hidden under the desktop instead of showing on the outside).
Now cut down your front legs (D). I listed it as 14" just in case you got a little cut-happy before you read all the steps. ;) You actually need to cut the ends of the front legs at a 20 degree angle (parallel /=/), with each side measuring 12" long after the cuts. Line up the front legs flush with the top edge of the frame, and set in 5 1/2" from the back legs. Attach them by drilling out through the side board into the leg (2 screws per leg!).
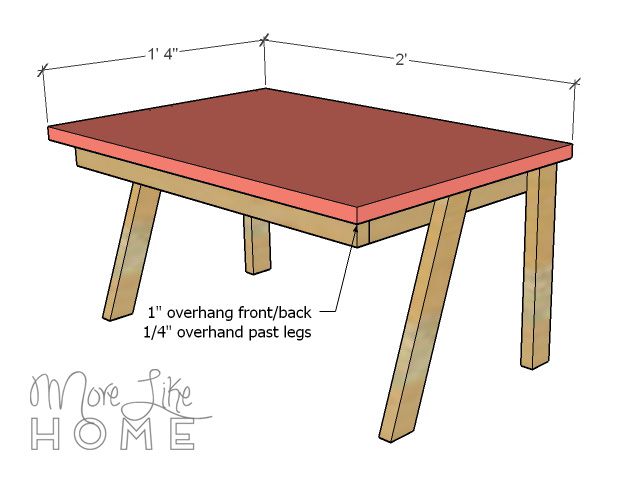
Attach the top board (E). It should be centered with a 1" overhang around the frame (only 1/4" past the legs). You can use finishing nails and glue, or drill down through the top into the frame with 1 1/4" wood screws. Screws will be stronger, but finishing nails will give a more seamless look when you finish it.
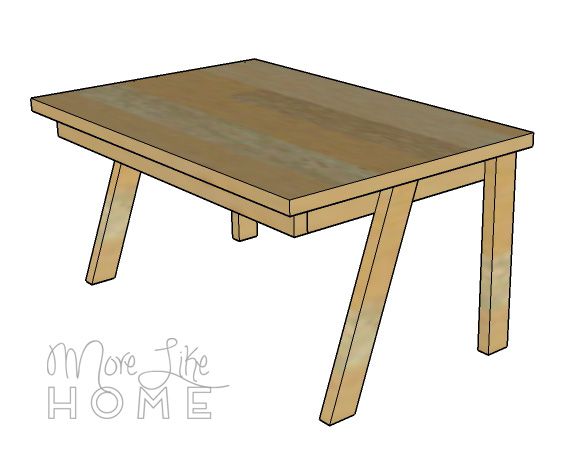
If you're building a one-step desk for a laptop, you're almost done! Skip down to the finishing instructions! If you need the second level, here you go:
Build the frame. For this one, since the space is so tight, I would do pocket holes on the front ends of the side boards (G) and attach them to the front board with pocket hole screws. Then attach the back board by drilling through that board into the ends of the side boards. You won't have room to do pocket holes for the back, but at least this way the screws will be hidden on the back with nothing visible on the front.
Attach the legs the same way you did for the first platform. The back legs should be flush with the back of the frame.
The front legs should be cut at a 20 degree angle with each side measuring 10 1/16" (sorry about the oddball number, that's how it worked out!) and spaced in 1 3/4" from the back legs.
Attach the top the same way you did for the first platform. Again centered with 1" overhang on each side.
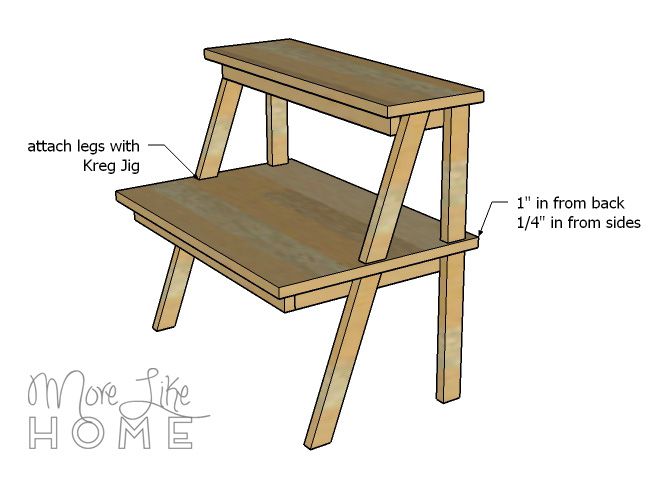
Now you can attach this platform your your first platform. The easiest way to do this is using the Kreg Jig to make a pocket hole at the bottom of each leg on the upper platform. If you don't have a Kreg Jig, you can use nails or wood screws and drive them in at an angle near the bottom of the legs so they catch both the legs and the desktop.
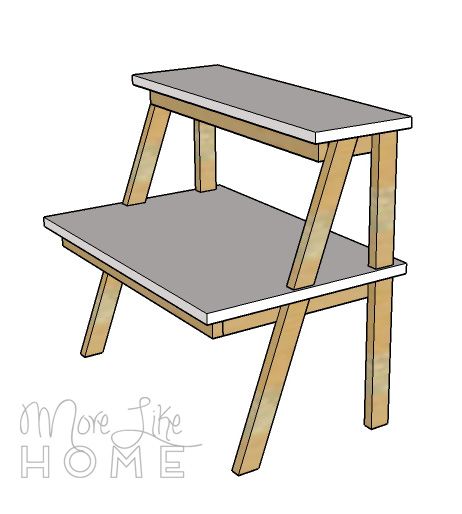
To finish, fill any holes with wood filler then sand everything down really well. This is the most important step for a professional finish! Start with a rough sand paper, then go over everything with a medium paper, then again with a fine paper. Once it's super smooth, finish it with whatever paint or stain and sealer you like. I'm loving the two-tone look of a white top with stained legs!
That's it! Come back tomorrow for another DIY desk plan, and check out the full series here!
)
nice
ReplyDeleteI am thinking of just put a coffee table on top of my office table, do you think it will work?
ReplyDeleteIt definitely could work, depending on the height of your coffee table. If you find it's too high to type comfortably you could cut the legs a bit shorter to get a better fit. Good luck! :)
Delete