
P.S. Check out the rest of our free DIY Desk Plan Series here!
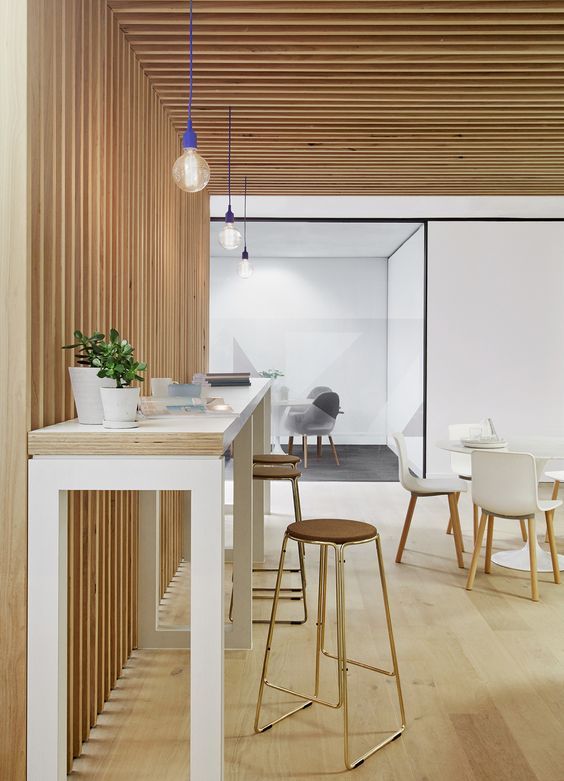
inspiration photo source
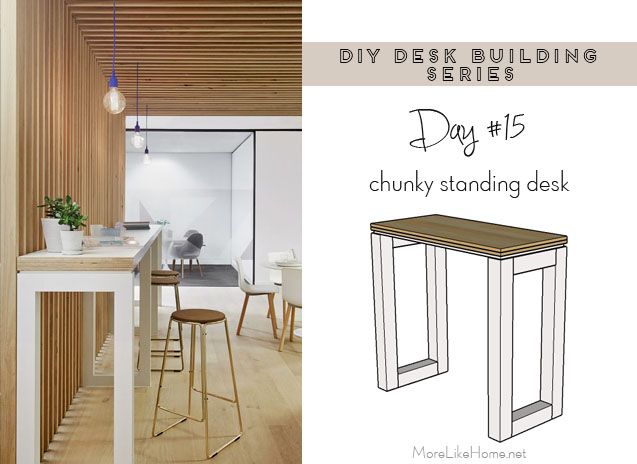
This desk can easily do double-duty as a console table, so it's a great way to squeeze a work space into your living or dining room.
inspiration photo source
Got kids with homework? This is a perfect station to tackle those math books without cluttering the table or countertop.
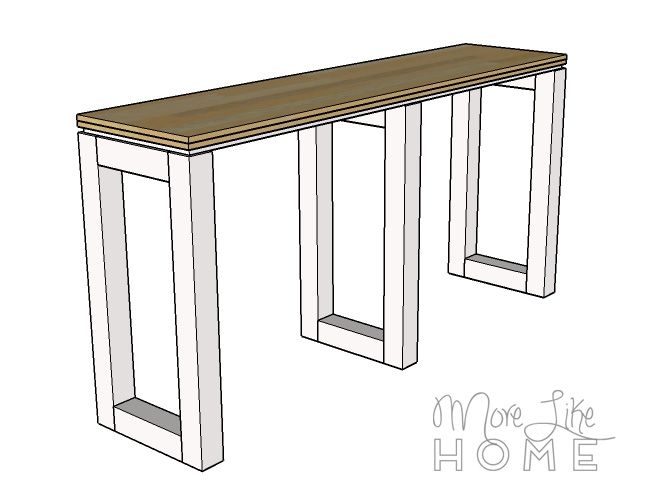
Need workspace for more than one? You can easily extend the desk to fit multiple people (or make a full wall-length console!).
Shopping List:
3 - 4x4 @ 8'
1 sheet 3/4" plywood
Kreg Jig
2 1/2" pocket hole screws
1 1/4" wood screws
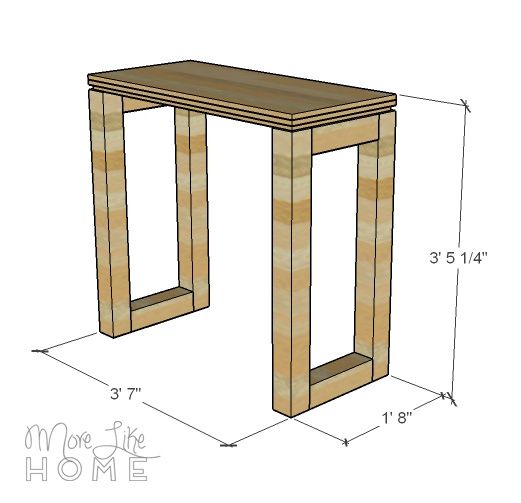
Dimensions: 43" wide x 41 1/4" high x 20" deep
Measure twice, cut once (seriously, though). Use glue in every step (be careful to clean up any drips, because they will mess up your finish at the end!). Read through all the instructions before you begin. Use 1 1/4" screws unless otherwise indicated. Pre-drill and countersink all your screws. Be safe, have fun, and let me know if you have any questions! Please note I have not built from these plans myself (you might be the first!), so double check everything as you go.
Cut List:
(A) 4 - 4x4 @ 39" (legs)
(B) 4 - 4x4 @ 13" (side stretchers)
(C) 1 - 4x4 @ 36" (back stretcher)
(D) 1 - plywood @ 42 x 19" (base)
(E) 2 - plywood @ 43 x 20" (top)
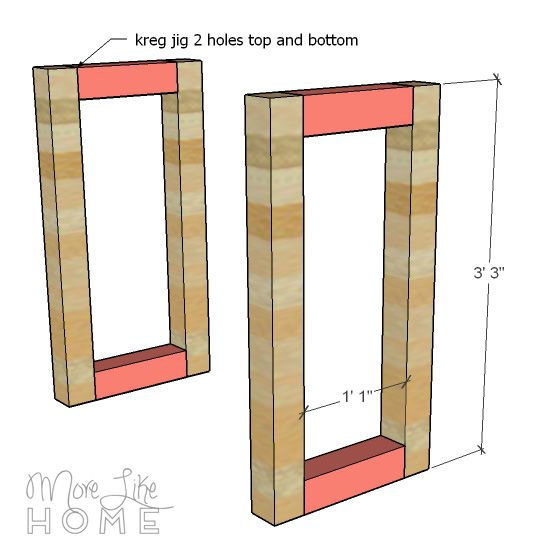
Build each leg section by drilling pocket holes in the ends of the side stretchers (B). Do two holes each on the top and bottom of each stretcher. Attach them to the legs (A) with the pocket screws, one flush with the top of the legs and one flush with the bottom.
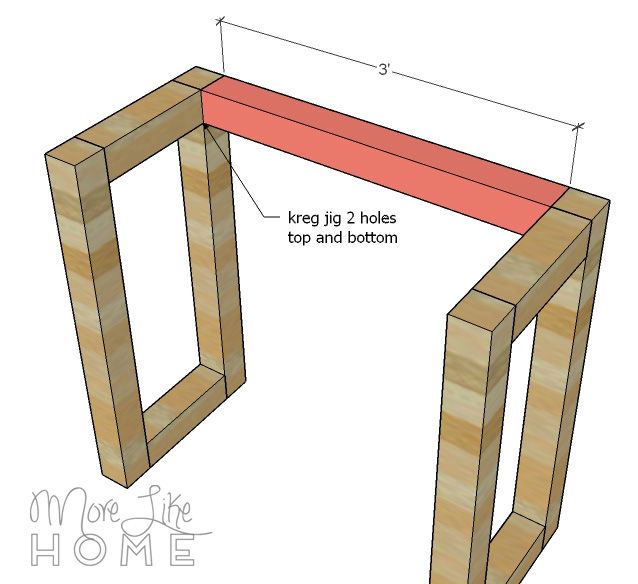
Connect the leg sections with the back stretcher (C) the same way you installed the side stretchers.
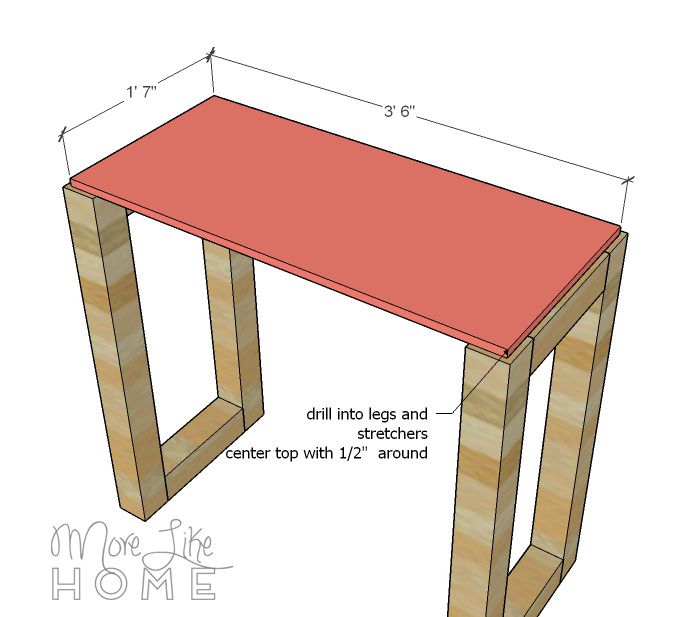
Center the base (D) over the legs with 1/2" of the frame showing on all sides. drill down through the top into all the legs and stretchers with 1 1/4" wood screws.
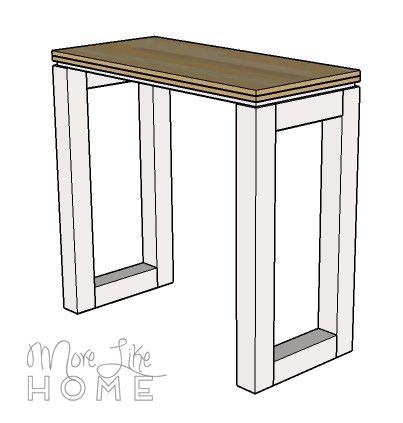
To make a thick wood top like the inspiration photo, we're going to sandwich two pieces of plywood together. Lay the two top boards (E) together with glue between them. Drill through the bottom board into the top board with several screws to connect them, but be careful not to drill all the way through. Make sure you choose the best side for the top of the desk!

Center the top over the base board. It will have a 1/2" overhang on all sides and line up with the legs. Drill up through the base into the top with 1 1/4" wood screws.

That's it! Super easy! If you want to make a long desk, just build another set of legs and back stretcher, then cut the top longer to reach across.
To finish, fill any holes with wood filler then sand everything down really well. This is the most important step for a professional finish! Start with a rough sand paper, then go over everything with a medium paper, then again with a fine paper. Once it's super smooth, finish it with whatever paint or stain and sealer you like. I'm loving the two-tone look of white legs with a stained top!
That's it! Come back tomorrow for another DIY desk plan, and check out the full series here!
)
Really a nice information
ReplyDelete