
P.S. Check out the rest of our free DIY Desk Plan Series here!
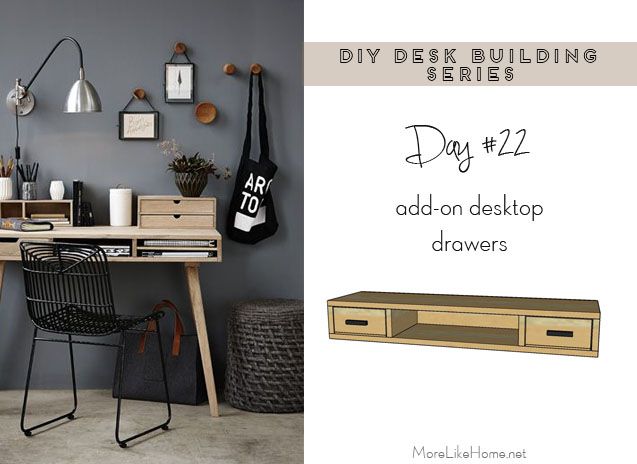
We'll be doing a version with two separate units like the inspiration photo. You can leave it as an open cubby, or make a small drawer to tuck in:

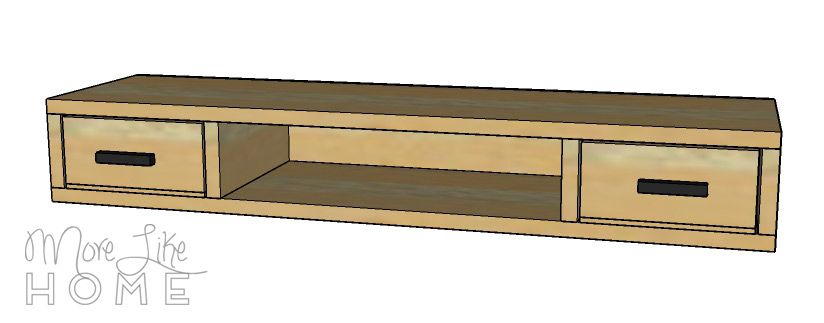
And a full-length version to reach completely across the desktop, with a drawer at each end (you could leave these open as cubby spaces, too.
You can stack them together, or even stack one with the hutch from yesterday's plans!

Separate Drawers
Shopping List (to make two boxes - one with a drawer and one without):
- 1 - 1x10 @ 6'
- 1 - 1x4 @ 4'
- 1/4" plywood project panel, or a few small scraps
- drawer pull
- finishing nails or 1 1/4" wood screws (I would just use nails and glue for these little guys assuming it won't see heavy use, but you can use screws for a stronger hold if you like, especially for the drawer box if you'll be pulling it out a lot)
- wood glue
- wood filler (if you screws)
- sandpaper and finishing supplies

Measure twice, cut once (seriously, though). Use glue in every step (be careful to clean up any drip, because they will mess up your finish at the end!). Read through all the instructions before you begin. Use 1 1/4" screws unless otherwise indicated. Pre-drill and countersink all your screws. Be safe, have fun, and let me know if you have any questions! Please note I have not built from these plans myself (you might be the first!), so double check everything as you go.
Cut List:
(A) 4 - 1x10 @ 12 1/2" (top/bottom)
(B) 4 - 1x10 @ 3 7/8" (sides)
(C) 2 - plywood @ 12 1/2 x 5 3/8" (back)
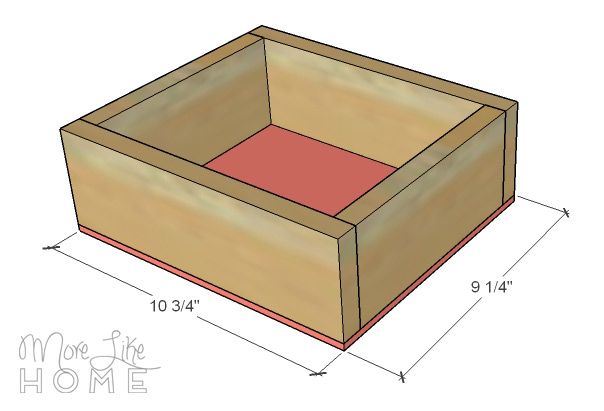
(D) 2 - 1x4 @ 10 3/4" (drawer front/back)
(E) 2 - 1x4 @ 7 3/4" (drawer sides)
(F) 1 - plywood @ 10 3/4 x 9 1/4 (drawer bottom)
Start by attaching the top and bottom (A) to the sides (B) as shown with finishing nails:
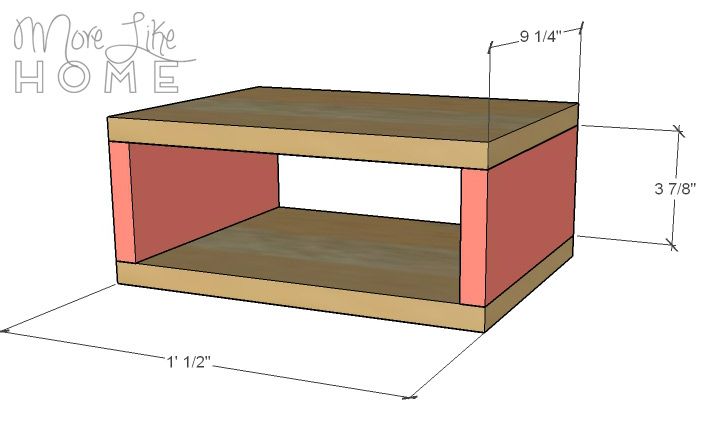
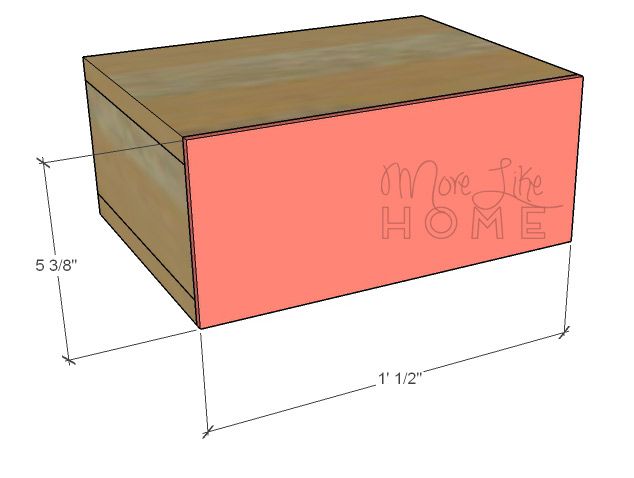
Attach the back (C) to the box with finishing nails.
Build a second box just like that.
Now make the drawer. Attach the drawer front & back to the drawer sides with finishing nails.

Attach the drawer bottom with finishing nails.
Attach the drawer pull and slide the drawer in place. All done! Scroll to the end for finishing instructions.
Long Drawer Unit
Shopping List:
- 1 - 1x10 @ 10'
- 1 - 1x4 @ 6'
- 1/4" plywood project panel, or a few small scraps
- 2 - drawer pulls
- finishing nails or 1 1/4" wood screws (I would just use nails and glue for these little guys assuming it won't see heavy use, but you can use screws for a stronger hold if you like, especially for the drawer box if you'll be pulling it out a lot)
- wood glue
- wood filler (to fill holes if you use screws)
- sandpaper and finishing supplies

Measure twice, cut once (seriously, though). Use glue in every step
(be careful to clean up any drip, because they will mess up your finish
at the end!). Read through all the instructions before you begin. Use 1
1/4" screws unless otherwise indicated. Pre-drill and countersink all
your screws. Be safe, have fun, and let me know if you have any
questions! Please note I have not built from these plans myself (you
might be the first!), so double check everything as you go.
Cut List:
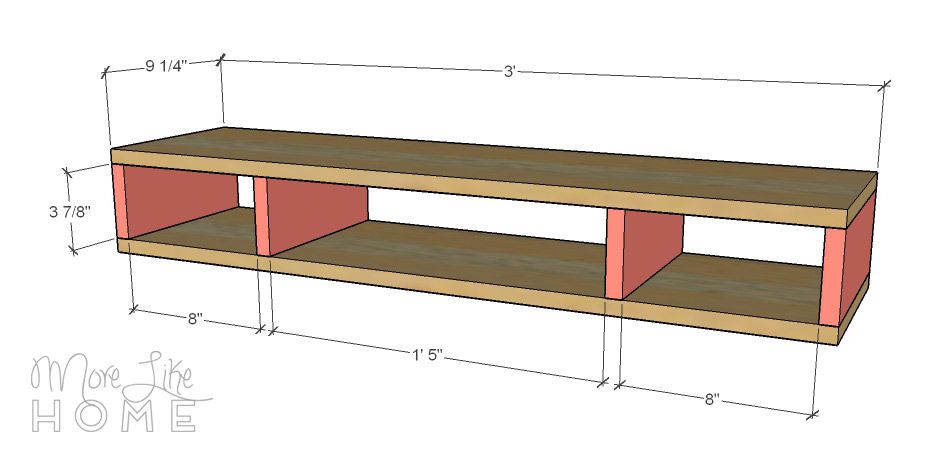
(A) 2 - 1x10 @ 36" (top/bottom)
(B) 4 - 1x10 @ 3 7/8" (sides)
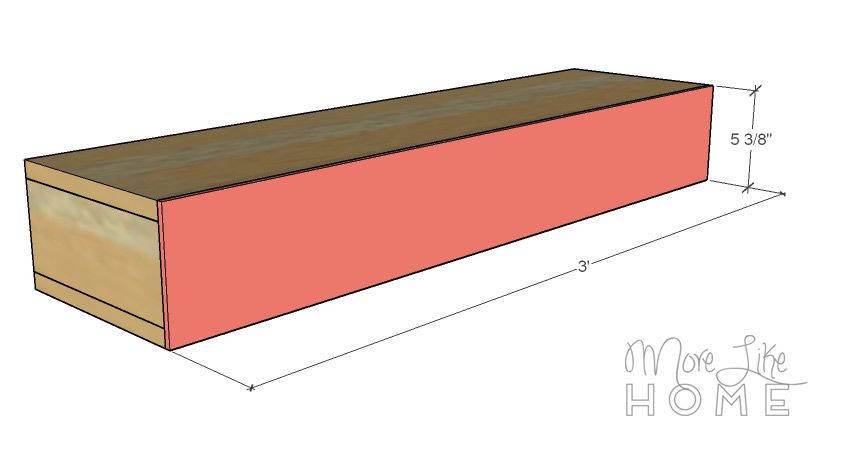
(C) 1 - plywood @ 36 x 5 3/8" (back)
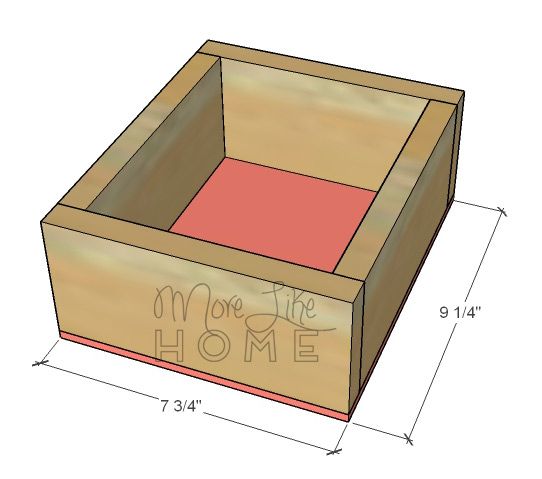
(D) 4 - 1x4 @ 7 3/4" (drawer front/back)
(E) 4 - 1x4 @ 7 3/4" (drawer sides)
(F) 2 - plywood @ 7 3/4 x 9 1/4" (drawer bottoms)
Start by attaching the top/bottom (A) to the sides (B) with finishing nails. One should be flush with each end, and one should be set in 8" from each side. Make sure they are straight.
Attach the back (C) with finishing nails.
For each drawer, attach the drawer front/back (D) to the drawer sides (E) with finishing nails.

Attach the drawer bottoms with finishing nails.
Attach the drawer handles, slip the drawers in place, and you're done!
Finishing
To finish, fill any holes with wood filler then sand everything down really well. This is the most important step for a professional finish! Start with a rough sand paper, then go over everything with a medium paper, then again with a fine paper. Once it's super smooth, finish it with whatever paint or stain and sealer you like.
Attach the drawers to your desktop with a few finishing nails through the base into the desktop.
And that's it! Don't forget to check out the rest of the series here, and thanks for building with us!!!
)
No comments:
Post a Comment