
This is a simple build that doesn't require any specialty tools (I'll
include instructions for a Kreg Jig, but you can build it entirely
without one). Want to give it a try?
Measure twice, cut once (seriously, though). Use glue in every step (be careful to clean up any drips, because they can mess up your finish at the end!). Read through all the instructions before you begin. Use 1 1/4"" screws unless otherwise indicated. Pre-drill and countersink all your screws. Be safe, have fun, and let me know if you have any questions! Please note I have not built from these plans myself (you might be the first!), so double check everything as you go.
Shopping List:
1 - sheet 3/4" plywood
1 - 1x2 @ 6' long
1 1/4" wood screws
Optional: Kreg Jig + 1 1/4" pocket hole screws (Kreg Jig instructions will be in italics)
4 casters (this is the perfect time to use some industrial-style casters!)
2 pieces 17 1/2" x 17 3/4" foam 2" thick
1 yard batting
1 yard upholstery fabric

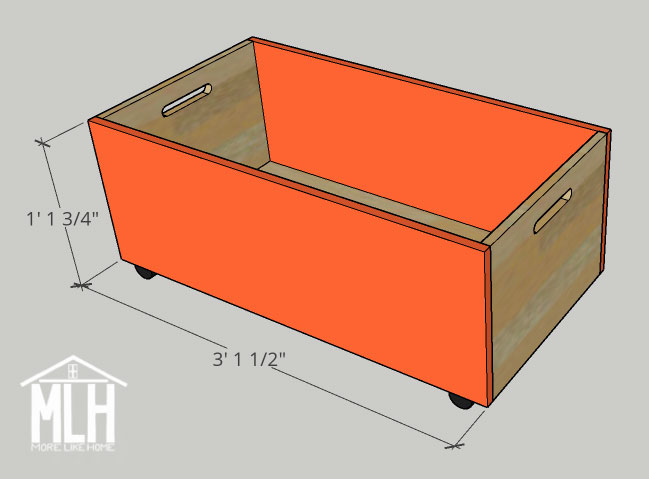
Dimensions: 37 1/2" long x 19 1/2" wide x 14 12" tall (plus casters)
Cut List:
(A) 2 - plywood @ 18 x 13 3/4" (sides)
(B) 1 - plywood @ 36 x 18" (bottom)
(C) 2 - plywood @ 37 1/2 x 13 3/4" (front/back)
(D) 1 - plywood @ 18 x 8" (divider) optional
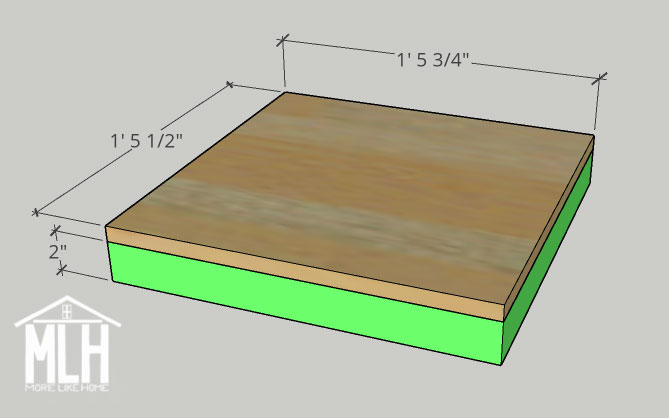
(E) 2 - plywood @ 18 5/8 x 19 1/4" (top)
(F) 2 - plywood @ 17 3/4 x 17 1/2" (seat)
(G) 4 - 1x2 @ 17 3/4" (trim)
A sheet of plywood is just big enough to cut out all your pieces. Here's a diagram to help with placement:

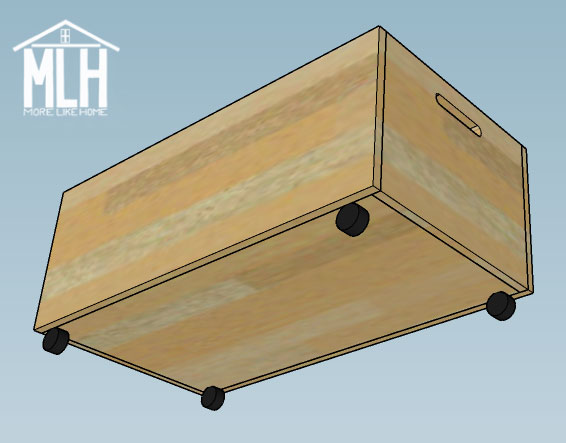
Start by cutting out the sides (A), and cutting handles in the sides. The handles are a great feature for moving your coffee table around and they are a key detail in the crate-style of this coffee table, but they aren't totally not necessary. If you'd like to include the handles, it will be easier to cut them before you start assembling the box. I'd try an opening centered on the board with 6" space on either side, set down 1 3/4" from the top edge. I have instructions for cutting handles and a bunch of photos in my crate nightstand plans to get you started. You could also just use a 1" drill bit to drill finger holes in the side and call it a day. And again, not a necessary feature if you don't have the tools or the time!

Attach the sides to the bottom (B). Drill through the outside face of the side boards and into the ends of the bottom board with 1 1/4" wood screws. Don't forget the glue! If you have a Kreg Jig, make pocket holes along all four sides of the bottom board and along the front and back of the side boards. Use the pocket holes along the short ends of the bottom board to attach the side boards with 1 1/4" pocket hole screws.

Attach the front/back boards (C). Drill through the face of the front/back boards into the edges of the side and bottom boards. If you have a Kreg Jig, use the pocket holes along the side and bottom boards to attach the front/back boards with 1 1/4" pocket hole screws.
Install the divider. You can make as many dividers as you like and any size you like! Or skip them altogether. You can separate it into sections for each child, make a large section for blankets or board games, or make narrow sections for stashing magazines or a laptop. Drill through the side and bottom boards into the edges of the divider with 1 1/4" wood screws. If you have a Kreg Jig, make pocket holes along the bottom and both sides of the divider and attach it with pocket hole screws.

Attach casters to the bottom of the crate.
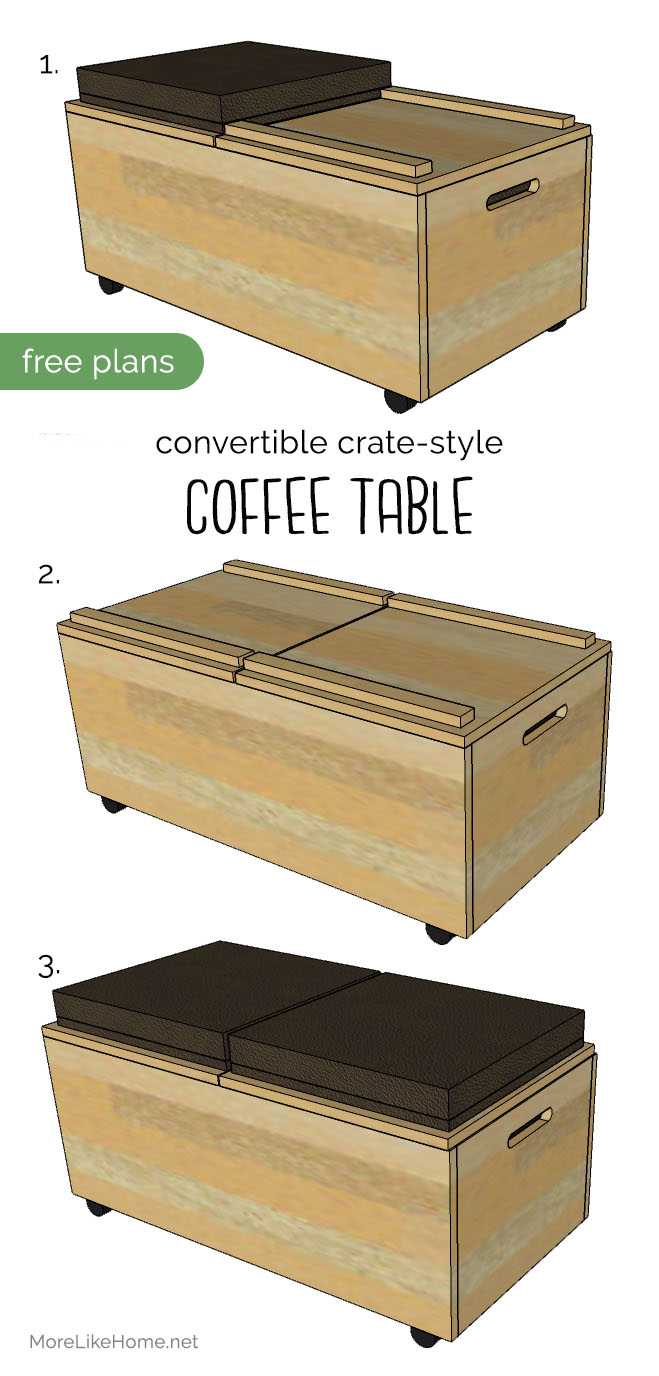
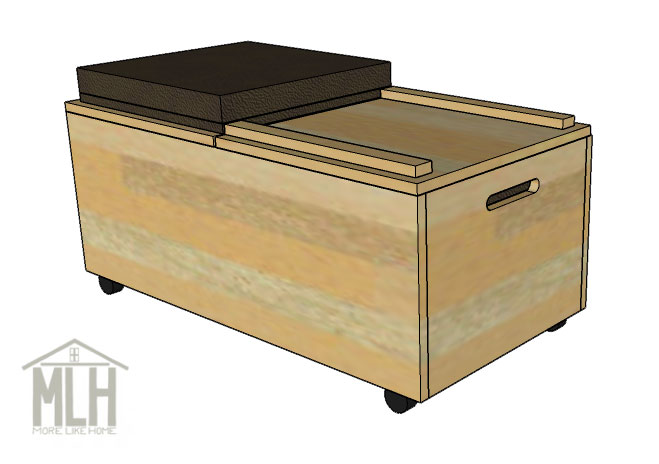
Now you can build the top. This coffee table is designed to have two reversible panels at the top that are upholstered on one side and wood on the other. When the upholstered side is up, there are wooden trim pieces on the bottom that hold the seat in place. When you flip the upholstery underneath, the trim boards will show on top and add to the rustic charm of the crate. However, if you don't expect you'll use the upholstered side for extra seating or putting your feet up, you can skip the upholstery and have a plain, solid wood top. If you like the look of the wood trim you'll need to add trim to both sides so you can see it on top, but still have trim underneath to keep the top from sliding around.
To create the upholstered seat (F), start a stack on the ground with your fabric (face-down), topped with the batting, topped with the piece of foam, topped with the plywood. Wrap the batting around the foam and up onto the plywood, pulling it taught, and staple it in place. Then wrap the fabric up over the batting and staple it in place. You can also tuft the upholstery like I did way back when I built our headboard.
You can buy a piece of foam at Joann fabric, or some people have had good luck buying a foam mattress or mattress topper for less $$ and cutting it down to size.
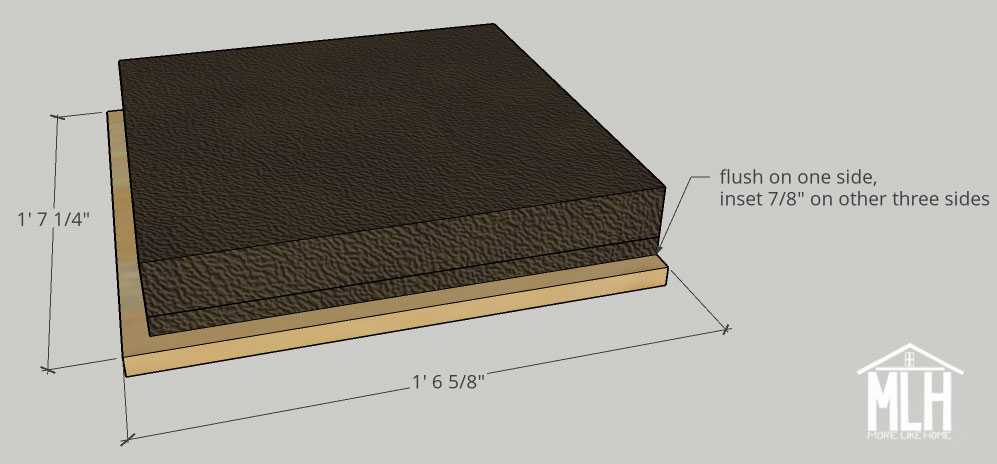
Attach the upholstered seat to the top board (E). Line it up flush against one of the longer sides, leaving a 7/8" overhang on the other three sides. Attach it by drilling through the top board into the bottom of the seat board with 1 1/4" wood screws. If you want the option to reupholster the seat later, don't cover these screws with wood filler.
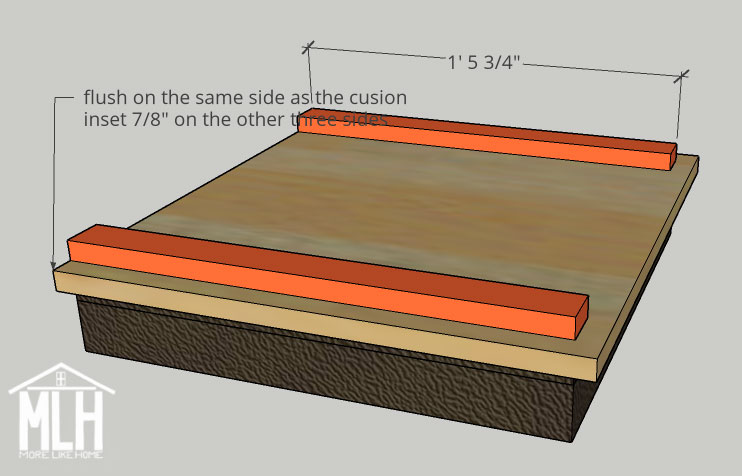
Attach the trim boards (G) to the other side of the top board. Line up the ends of the trim boards flush with the same edge the upholstered seat is flush with, leaving a 7/8" gap on the other sides. Attach by drilling through the trim boards into the top board with 1 1/4" wood screws.
To finish, fill any visible holes with wood filler then sand everything down really well. This is the most important step for a professional finish! Start with a rough sand paper, then go over everything with a medium paper, then again with a fine paper. Once it's super smooth, finish it with whatever paint or stain and sealer you like. Also note that the edges of plywood will not take stain or paint as well. It's a more obvious difference with stain, but even with paint the edges probably won't quite match the rest of the table. You can solve this problem by applying 3/4" plywood edge banding. It's usually an iron-on strip of thin wood that will stain to match the plywood top. Honestly, though, I usually just roll with the regular plywood edge and it doesn't bother me since I expect it. But be warned, if you're a bit of a perfectionist you'll probably want the edge banding.

You're done! You can leave the wood top up for cups and card games, or flip it over for extra seating.

Or get crazy and put your feet up at one end and set your bowl of ice cream at the other. There's no wrong way to coffee table, guys.
I love to see your finished projects! Tag me on instagram @more.like.home or share them on our facebook page!
Want more plans? Check out the rest of the coffee table series here and all our other building plans here!
No comments:
Post a Comment