
Don't have kids? Don't leave just yet. This table still has a beautiful minimalist vibe that works with just about any decor. You can use it with the ottomans for more storage, or without ottomans for a cleaner, lighter style. Round coffee tables are a great way to add surface area without interrupting the flow of the room. They work well in any layout, but are especially well-suited with a sectional sofa or any other setup that will involve shimmying around the table to reach your seat. The rounded top means more wiggle room where you need it most, fewer bumped shins, and no sharp corners for a toddling baby!
(If you love this concept, you'll also enjoy the rectangular version with even more storage from this series!)
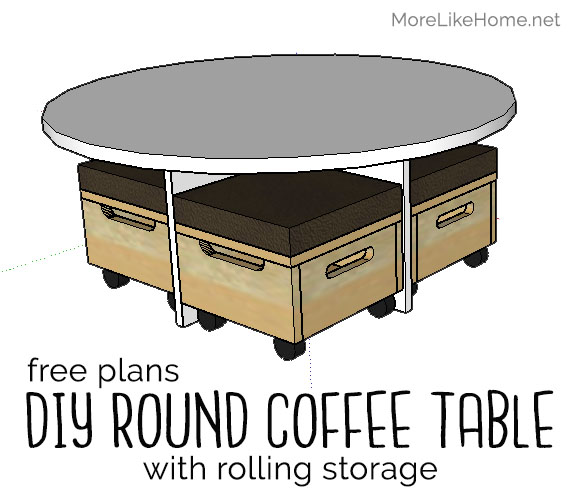
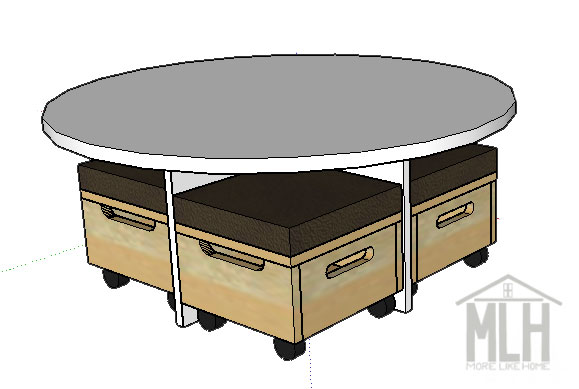
Each of the four small ottomans rolls out on casters and has its own hidden storage under a hinged lid. And the upholstered tops make them perfect little seats for the kids! If you have multiple kids, you could give them each their own ottoman to keep their own things in when it's time to clean up! Ready to get started?
Measure twice, cut once (seriously, though). Use glue in every step (be careful to clean up any drips, because they can mess up your finish at the end!). Read through all the instructions before you begin. Use 1 1/4"" screws unless otherwise indicated. Pre-drill and countersink all your screws. Be safe, have fun, and let me know if you have any questions! Please note I have not built from these plans myself (you might be the first!), so double check everything as you go.
Shopping List:
1 - 4' x 4' project panel of 3/4" plywood (sometimes sold in a different aisle than the full sheets. But it's usually a much better deal to get a full sheet, so if you plan to build more and use it up go for the full sheet!)
36" round tabletop OR go ahead and get a full sheet of 3/4" plywood instead of the project panel and you can cut your own from the extra
1 - 1x6 @ 8' long
1 1/4" wood screws
finishing nails
3/4" plywood edge banding
16 casters (2" total height or smaller)
8 hinges (for the ottoman lids, any style you like, but consider a soft-close lid support if kids will be using the ottomans)
1 yard fabric
1 yard batting
4 pieces of 2" thick foam 11 1/2" x 11 1/2" each
heavy duty stapler (not an office stapler!)
Kreg Jig and 1 1/4" pocket hole screws (You really only need this for the table base, and can find away around it if you don't have one)
Optional: 4 drawer pulls for ottomans if you don't want to cut notches

Table dimensions: 36" round and 15 1/4" tall
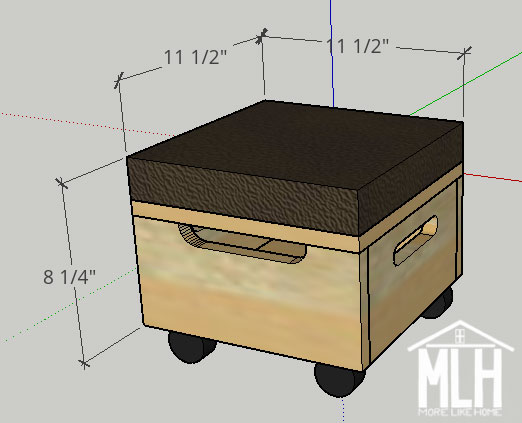
Ottoman dimensions: 11 1/2" wide x 11 1/2" long x 8 1/4" tall (plus casters)
Cut List:
(A) 1 - plywood @ 24" x 14 1/4" (base)
(B) 2 - plywood @ 11 5/8" x 14 1/4" (legs)
(C) 1 - 36" round top, either purchased or cut from plywood
(D) 4 - plywood @ 10" x 10" (ottoman base)
(E) 8 - 1x6 @ 10" (ottoman sides)
(F) 8 - 1x6 @ 11 1/2" (ottoman front/back)
(G) 4 - plywood @ 11 1/2" x 11 1/2" (ottoman top)
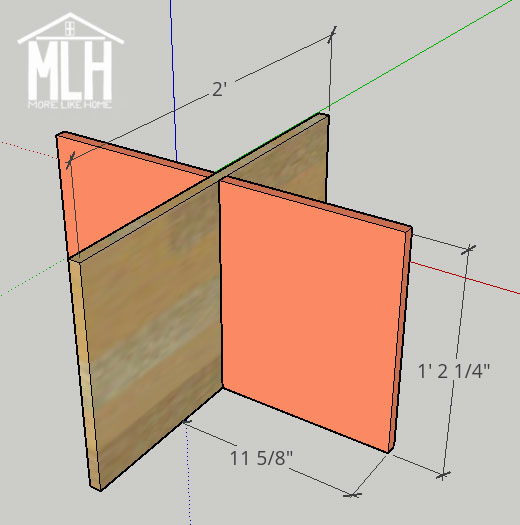
Start by building the table base. Attach one table leg (B) on each side of the base (A). Each leg should be centered on the base with 11 5/8" space on either side. Drill pocket holes along one side of each leg and use them to attach the base with 1 1/4" pocket hole screws. If you don't have a Kreg Jig, you can use regular screws and drill through the legs at an angle so you hit the base. It will be difficult to completely hide the screws without the pocket holes, though
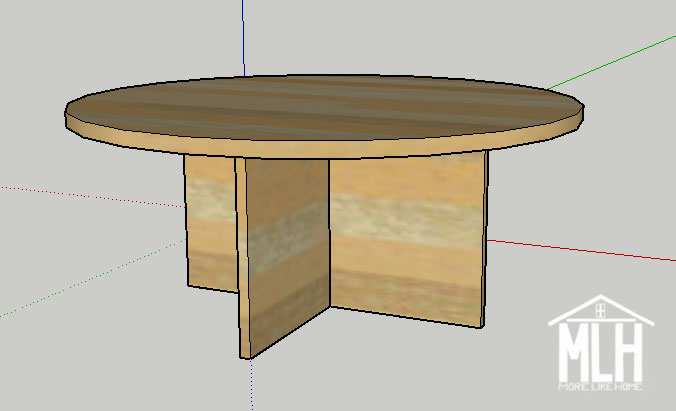
Now about that top (C). If you bought a 3' round top, you're ready to go! If you're cutting your own, start by using a small nail or tack to fasten a piece of string to the center of a 3' piece of plywood. Hold a pencil 18" from the nail and use the string as a compass to mark a circle on the board. Use a jig saw to cut out your table top (or check out Ana White's video on cutting a round top with a circular saw).

Drill pocket holes along the top of the table base and legs and use them to attach the top with 1 1/4" pocket hole screws. This will hide all the holes underneath the top and keep the tabletop flawless and beautiful! Be sure to keep the legs at a 90 degree angle - don't let them shift too close or too far from each other. You want a perfect "x" not a squashed "x". If you don't have a Kreg Jig, you can drill down through the tabletop into the legs and base board with 1 1/4" wood screws.
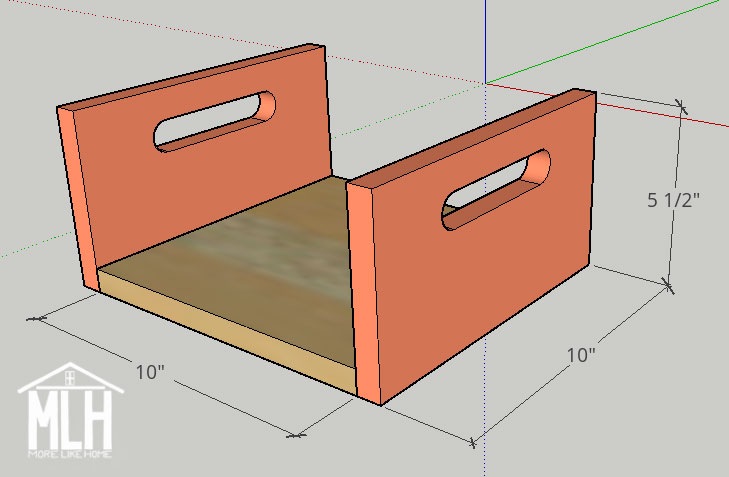
To build each ottoman, start by attaching two ottoman sides (E)) to an ottoman bottom (D). Make pocket holes along all four sides of the bottom boards and along the short ends of the side boards for later. Then use the holes along two ends of the bottom board to attach the side boards with pocket hole screws. If you don't have a Kreg Jig, drill through the side boards into the ends of the bottom board. It might be handy to cut notched handles in the sides of the ottoman in case you ever carry it around the house, but it's totally not necessary. If you'd like that option, it will be easier to cut them before you start assembling the box. I'd try a 5" opening (with 2.5" space on either side), set down 1" from the top edge. I have instructions for cutting handles and a bunch of photos in my crate nightstand plans to get you started. You could also just use a 1" drill bit to drill finger holes in the side and call it a day. And again, totally not a necessary feature if you don't have the tools or the time!
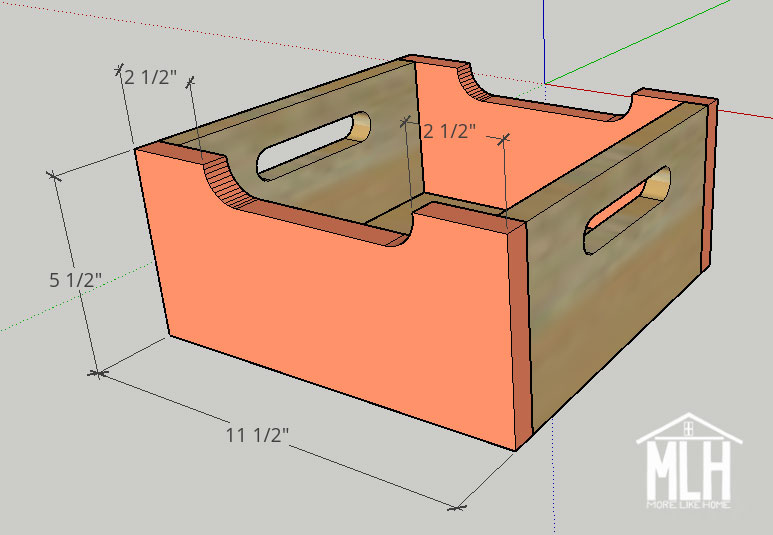
Attach the front and back boards (F) to the ottoman box. Use the pocket holes along the bottom and side boards to attach the front and back with pocket hole screws. If you don't have a Kreg Jig, drill through the front/back into the box sides and bottom. Like the sides, you can also cut notches in the front and back. The notches will give you something to grab when you pull it out from under the table, as well as creating finger space to lift the lid easier. Use a jigsaw to cut a little notch about 1" deep at the center of the board. You can also just use a 1" drill bit to drill a finger hole for pulling the ottoman, or attach an extra cabinet knob to the box. Whatever floats your boats, peeps.
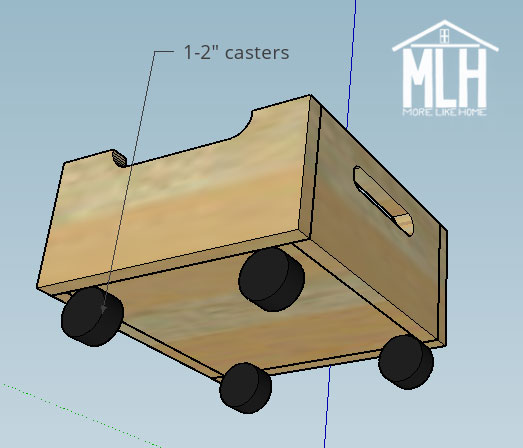
If you opted for drawer pulls instead of cutting notches, go ahead and drill the holes for them. Attach casters to the bottom of each ottoman. Repeat to build three more ottomans!
Now you can go ahead and finish the ottoman boxes and the table you already built. It will be easier to finish the boxes before the upholstered tops are attached.
To finish, fill any visible holes with wood filler then sand everything down really well. This is the most important step for a professional finish! Start with a rough sand paper, then go over everything with a medium paper, then again with a fine paper. Once it's super smooth, finish it with whatever paint or stain and sealer you like. Also note that the edges of plywood will not take stain or paint as well. It's a more obvious difference with stain, but even with paint the edges probably won't quite match the rest of the table. You can solve this problem by applying 3/4" plywood edge banding. It's usually an iron-on strip of thin wood that will stain to match the plywood top. Honestly, though, I usually just roll with the regular plywood edge and it doesn't bother me. But be warned, if you're a bit of a perfectionist you'll probably want the edge banding. All hearts clear? Ok, let's go ahead with the upholstery:
You can buy a piece of foam at Joann fabric, or some people have had good luck buying a foam mattress or mattress topper for less $$ and cutting it down to size.
Far each ottoman top (G), start a stack on the ground with your fabric (face-down), topped with the batting, topped with the piece of foam, topped with the plywood. Wrap the batting around the foam and up onto the plywood, pulling it taught, and staple it in place. Then wrap the fabric up over the batting and staple it in place. You can also tuft the upholstery like I did way back when I built our headboard.
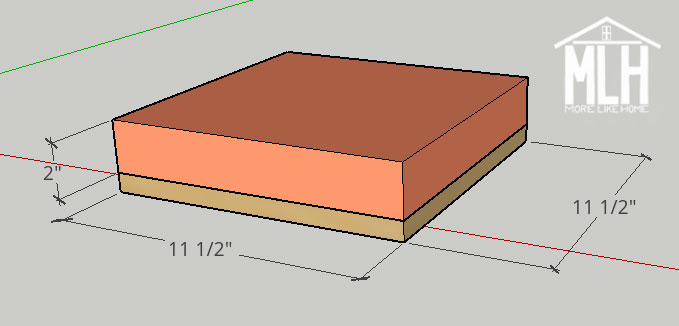
The fabric will be covering the plywood. Sorry I didn't show that in the drawings!
Use the hinges to attach the upholstered tops to the finished boxes.
I love to see your finished projects! Tag me on instagram @more.like.home or share them on our facebook page!
Want more plans? Check out the rest of the coffee table series here and all our other building plans here!
No comments:
Post a Comment