
Build matching end tables here!
Check out the rest of our DIY Coffee Table Series for more free plans!
Measure twice, cut once (seriously, though). Use glue in every step (be careful to clean up any drips, because they can mess up your finish at the end!). Read through all the instructions before you begin. Use 1 1/4"" screws unless otherwise indicated. Pre-drill and countersink all your screws. Be safe, have fun, and let me know if you have any questions! Please note I have not built from these plans myself (you might be the first!), so double check everything as you go.
Shopping List:
1 - sheet 3/4" thick plywood
1 - 2x2 @ 8' long
1 - 2x2 @ 4' long
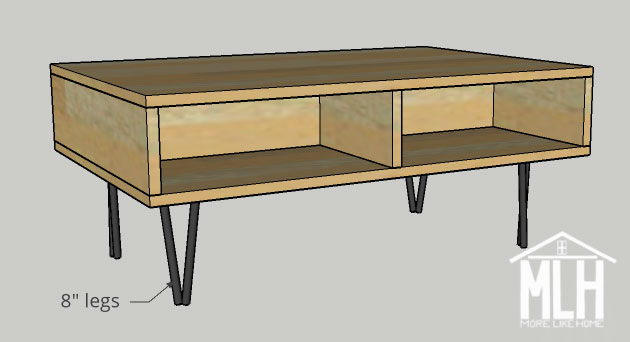
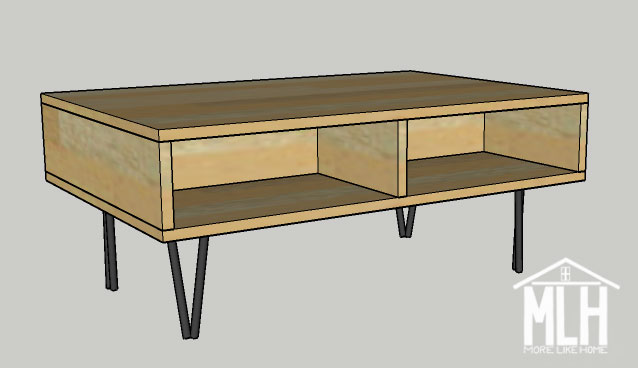
OR purchase a set of 8" hairpin legs instead of the 2x2 boards
1 1/4" wood screws
2" wood screws
Optional: Kreg Jig + 1 1/4" pocket hole screws (instructions shown in italics at each step)
wood filler
wood glue
sandpaper and finishing supplies
Optional: 3/4" plywood edge banding
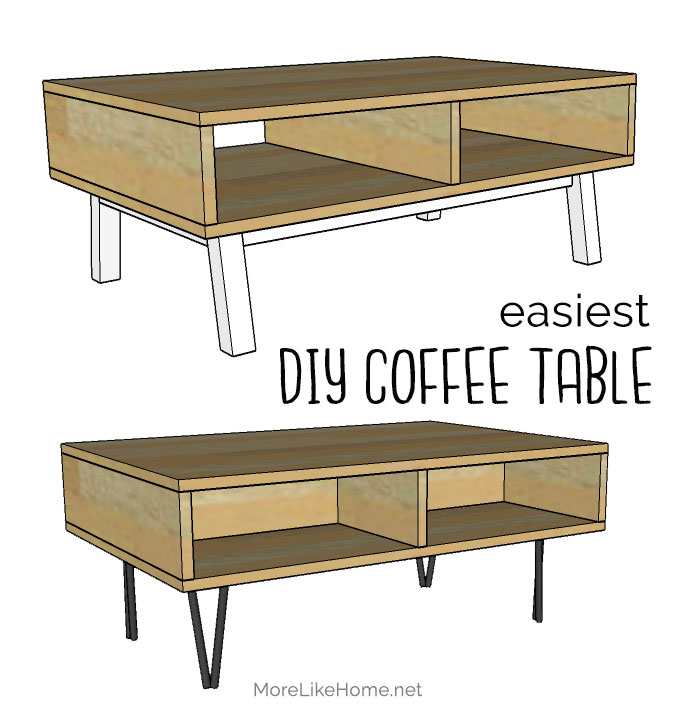
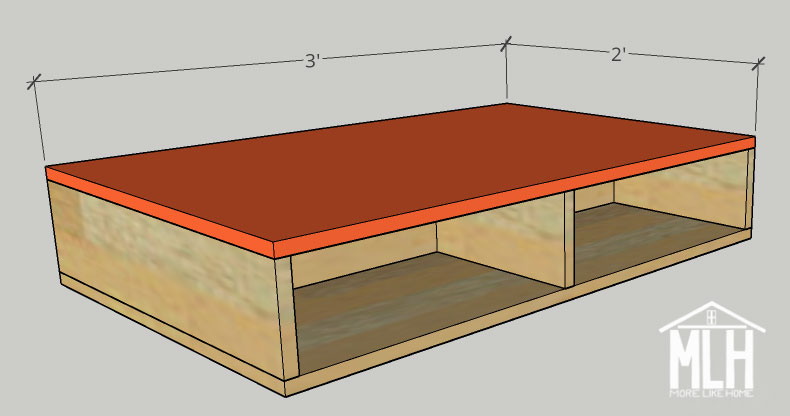
Dimensions: 36" long x 24" wide x ~15" tall
Table Cut List:
(A) 2 - plywood @ 36" x 24" (top/bottom)
(B) 3 - plywood @ 24" x 5 1/2" (sides/center)
(C) 2 - plywood @ 16 7/8" x 5 1/2" (dividers)
Leg Cut List:
(D) 2 - 2x2 @ 16 1/2" (trim)
(E) 4 - 2x2 @ ~10" (legs)
(F) 2 - 2x2 @ 29" (aprons)
OR purchase a set of 8" hairpin legs
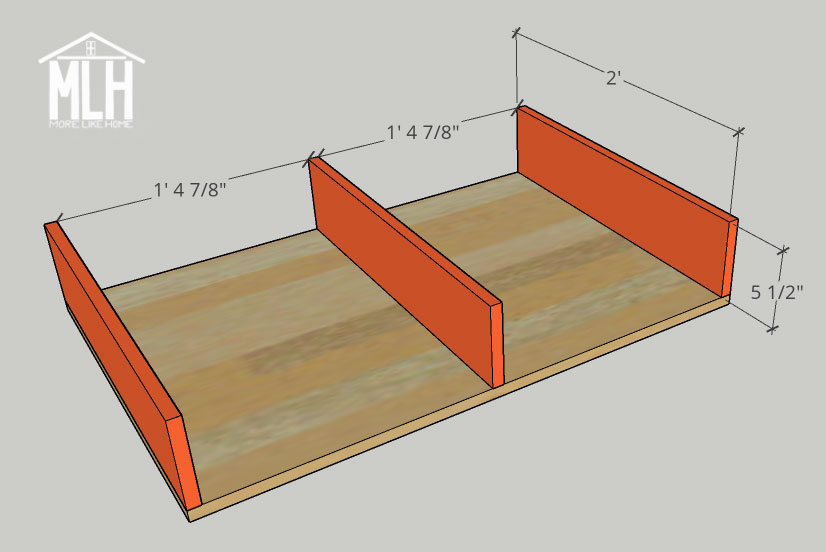
Start by attaching the sides/center boards (B) to the top (A). Line one side up flush with each edge of the top board and center the remaining divider board between the sides with 16 7/8" on either side (or you can offset it to one side for a different look!). Drill down through the top board into the edge of each side and center board with 1 1/4" wood screws. Don't forget the glue! If you have a Kreg Jig, make pocket holes along the top edge of each side/center board and attach them with 1 1/4" pocket hole screws.
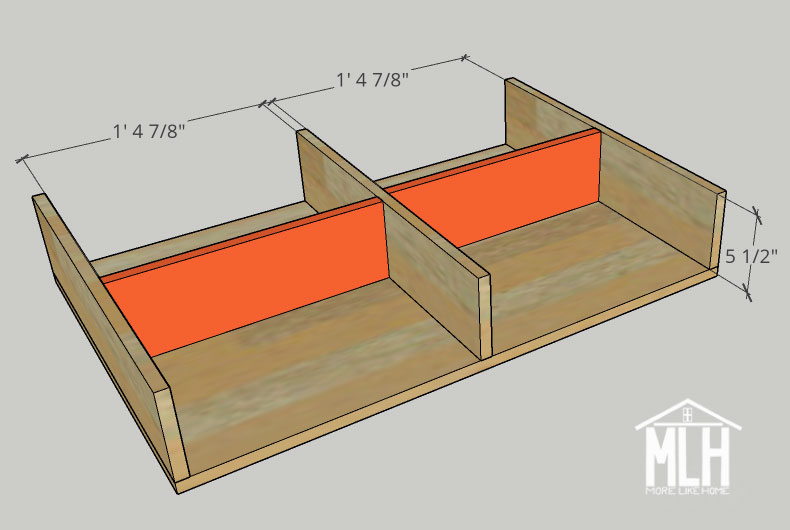
Install the divider boards (C) between the side and center boards. I've drawn them centered, but you can offset them one way or another if you need deeper storage on one side. You can also leave them out completely for a pass-through table. Drill through the top into the divider boards, and through the side boards into the ends of the divider boards with 1 1/4" wood screws. If you have a Kreg Jig, make pocket holes along the top and ends of the divider boards and attach them with 1 1/4" pocket hole screws.
Line up the bottom board (A) over the side and divider boards. Drill down through the bottom board into the sides, center, and divider boards. If you used a Kreg Jig for the other steps, you can flip this right side up and all the holes will be hidden underneath!
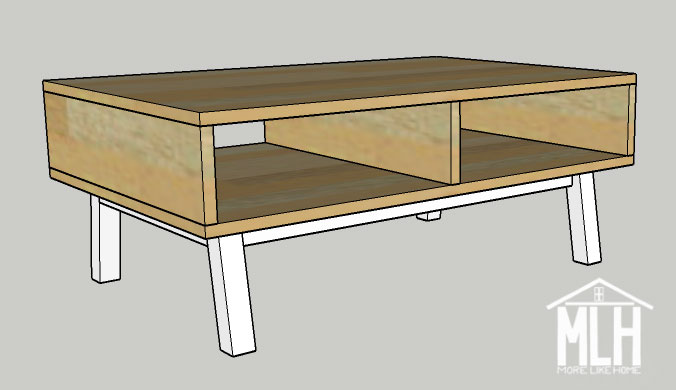
Now you need to build the legs (skip this section if you are using hairpin legs).
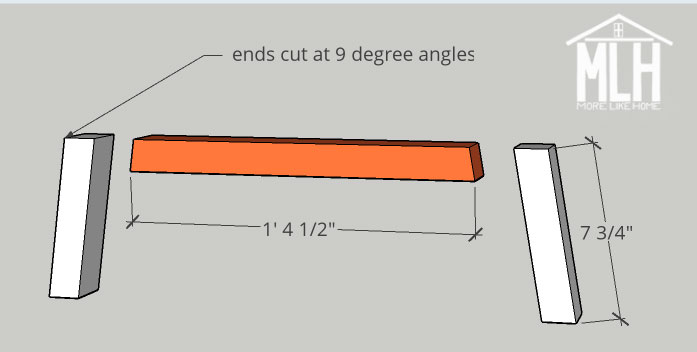
Start by cutting both ends of the trim (D) at a 9 degree angle. Make sure these ends are not cut parallel (/ \) an the overall length ends up 16 1/2" at the widest point.
Cut both ends of the legs (E) at a 9 degree angle. This time the cuts should run parallel (/ /) and the length should be 7 3/4" on each side, not the length to the longest points.
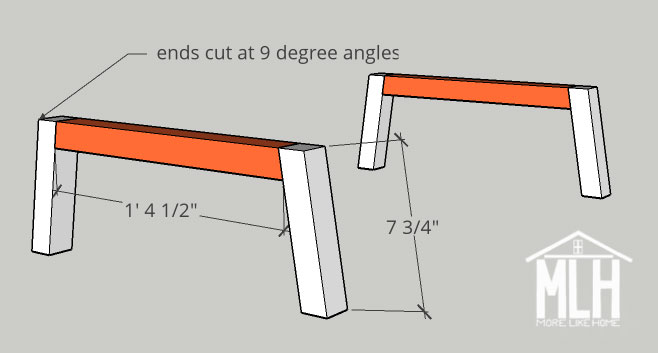
Attach the legs to the trim so they angle out with the legs flush with the top of the trim and sitting flat on the floor. Drill through the legs into the ends of the trim board with 2" wood screws. Don't forget the glue! If you have a Kreg Jig, make pocket holes in both ends of the trim board and attach the legs with pocket hole screws.
Repeat to build a second leg section.
Connect the two sections together with the aprons (F). Drill through the legs into the ends of the aprons with 2" wood screws. If you have a Kreg Jig, make pocket holes in both ends of the aprons and attach the legs with pocket hole screws.
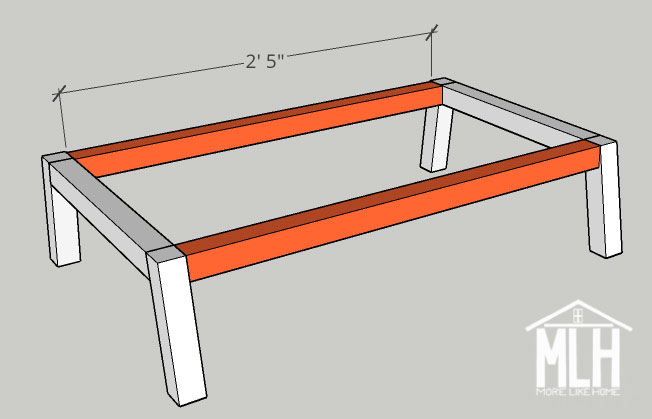
Center the legs on the bottom of the table. Attach them by drilling up through the trim boards and aprons with 2" wood screws.
If you opted for hairpin legs, follow the instructions that came with them to install them.
To finish, fill any visible holes with wood filler then sand everything down really well. This is the most important step for a professional finish! Start with a rough sand paper, then go over everything with a medium paper, then again with a fine paper. Once it's super smooth, finish it with whatever paint or stain and sealer you like.
Also note that the edges of plywood will not take stain or paint as well. It's a more obvious difference with stain, but even with paint the edges probably won't quite match the rest of the table. You can usually solve this problem by applying 3/4" plywood edge banding. It's usually an iron-on strip of thin wood that will stain to match the plywood top. Honestly, though, I usually just roll with the regular plywood edge and it doesn't bother me. But be warned, if you're a bit of a perfectionist you'll probably want the edge banding. All hearts clear? Ok, get to it!
I love to see your finished projects! Tag me on instagram @more.like.home or share them on our facebook page!
Want more plans? Check out the rest of the coffee table series here and all our other building plans here!
No comments:
Post a Comment