
Measure twice, cut once (seriously, though). Use glue in every step (be careful to clean up any drips, because they can mess up your finish at the end!). Read through all the instructions before you begin. Use 2 1/2"" screws unless otherwise indicated. Pre-drill and countersink all your screws. Be safe, have fun, and let me know if you have any questions! Please note I have not built from these plans myself (you might be the first!), so double check everything as you go.
Shopping List:
1 - 2x8 @ 8'
1 - 2x8 @ 4'
1 - 2x6 @ 8'
1 - 2x6 @ 6'
1 - 4x4 @ 4'
2 1/2" wood screws
wood glue
wood filler
sanding and finishing supplies
basic tools (saw, drill, tape measure, etc.)
Optional: Kreg Jig + 2 1/2" pocket hole screws (instructions for the Kreg Jig will be in italics after the regular instructions. This tool allows you to build the table with no visible holes!)
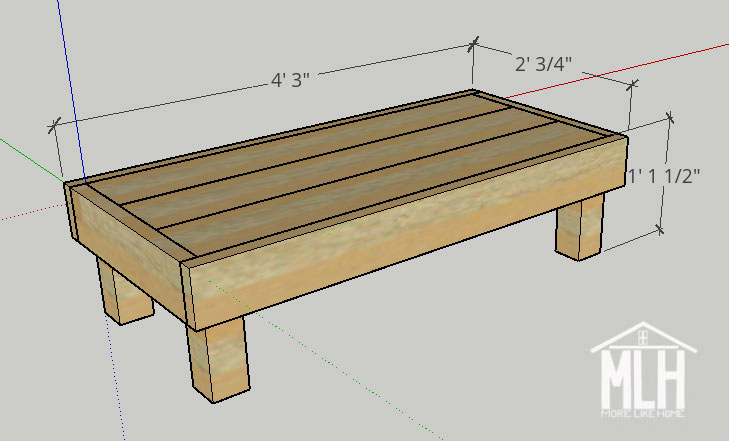
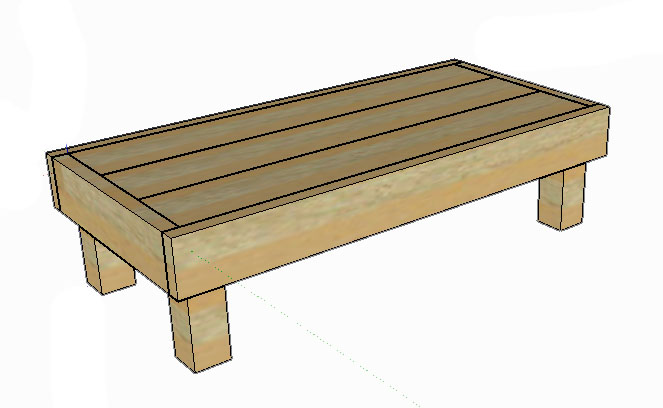
Dimensions: 51" long x 24 3/4" wide x 13 1/2" tall
You can change the height by changing the length of the legs. You can adjust the length by increasing or decreasing the length of all the top and side boards by the same amount (i.e. reduce them all by 6" for a shorter table).
Cut List:
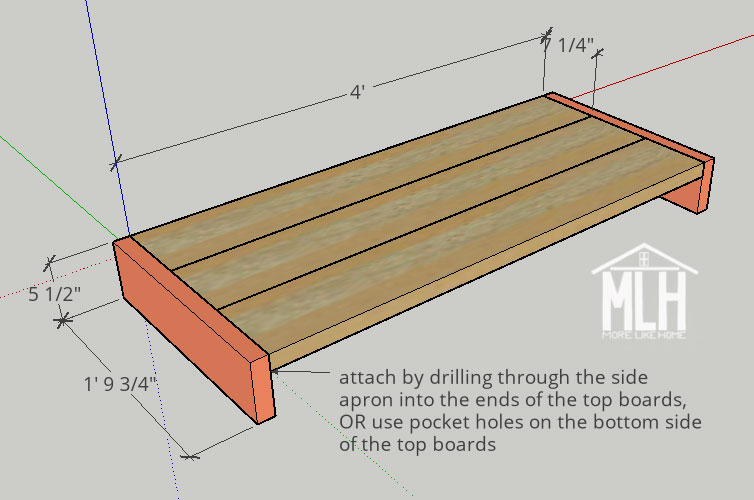
(A) 3 - 2x8 @ 48" (top)
(B) 2 - 2x6 @ 21 3/4" (ends)
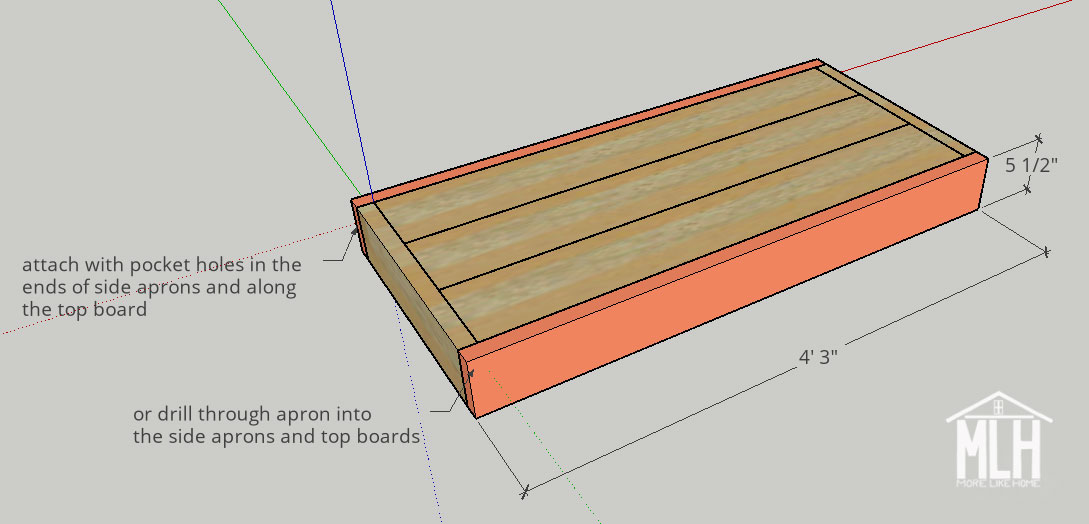
(C) 2 - 2x6 @ 51" (sides)
(D) 4 - 4x4 @ 12" (legs)
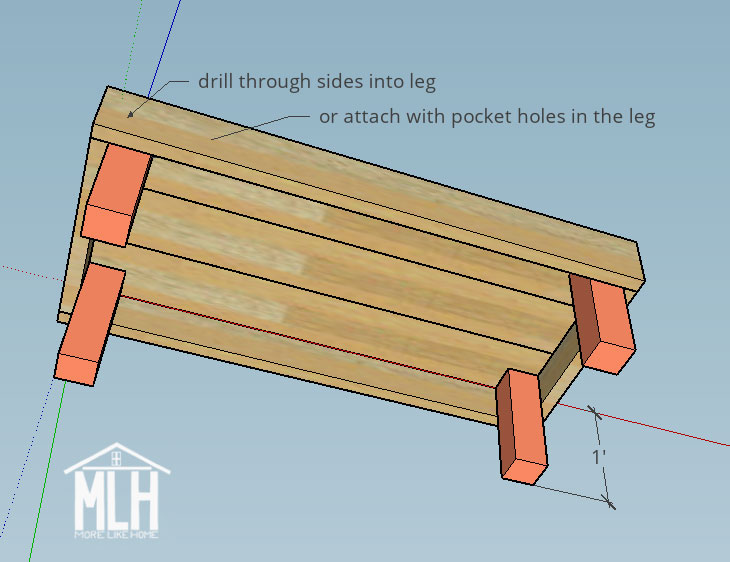
Start by attaching the top boards (A) to the end boards (B). Drill through the outside face of the end boards into the ends of the top boards. Which might be the most confusing sentence I ever wrote. If you have a Kreg Jig, start by making pocket holes along both sides of the two outer top boards, and along the short ends of all three top boards. Also make pocket holes along both ends of the end boards for later. Use the pocket holes along the sides to connect the top boards together into one solid top. Then use the pocket holes at the ends to attach the end boards with 2 1/2" pocket hole screws.
Attach the side boards (C) by drilling through the outside face of the side board into the edges of the top and ends boards. Don't forget the glue. If you have a Kreg Jig, use pocket holes along the sides of the top boards and the ends of the end boards to attach it with 2 1/2" pocket hole screws.
Attach the legs (D) by drilling through the side and end boards into the legs. The legs should fit all the way up with the tabletop resting on them. If you have a Kreg Jig, you can make pocket holes near the top along two sides of each leg. Use the pocket hole screws to attach the legs to both the side and end boards.
To finish, fill any visible holes with wood filler then sand everything down really well. This is the most important step for a professional finish! Start with a rough sand paper, then go over everything with a medium paper, then again with a fine paper. Once it's super smooth, finish it with whatever paint or stain and sealer you like.
I love to see your finished projects! Tag me on instagram @more.like.home or share them on our facebook page!
Want more plans? Check out the rest of the coffee table series here and all our other building plans here!
No comments:
Post a Comment