
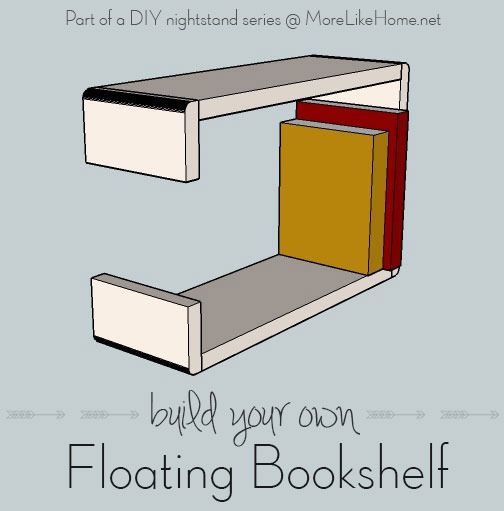
Welcome back! It's day five of our nightstand series and we're building something a little different today! You can see the entire series here. Today's plan is an add-on project that would go great with any nightstand in our series. It's a simple floating bookshelf that you can mount above the nightstand to keep your tabletop neat and clutter-free! The sides work as built-in bookends to keep your books where you want them.

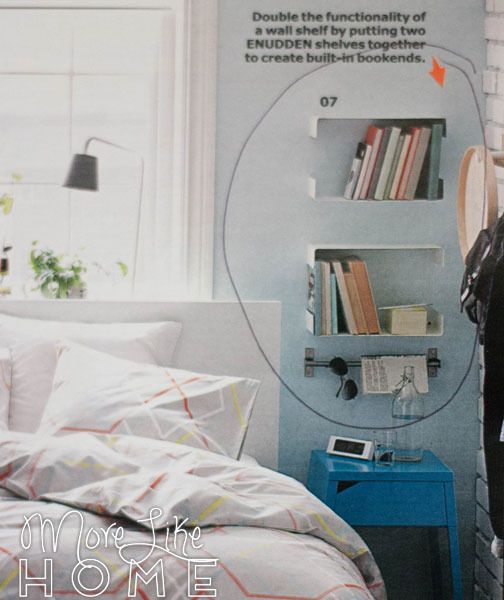
I spotted a metal version of this shelf alongside yesterday's nightstand in the 2015 Ikea Catalog. Again, their price isn't bad, but DIY will cost just a few dollars AND gives you the option to customize the size of your shelf!
1 - 1x6 @ 4'
thin plywood scraps OR a set of braces
wood filler
wood glue
1 1/4" screws
2" screws
Kreg Jig with 1 1/4" pocket screws (optional)
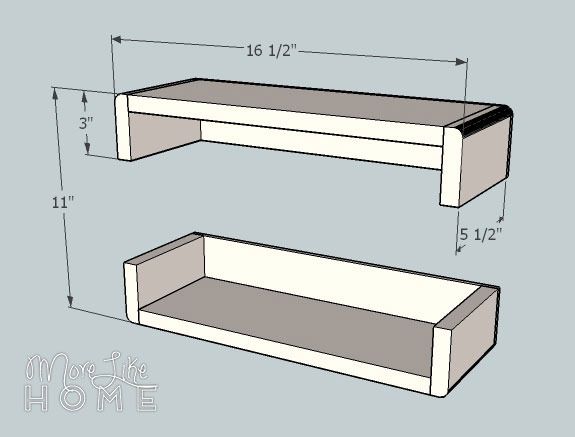
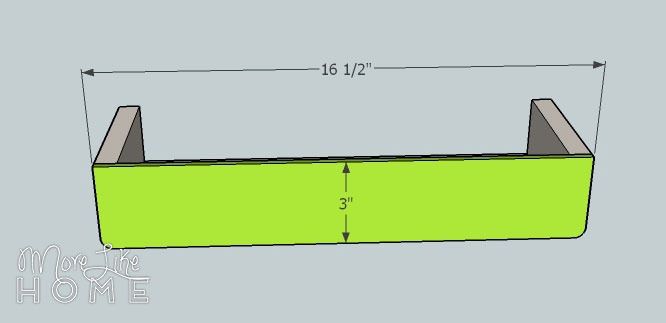
Finished dimensions per shelf are 16 1/2" wide x 3" tall x 5 1/2" deep. Overall height depends on how far apart you mount them. :)
Remember to always double check your measurements before you cut. Use 1 1/4" screws unless otherwise indicated. Pre-drill your holes and countersink your screws. Always use glue before you screw the boards together (you don't have to let it dry first), I'm not going to list it in every step, but it's a good idea to glue everything! Be safe, and have fun!
Cut List:
(A) 2 - 1x6 @ 15" (top/bottom)
(B) 4 - 1x6 @ 3" (sides)
(C) 2 - 1/4" plywood @ 16 1/2" long x 3" tall
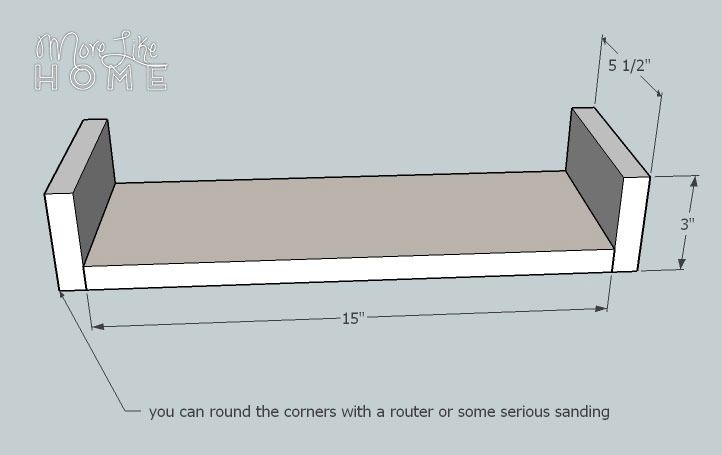
Attach a side piece to each end of the top/bottom boards. Use a Kreg Jig or drill through the sides into the top/bottom. Don't forget the glue! You can adjust the length of any of these boards to make the sides higher or the shelves a different length.
Attach the plywood across the back of the shelf using glue and screws, keeping all edges flush. You'll use this plywood to mount the shelves. The other option is to use braces (like for the floating nightstand in day two) in each corner to mount it. If you do that you can skip the plywood, but you'll need to cut the sides taller or find shorter braces to fit.
If you want you can use a router to round the outside corners, or do some major sanding to just soften the corners a big. Here are square corners:

And here are rounded:

The building is done, now you just have to finish it! Start by filling any holes with wood filler. Let it dry, then sand it smooth (repeat if necessary). Then sand the whole table smooth for a great finished product (a good sanding can be the difference between looking professional vs. crafty). Then finish with any paint or stain and polyurethane you like. My number one tip for finishing this project is to paint the plywood the same color as the wall so it blends in. You want them to basically disappear to give your shelves the "floating" look.

Hang in there - there are 13 more days of DIY nightstands you can pair this with coming up!

No comments:
Post a Comment