Wednesday, August 19

$75 Bookshelf Wall + The Horrors of Painting Laminate

Guess it's about time for my annual blog post.

Today we're looking at a set of crappy bookshelves I snagged on Facebook Marketplace, how I spiffed them up to feel just like home, and why I now and forever hate painting laminate furniture. Buckle up, folks. It's going to be a roller coaster of emotions.

Disclaimer: I actually did this a couple years ago and stashed these photos for a rainy day so a lot may have changed in the painting world since then. But good news - I can share how they're holding up after all these years!

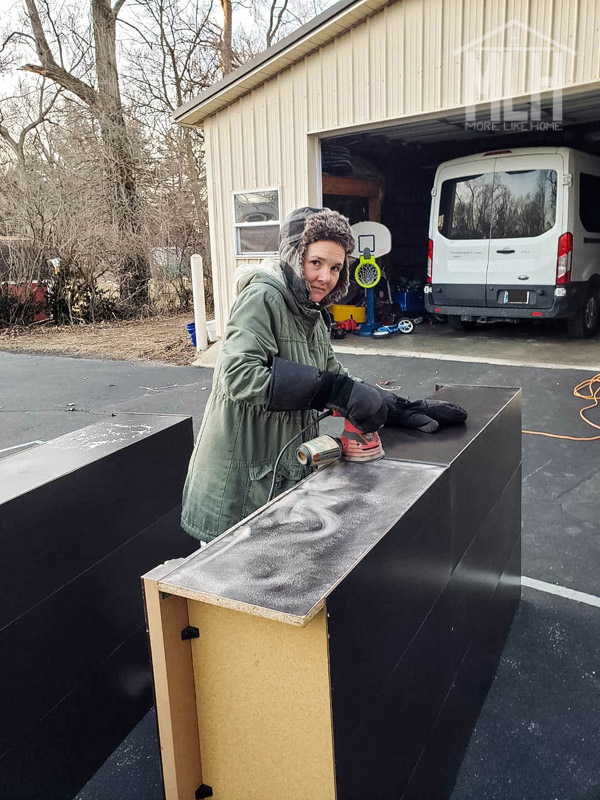
Our story begins with a girl who loves books. A girl blessed with a huge bookshelf (in the background of the photo above), but who kept buying books well beyond what that bookshelf could hold. Sweet, simple girl. Rather than part with any of those treasures, she decided to add another bookshelf... or three. Her dream was a whole wall of bookshelves in the living room. So she started hunting on marketplace for anything made of solid wood that would fit perfectly in that space. Alas - it was not to be found. Instead she found a perfectly sized set of three bookcases... that were made of laminate. And only $75 for all three. 

Ok, enough of that. The point is, I couldn't find anything wooden that fit the space the way I wanted, and I was too tired to build anything (although in hind sight that might have been easier). So when this handy set of three perfect bookcases popped up, I jumped on them.... even though they were laminate. 

The face of regret.

I took them home, bought a special fancy primer that said it works on laminate, and went for it... only to immediately face the reality of dripping, puddling primer that did NOT, in fact, stick to laminate.

Regret.

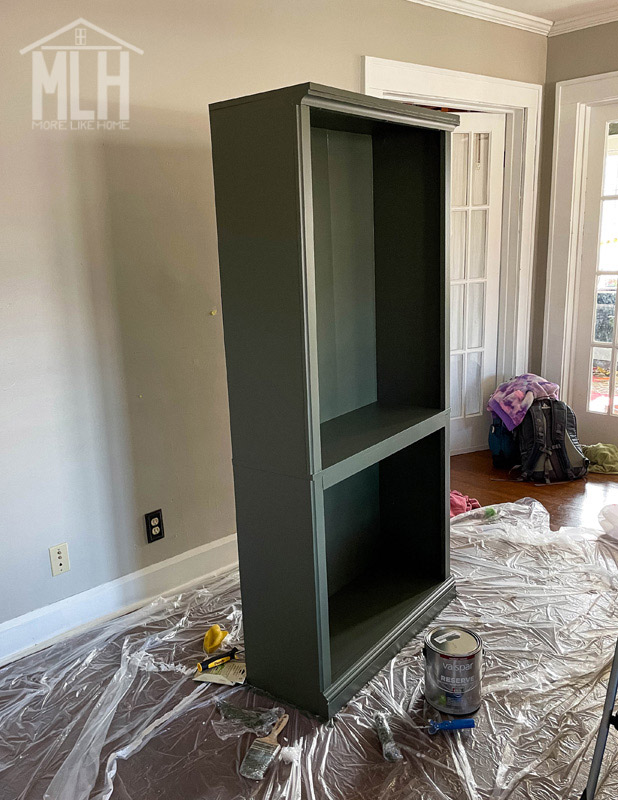
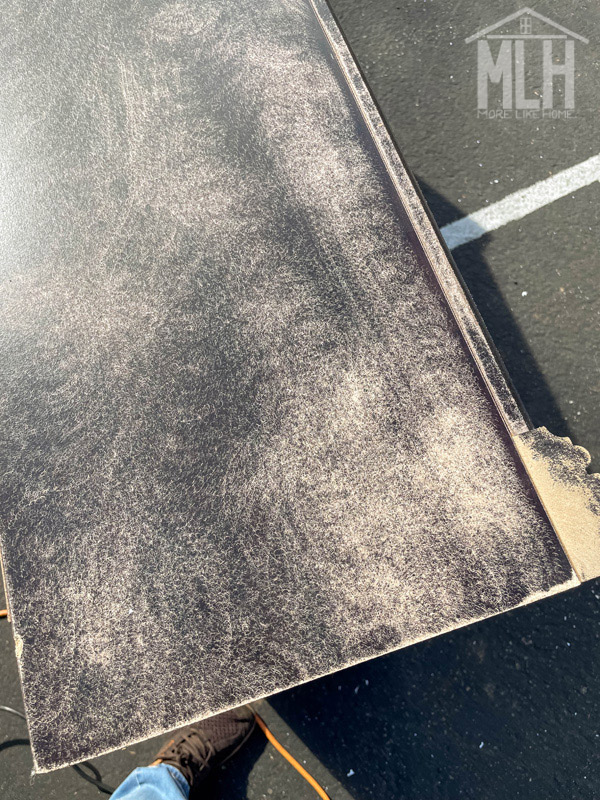
So, I did the thing that deep in my heart I knew all along I would have to do: went out and sanded down every inch of three huge bookshelves in freezing March weather. It took forever. I was cold. And I was so discouraged, I considered leaving them on the curb and starting fresh. But in the end I powered through and got them all sanded. And primed. And painted. And they look pretty amazing. 
So now I'm here to save you as much heartbreak as possible. 

The Secret Formula

If you ever find yourself in the unfortunate position of painting laminate furniture, this is the best advice I can give you. 

First of all, you must sand it. Anyone who tells you otherwise is a liar. The internet overall told me to use a fine sandpaper to scuff up the finish - this took forever to get through the shiny finish, so I tried one with a rougher sandpaper that wore it down a little faster. And I can now say from experience that the primer actually did stick better when I used the finer sandpaper. On the last bookcase I started with the rough paper and then went over it with the finer paper. I didn't notice a big difference in how long it took or how well the primer stuck. Do what you will with that. 

Expertly scuffed.

Luckily the next day was much warmer, so we were able to start the primer outside. That's spring in the midwest!
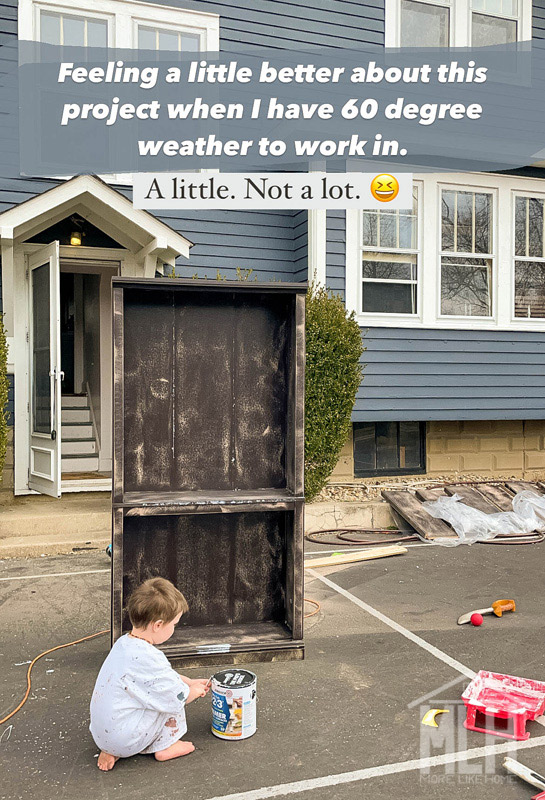

The best little helper!

Also the next day, my sister came to town. If you have a sister you know that every overwhelming, discouraging project is suddenly much easier when she does it with you. Or for you. Either one works. 

But this brings us to Step 2: Use primer, and use the best primer you can find. Like any good blogger, I don't remember the primer I used and cannot find the can, but I went to Lowe's like "what is the best primer you have." (the can in the photo says "1 2 3 Primer") Could a cheaper primer do the job? I have no idea. I've never tried. But this whole project was a pain, and I wanted to avoid as much grief as I could, so I got the good stuff. I have many regrets, but this is not one of them. So while I call these "$75 bookshelves" because that's what the shelves themselves cost, I actually spent more on the paint and primer than I did on the shelves. Whoops. Still seemed like a pretty good deal for how pretty they turned out in the end.
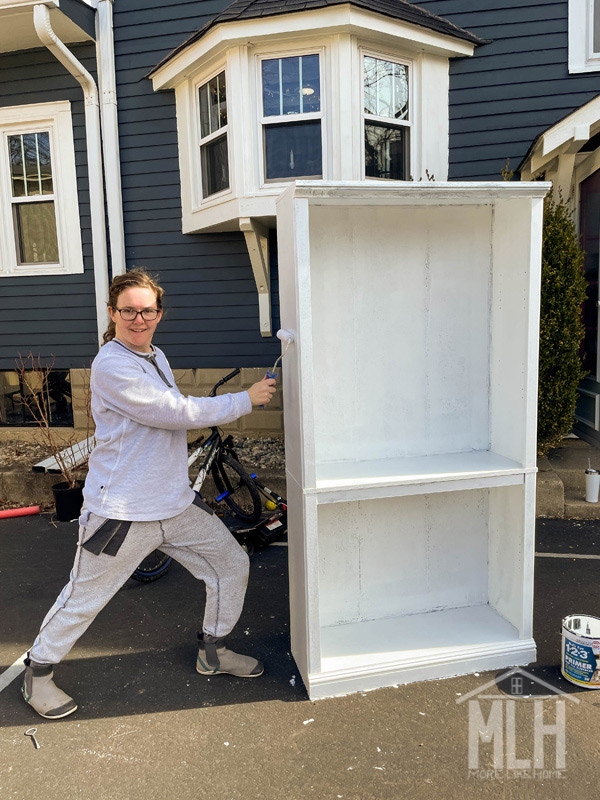
This weirdo is, in fact, my sister. Not me. And she really paints like this.

This time, the primer stuck! And then temperature dropped so we had to move everything into the living room to finish over the next two days. In the photo below you can see the first shelf I tried to prime without sanding, and the primer is just falling off (back on the right). You can also see one that's sanded with the first coat of primer (back left) and the front one that's fully primed with a coat of paint. So I guess Step 3 is just to paint it! Again, I splurged on some pretty good paint. I went a little outside my usual neutrals and greens... by going with a darker green. I know. Really mixing things up. Who even am I? And before you say it's "millennial green" or whatever the kids are calling it, just know I was painting things green long before it was cool, and I'll be doing it long after. Because it's the best. 
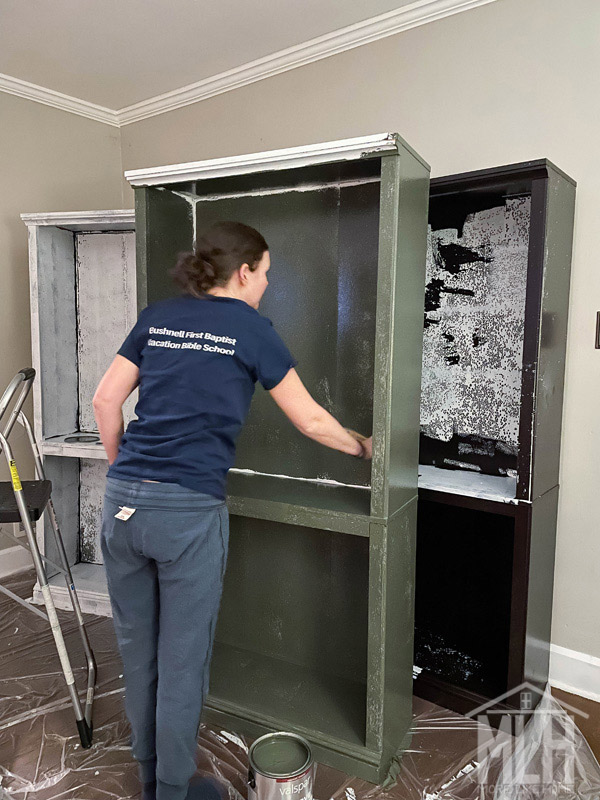

First one done, and looking so beautiful it was almost worth it:

After the paint dried, I added two coats of polycrylic on all the shelf surfaces to try to protect it from the wear and tear of sliding books in and out because I still didn't totally trust it to hold up on laminate (for what it's worth, the shelves still look perfect three years later!). 
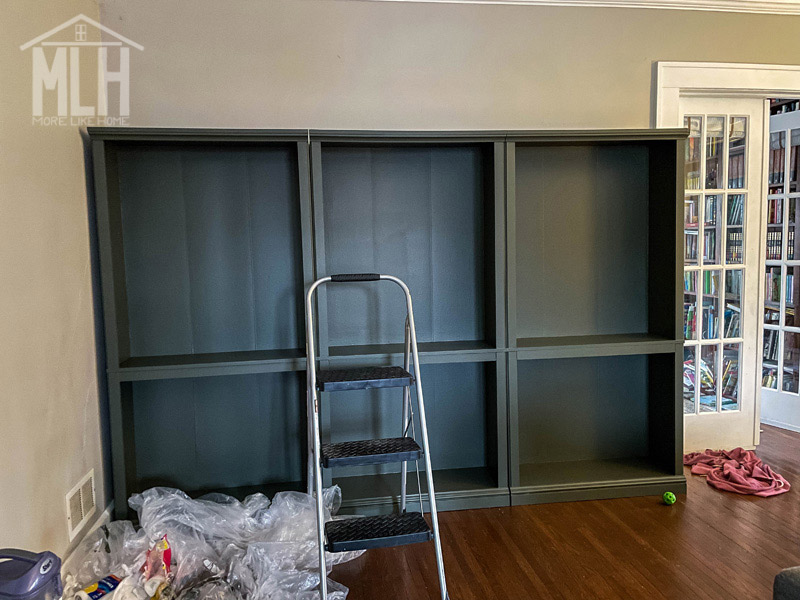

I let them sit for a full week after that to let the paint cure so the books wouldn't stick. Then I started filling those beautiful green shelves.

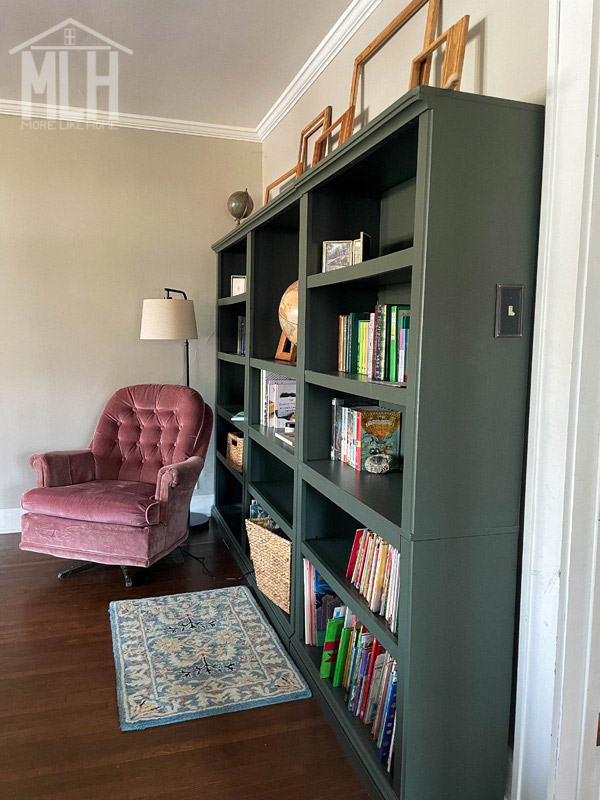
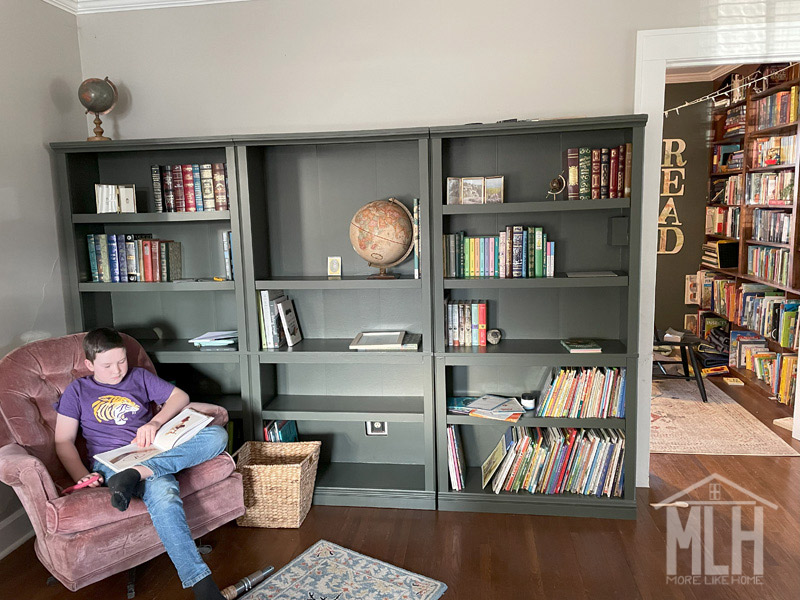
I was so naively optimistic that I left a shelf out to make a big gap for art and a globe (you can see it below). I'm happy to report that was a short-lived delusion, this bookshelf it totally full, and I've added another on the other wall. But even before all that, this was already turning into a perfect little reading corner.
One more detail to note: I originally wanted shelves that went all the way to the ceiling, so in that respect these were not the perfect size. But it turned out great because I thrifted a handful of wooden frames to make a little gallery wall along the top! I found a frame arrangement that I liked:
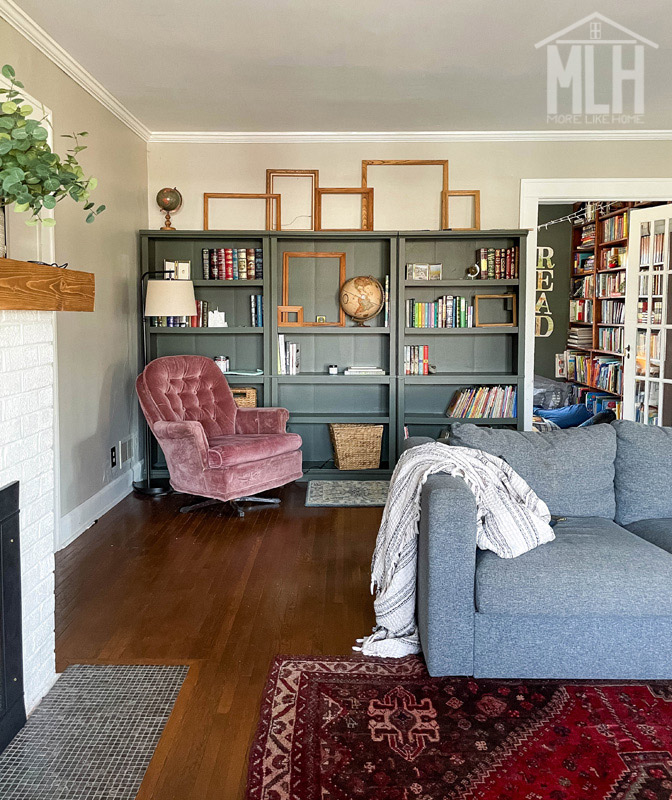
Then I bought digital downloads of paintings on Etsy (they were like $2 each) and had them printed the sizes I needed. I think I had them printed at Staples?
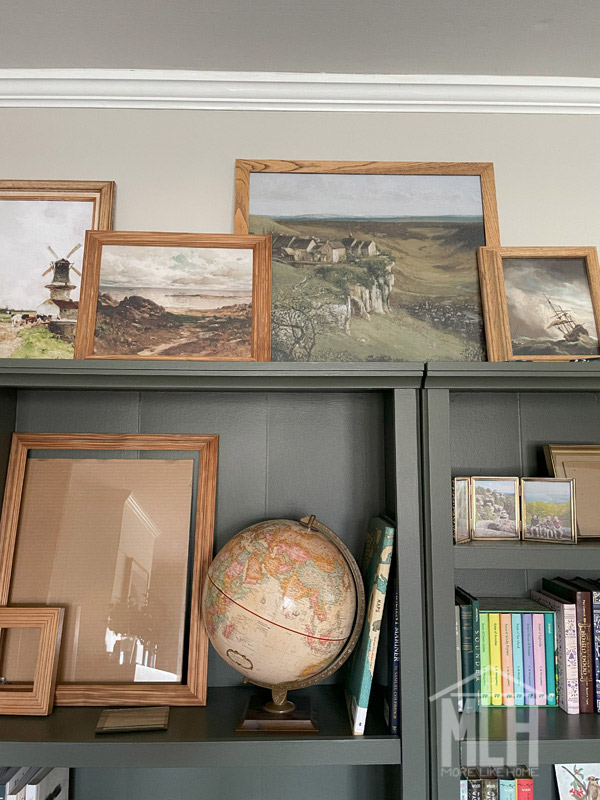
Then I immediately went to a library book sale with my sister where the books were $1 per bag. So naturally... I bought three bags. Which may have contributed to the loss of my artwork shelf dreams. Which was a small price to pay.
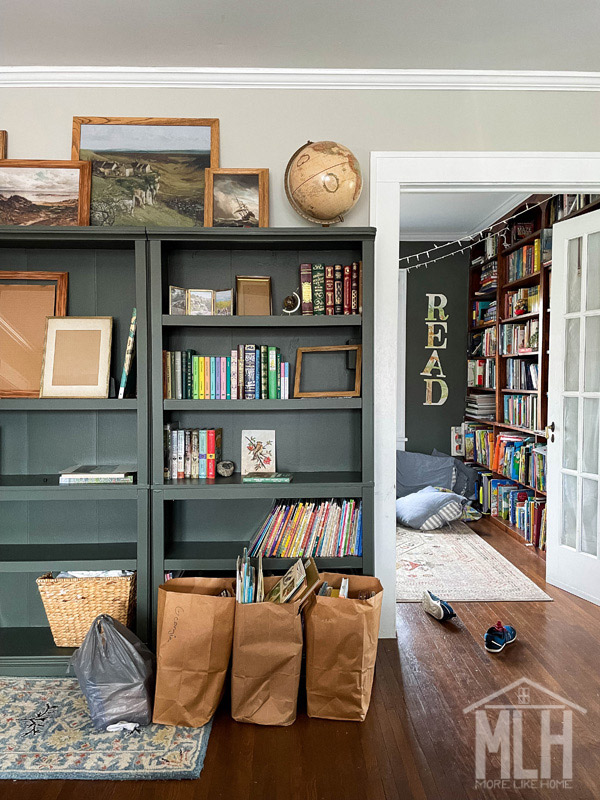
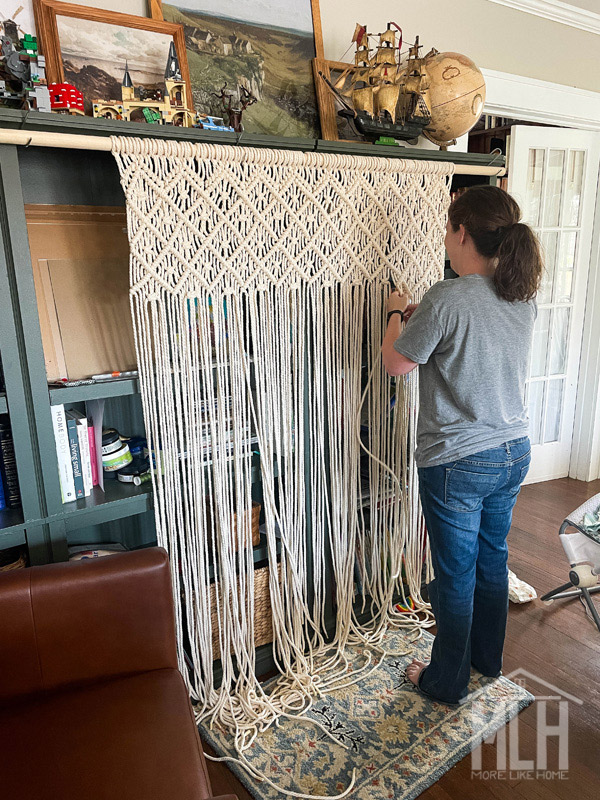
After all the grief they caused, these bookshelves have turned out to be an absolutely perfect addition to our living room. They really anchor the space and make the whole room feel so cozy and warm, not to mention all the new books we've been able to collect. Plus it has been a perfect place to display a few Lego sets, and even work on a giant macrame for my sister's wedding shower. All in all, it was in fact worth it. 

But now the important question: 
How has it held up after 3 years?

Surprisingly well! I really am shocked at how good they still look, even after so much use on the bottom shelves (where the picture books are). The only trouble we have are a couple spots around the trim that I couldn't get into with my sander, and sure enough those little corners of paint peeled off (laminate still is the worst), but everything else looks perfect and expect that if I had taken the time to sand those little spots by hand, they would have held up as well. So the moral of the laminate painting story: don't skimp on any tiny little step in the process. You will regret it. But the parts you do right just might turn out amazing. So good luck, and I hope to never do it again. 

P.S. All you pro-laminate painters - keep it up. You the real MVPs. 

Wednesday, February 19

$100 Bathroom Makeover - Going Green!


Lest you think this is about "going green" in the trendy environmental way - no. 
As my husband likes to say: "Why do you paint everything green?" 
And, as Harriet the Spy says: "I can't help it if I know what I like."

So. If you want to watch me literally turn my bathroom green for almost $0? Keep reading. 

If you want tips on going environmentally green? I mean, we still make castile hand soap, we clean chemical-free with e-cloth, and... not showering everyday saves water? There you go. 

On to today's project. Here's the before:

Thursday, January 2

Fabric Gift Wrap (furoshiki)

This year I'm trying out some fabric wrapping "paper" and I'm so excited about it!

Pre-made wrapping fabric (called "furoshiki") on Etsy runs anywhere from $10-20 for a single 20" square piece. Sorry, folks, but that piece of fabric costs more than most of the gifts I'll be wrapping. So I've got a much more budget-friendly option for you today. I'll show you how to make your own for a fraction of the cost!

Wednesday, January 1

2025 Goals Worksheet (free printable!)

Happy New Year, friends! I wanted to start off the year with another goal setting printable. Because there's nothing better than getting all your ideas down on paper. And who doesn't have a head full of ideas as we roll into a new year? But before we start making lists, let's talk about this whole goal-setting thing for just a minute. 

Friday, December 6

Gifts for Boys (A Few of Our Favorite Things)

I'm not putting any fancy gift guides together this year (you can check out my minimalist gift guide for kids and my gift guide archive if you want some more specific ideas from years past), but I did want to put up a quick post with a few of the boys' tried-and-true favorite things. As you may know, we have a house full of boys. And these are the things that are loved and played with day after day. So, if you're shopping for boys, this might be a good place to start.

Tuesday, December 3

$3 Christmas Wreath Hack

Want to add a little Christmas cheer to every corner of your home without breaking the bank? Me too! And this is one of my favorite hacks to get the job done. Wreaths are so versatile because they don't need any floor space, you can hang them just about anywhere, and they are super easy to put up. These little guys have an extra bonus - they're only $3 each at Hobby Lobby!

Saturday, November 30

My Favorite Realistic Christmas Tree (and why it matters)

Last Christmas I talked about simplifying Christmas decor while maximizing its impact (and making your life easier - you can read all about it here). If you remember, I mentioned why it's important to choose quality over quantity (cliche, maybe, but can actually save you money!), and why you need to evaluate what's actually missing before you overcompensate in all the wrong ways.

Really, you should check out that original post because it goes into way more detail than I will here, but today I just wanted to share one Christmas splurge that made all the difference in my own Christmas decor:

A realistic Christmas tree!


Monday, November 25

Dark Chocolate Syrup (for coffee or chocolate milk!)

If you love a mocha coffee but don't love the price tag at a coffee shop....

If you love the idea of coffee but are more of a chocolate milk girl....

If you are just tired of junk ingredients and want an easy homemade chocolate syrup....

This one is for you!


I've tried quite a few chocolate syrup recipes and came up with this one that is by far my favorite. I think the dark chocolate cocoa powder is what really makes it, so it's worth grabbing a box if you've never tried it (although you can definitely make this syrup with regular cocoa powder). You only need five simple ingredients and a few minutes to make the syrup. You'll never go back to store-bought!

Friday, August 16

Homeschool Convention Haul 2024

We're about to kick-off another year of homeschool, and I just unpacked my homeschool convention haul that has been sitting by the desk since April. Let's see if we made some good choices way back then. 

You can check out the video here:


All the links after the jump!

Thursday, January 25

DIY Renovation - What To Do Yourself vs. What To Hire Out

I've had a few questions about what we do ourselves vs. what we hire out, so I thought it might be helpful to go into that more in-depth today and talk about not just what we personally hire out, but also how we make those decisions (and I'll walk you through how to make those decisions for yourself as well). It's always a good to have an idea of what you really can (and want to) do yourself before you begin any kind of remodeling project!  I addressed this briefly in my post about installing the recessed lighting in our kitchen if you want to check that out as well.

When it comes to home renovation, you're not only deciding how much you want to pay, but also what you want to pay. Because doing things yourself involves a different kind of cost than paying a contractor. While DIY does save money, it costs time instead. Nathan once spent a whole Saturday installing flooring in our dining room with help from a friend and they only got about 75% done. So while we saved a lot of money over having it professionally installed, it cost him a couple days of time instead. See what I mean? 

So for every part of your renovation, you need to evaluate your unique needs and decide exactly what you're willing to pay. Find the balance that works for you, your home, and your family. Today I have several tips to help you think through these decisions and I put together a free printable workbook to help you as you work through that thought process! You can get it here:

DIY Renovation Planning Workbook

Friday, January 12

Installing Can Lights in our DIY Kitchen Reno

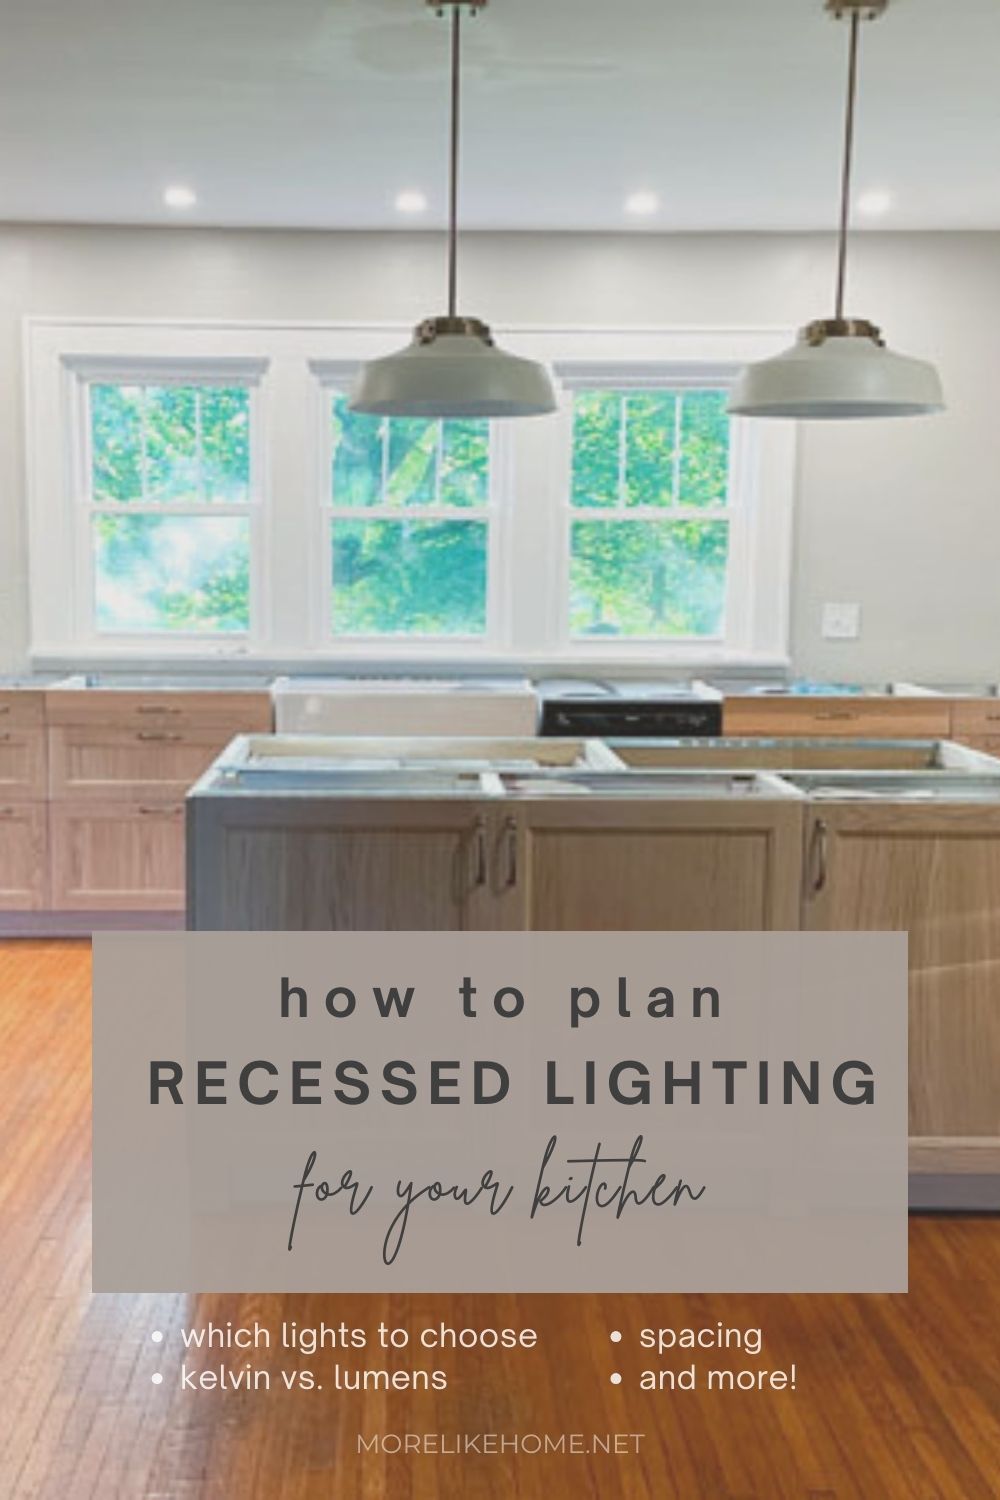
Lighting is so important to a functional kitchen. I'll admit I'm no lighting expert, but I did plan all the lighting for our DIY kitchen remodel myself and I know that you can do it, too! So today I'll share the lighting choices we made for our kitchen (and why we made them) which should at least be a good starting point for you to jump into your own kitchen lighting project!

Tuesday, January 9

First Steps in our DIY Kitchen Renovation

Guys, we're well over a year into our DIY kitchen renovation. Which sounds crazy. But we're DIYing the entire thing (on top of jobs/kids/homeschooling) so it takes as long as it takes. I've been planning to share as many details as I can, but it turns out finding time to both do the DIY and write about the DIY has been difficult has not been something I really wanted to try to do. So. I didn't. 

But I think it's time. So today I'm going to kick if off by going back to the beginning to share the first steps we took toward get our dining room ready to convert into a kitchen just in case it would help anyone else planning a similar renovation. Obviously the very first step was a lot of planning, which you can read about here. Then the first actual ax-to-the-grindstone step was getting the bones of the room ready and creating a blank slate. 

Friday, January 5

7 Steps to Simplify Your Christmas Decor & Cut the Clutter

I know Christmas is over, but if you celebrate the full 12 days of Christmas you'll just be taking down your decor today or tomorrow. And believe it or not, the day you pack up your Christmas decor is actually the perfect time to evaluate your decor, your storage, and any changes you need to make! And I'll walk you through it all in a few simple steps.

Monday, January 1

2024 Goals Worksheet (free printable!)

Happy New Year, friends! I wanted to start off the year with another goal setting printable. Because there's nothing better than getting all your ideas down on paper. (And who doesn't have a head full of ideas as we roll into a new year?) 

Now, this is not a resolution list. And trust me, there is a difference. While resolutions imply something you're absolutely committing to doing or changing, this goals list is more of brain dump for your hopes and dreams for the year. It's much more fun (and for me, more productive) kind of list! Anything you'd like to work towards or make progress on this year can go on the list - home projects you'd like to tackle, places you'd like to visit, habits you'd like to practice, etc. All the things you'd love to see in, you know, a perfect world. But we don't live in a perfect world, do we? And we have no idea what this next year will hold. Which is also the beautiful thing about a goal sheet like this. It's totally flexible and totally fluid. No pressure when things change or plans fail. We can go into it knowing things don't always work out, and we most likely won't cross everything off before next year. It's ok. The best plans in the world are really just guesses, aren't they? We can still dream and plan, and leave it all in God's hands. 

Thursday, December 21

Final Christmas Prep - what you really NEED

I wrote this post three years ago and never got around to publishing it. But it rings just as true today.

Guys. It's four days until Christmas. It's the epitome of crunch time when we all run ourselves ragged getting everything just perfect for the big day. Right? In and out of stores, more presents, more food, more decorating!

But this year we're after a different Christmas. This year we're after peace. And I just want you to know, it's okay to chill. To let go of grand plans and take hold of the simple alternatives. To wait with eager expectation and just let things be.

Check out my SIMPLE Christmas projects and tutorials here.


Don't get me wrong, there are a lot of things I'd still like to get done. But it turns out there are very few things I actually need to get done. That's the key, friends.

Things I still need to do are the simple and basic things. The things that, if I don't finish them, will actually cause problems or hinder our Christmas celebration. And I can only think of four things:
  • finish wrapping gifts (although even this one is iffy. I could leave things in their amazon boxes and we would survive)
  • pack for our holiday travels
  • prep our (simple) Christmas meals 
  • read the Christmas story

Now, I can think of a whole list of things I would still like to get done. But they are all extra. I can recognize that if I don't do them... it's not actually going to hinder us in anyway. We can still have a beautiful, meaningful, peaceful Christmas. Probably even more-so, because when we're not distracted by our own need to impress with the "perfect" Christmas, we have more time to focus on the things that are actually important and meaningful this season. So here are the things I've eliminated from my list already:
  • making Christmas cookies
  • putting up exterior lights
  • fancy gift wrapping
  • cooking an elaborate feast
  • sending Christmas cards

All that to say: don't be afraid to chill, friends. Don't be afraid to take an honest look at what NEEDS to be done - what truly matters for your family - and then let go of whatever doesn't fit the bill.  Don't let striving for a "perfect" Christmas steal the joy and peace from your home this season.

Let's have a peaceful Christmas, friends.

And above all, remember this: no matter how much we chase it this season, true peace and joy only come with the Savior we are celebrating. Who came because of his great love for us and died so our sins could be forgiven. He took the punishment that should be ours. This Christmas, don't forget what's truly most important, and don't let your kids forget it either. 

"For unto you is born this day in the City of David a Savior, who is Christ the Lord." Luke 2:11
But when the kindness and love of God our Savior appeared, he saved us, not because of righteous things we had done, but because of his mercy. Titus 3:4-5
Here is a trustworthy saying that deserves full acceptance: Christ Jesus came into the world to save sinners—of whom I am the worst. But for that very reason I was shown mercy so that in me, the worst of sinners, Christ Jesus might display his immense patience as an example for those who would believe in him and receive eternal life. 1 Timothy 1:15-16
And in despair I bowed my head;
"There is no peace on earth," I said;
    "For hate is strong,
    And mocks the song
Of peace on earth, good-will to men!"

Then pealed the bells more loud and deep:
"God is not dead, nor doth He sleep;
    The Wrong shall fail,
    The Right prevail,
With peace on earth, good-will to men."

Have a merry Christmas, and I'll see you in 2024!

Wednesday, December 20

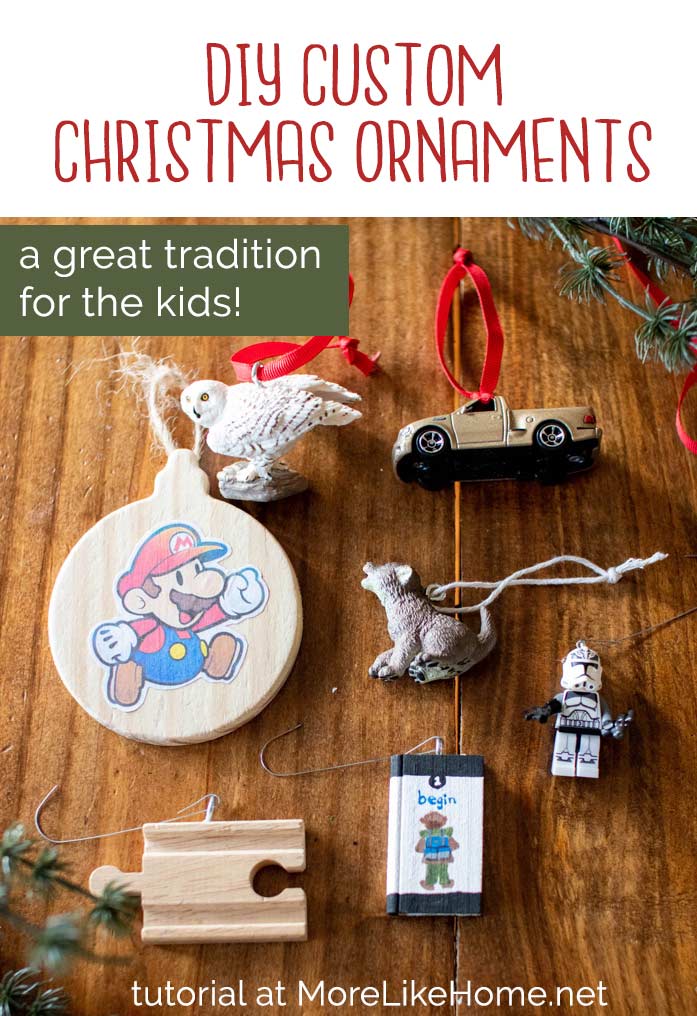
Custom Keepsake Ornament Hack

Every Christmas we love to give each of our kids a new Christmas ornament to commemorate something from the year - a favorite toy, favorite activity, funny memory, etc. It's so fun to pull them out every year to reminisce! I know a lot of families enjoy a similar tradition, but today I wanted to share a simple little twist that can save time and money as you hunt down your own special ornaments.


So what's the twist? It's just this: you can make your own one-of-a-kind ornaments for next to nothing! Rather than trying to hunt down a mass-produced, overpriced keepsake, let me show you a few shortcuts to try first. You'll probably need a few simple supplies like eye hooks, ribbon, and glue depending on the ornament you are making. 

Monday, December 18

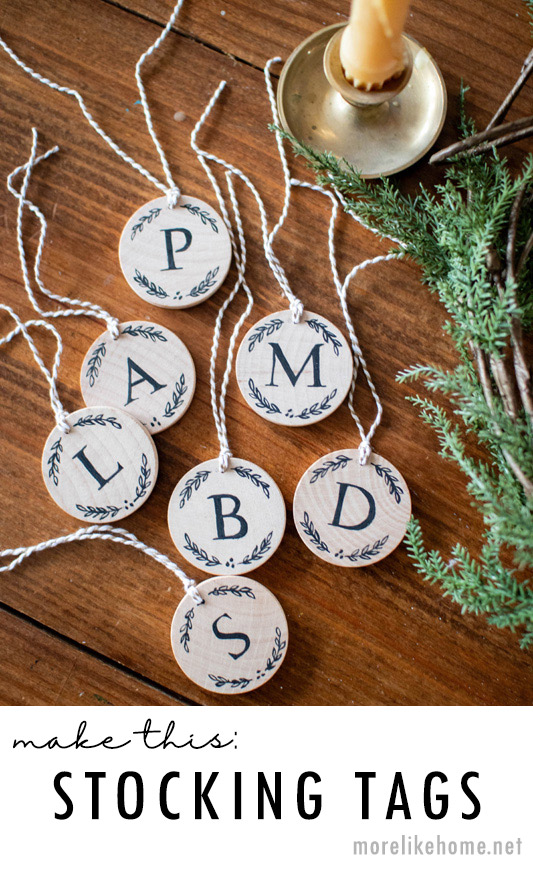
DIY Wooden Stocking Tags

I know, I know. I'm changing up the stockings again. Turns out I have a have a restless spirit when it comes to stockings - which you've probably noticed if you've followed me for more than one Christmas (you can read all about it and see my long stocking history here, if you're curious). But I would like to say, for the record, that this year I only added tags to the new stockings I made last year. So. That's something. 

Saturday, December 16

Cream Cheese Pinwheels (only 3 ingredients!)

Cream cheese pinwheels are one of our classic go-to treats. Whether it's the Superbowl, a birthday, Christmas, or anything in between - if there is something special going on, this sweet, creamy goodness is on the menu. Pinwheels hold a lot of nostalgia for me because I remember my mom making them, and now my kids love them just as much as I do! You won't believe how simple they are with just three ingredients.

Friday, December 15

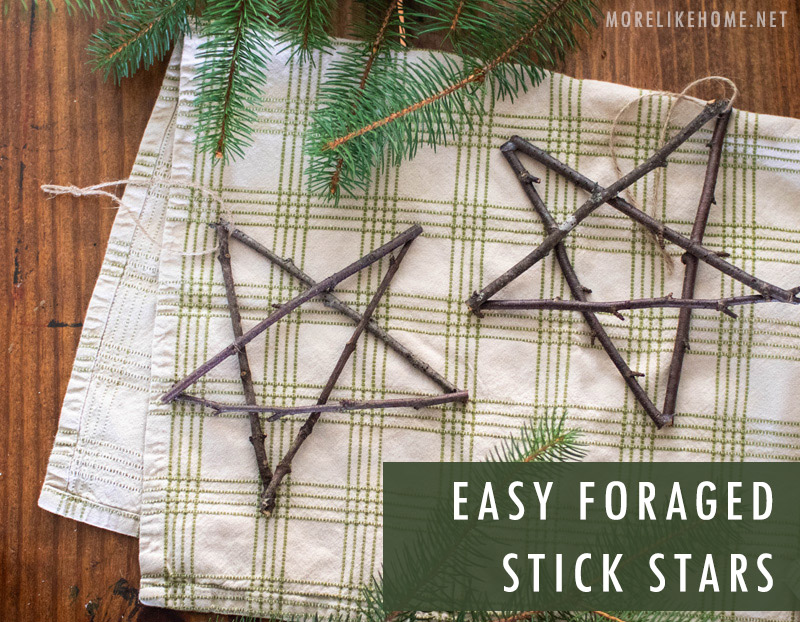
Foraged Stick Stars

This Christmas project is almost too easy to post. But it's a fun one that's super simple and cheap, plus collecting the sticks can be a lot of fun with the kids!

Wednesday, December 13

Vintage Inspired Yarn Doll Ornaments

This is easily my very favorite Christmas project this year. These little yarn dolls are the sweetest, and are a great way to share memories that will last a lifetime. And I love that they are ornaments the kids can actually touch and play with without hurting them. Anyone with small children knows the value of an unbreakable ornament!


But first, let me explain what I mean by memories that last a lifetime. Beyond the memories you will make with your kids that they will get to enjoy year after year. I remember visiting an older woman in a nursing home when I was very young, and when we visited she would give my sister and me yarn doll ornaments just like these. I don't know when it was or who she was, but that memory has stuck with me my whole life. In a similar way, I have an older, very dear friend who makes little angel ornaments that are crochet instead of yarn. She gave me one when I was younger, then surprised me with a second one when my oldest son was born. They are some of my most treasured ornaments. 

I say all of that to help us remember - little gestures can make a huge impact. And in this busy season it's good to remember to look out and see how we can be a blessing to others (it's so easy to forget that in all the holiday hustle and bustle). The smallest thing can make someone feel remembered and loved. Last year I asked my friend for a copy of her crochet pattern. Then I did a little digging to figure out how to make these yarn dolls. I hope to be the next generation ornament giver. To continue the traditions those ladies started. To give a tangible reminder to friends and family that they are loved and thought of. And I hope to bring my kids along with me. 
Subscribe